Introduction
PACDock is our asset management and monitoring solution. It is a SaaS platform to track, reserve, and manage fixed and movable assets across multiple departments.
Understanding Assets
Asset
An Asset is an individual, physical item that is tracked and managed in the system. Each asset has its own unique tag, serial number, and associated metadata such as purchase date, cost, ownership type (leased or owner), depreciation etc. These assets are tracked from acquisition to disposal.
Asset Models
An Asset Model represents a grouping that defines the common characteristics of a specific asset. Multiple individual assets belong to the same asset model.
As an example, Canon EOS C300 Mark III camera would be the asset model. All individual Canon EOS C300 Mark III cameras with details such as purchase date, cost, ownership type (leased or owned), depreciation etc. would be an asset grouped under the asset model.
A single asset model can be associated with multiple individual assets. For example, a company may have 5 or 10 Canon EOS C300 Mark III cameras, all of which fall under the same model.
Adding an asset model
In order to use the system, you will have to save your assets onto the system. First you will need to create an asset model which is a template for a collection of assets. Navigate to the Asset Models menu in the sidebar to see a list of asset models. To add a new asset model click on the new button. Fill out the relevant information and save the model.
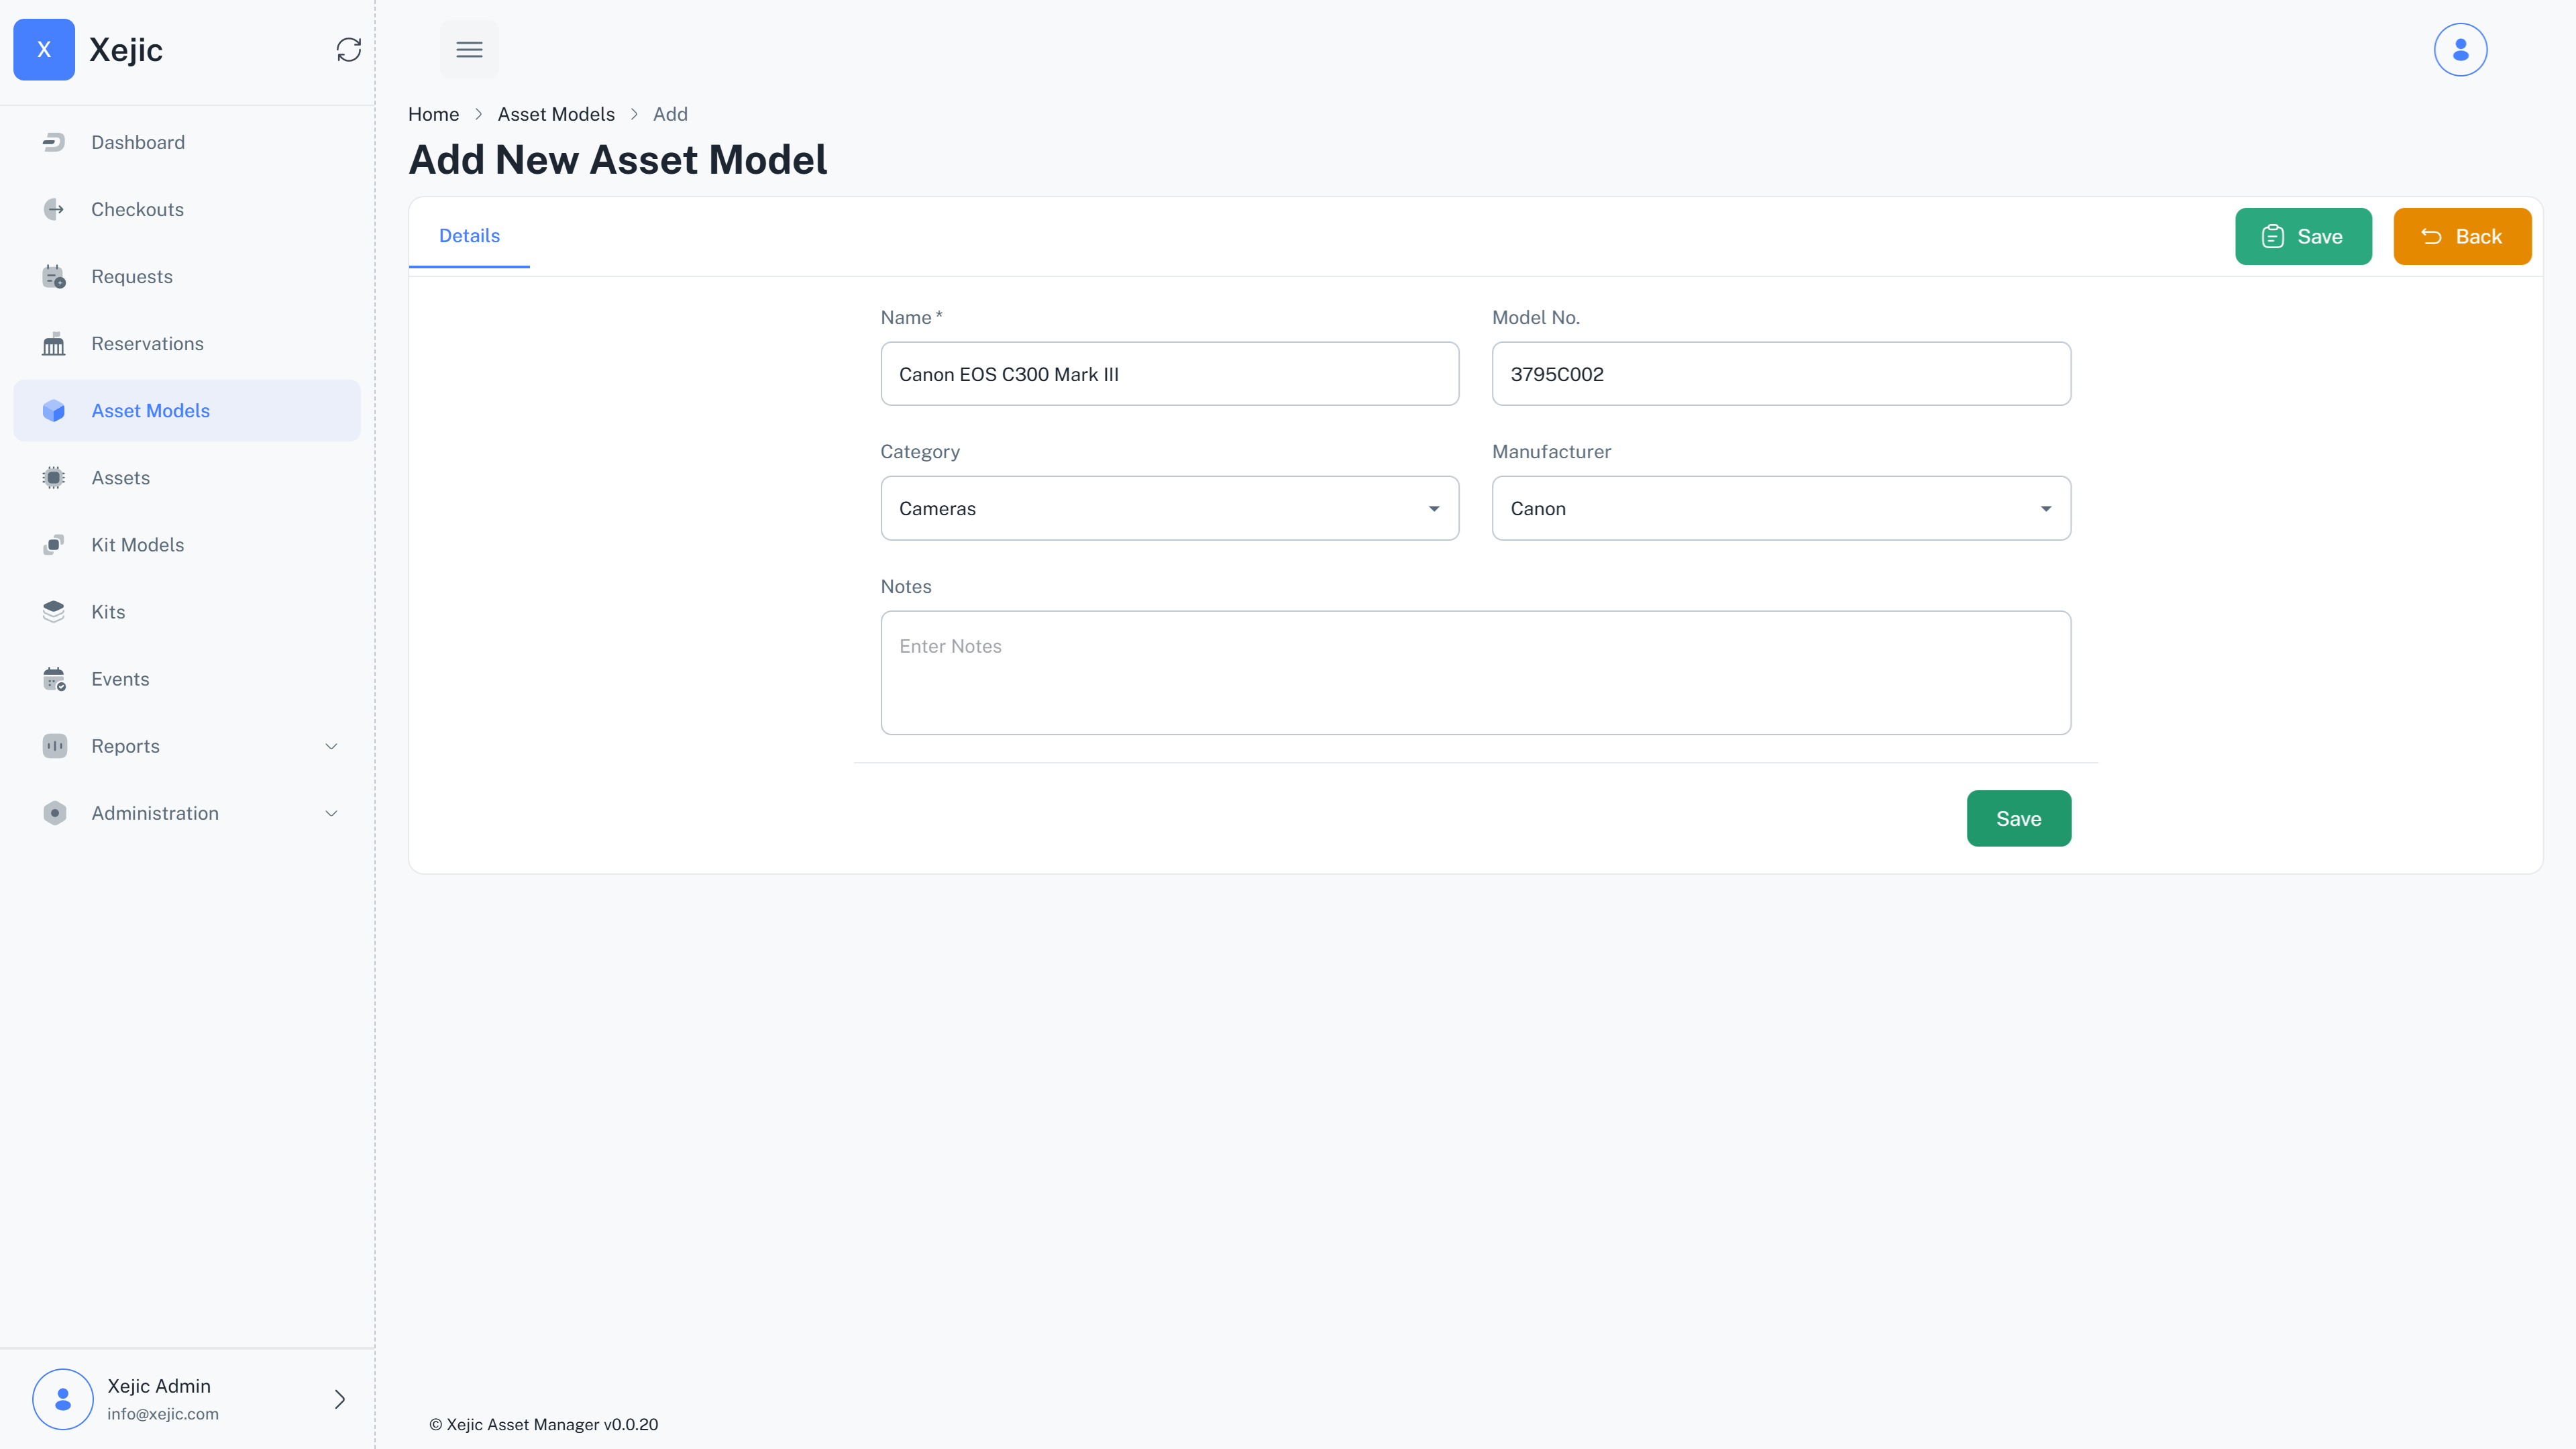
An asset model can be belong to a category. To manage catagories navigate to Administration > Categories Menu. Here you can add and manage categories.
An asset model can also be assigned to a manufacturer. To manage manufacturers navigate to Administration > Manufacturers Menu. Here you can add and manage manufacturers.
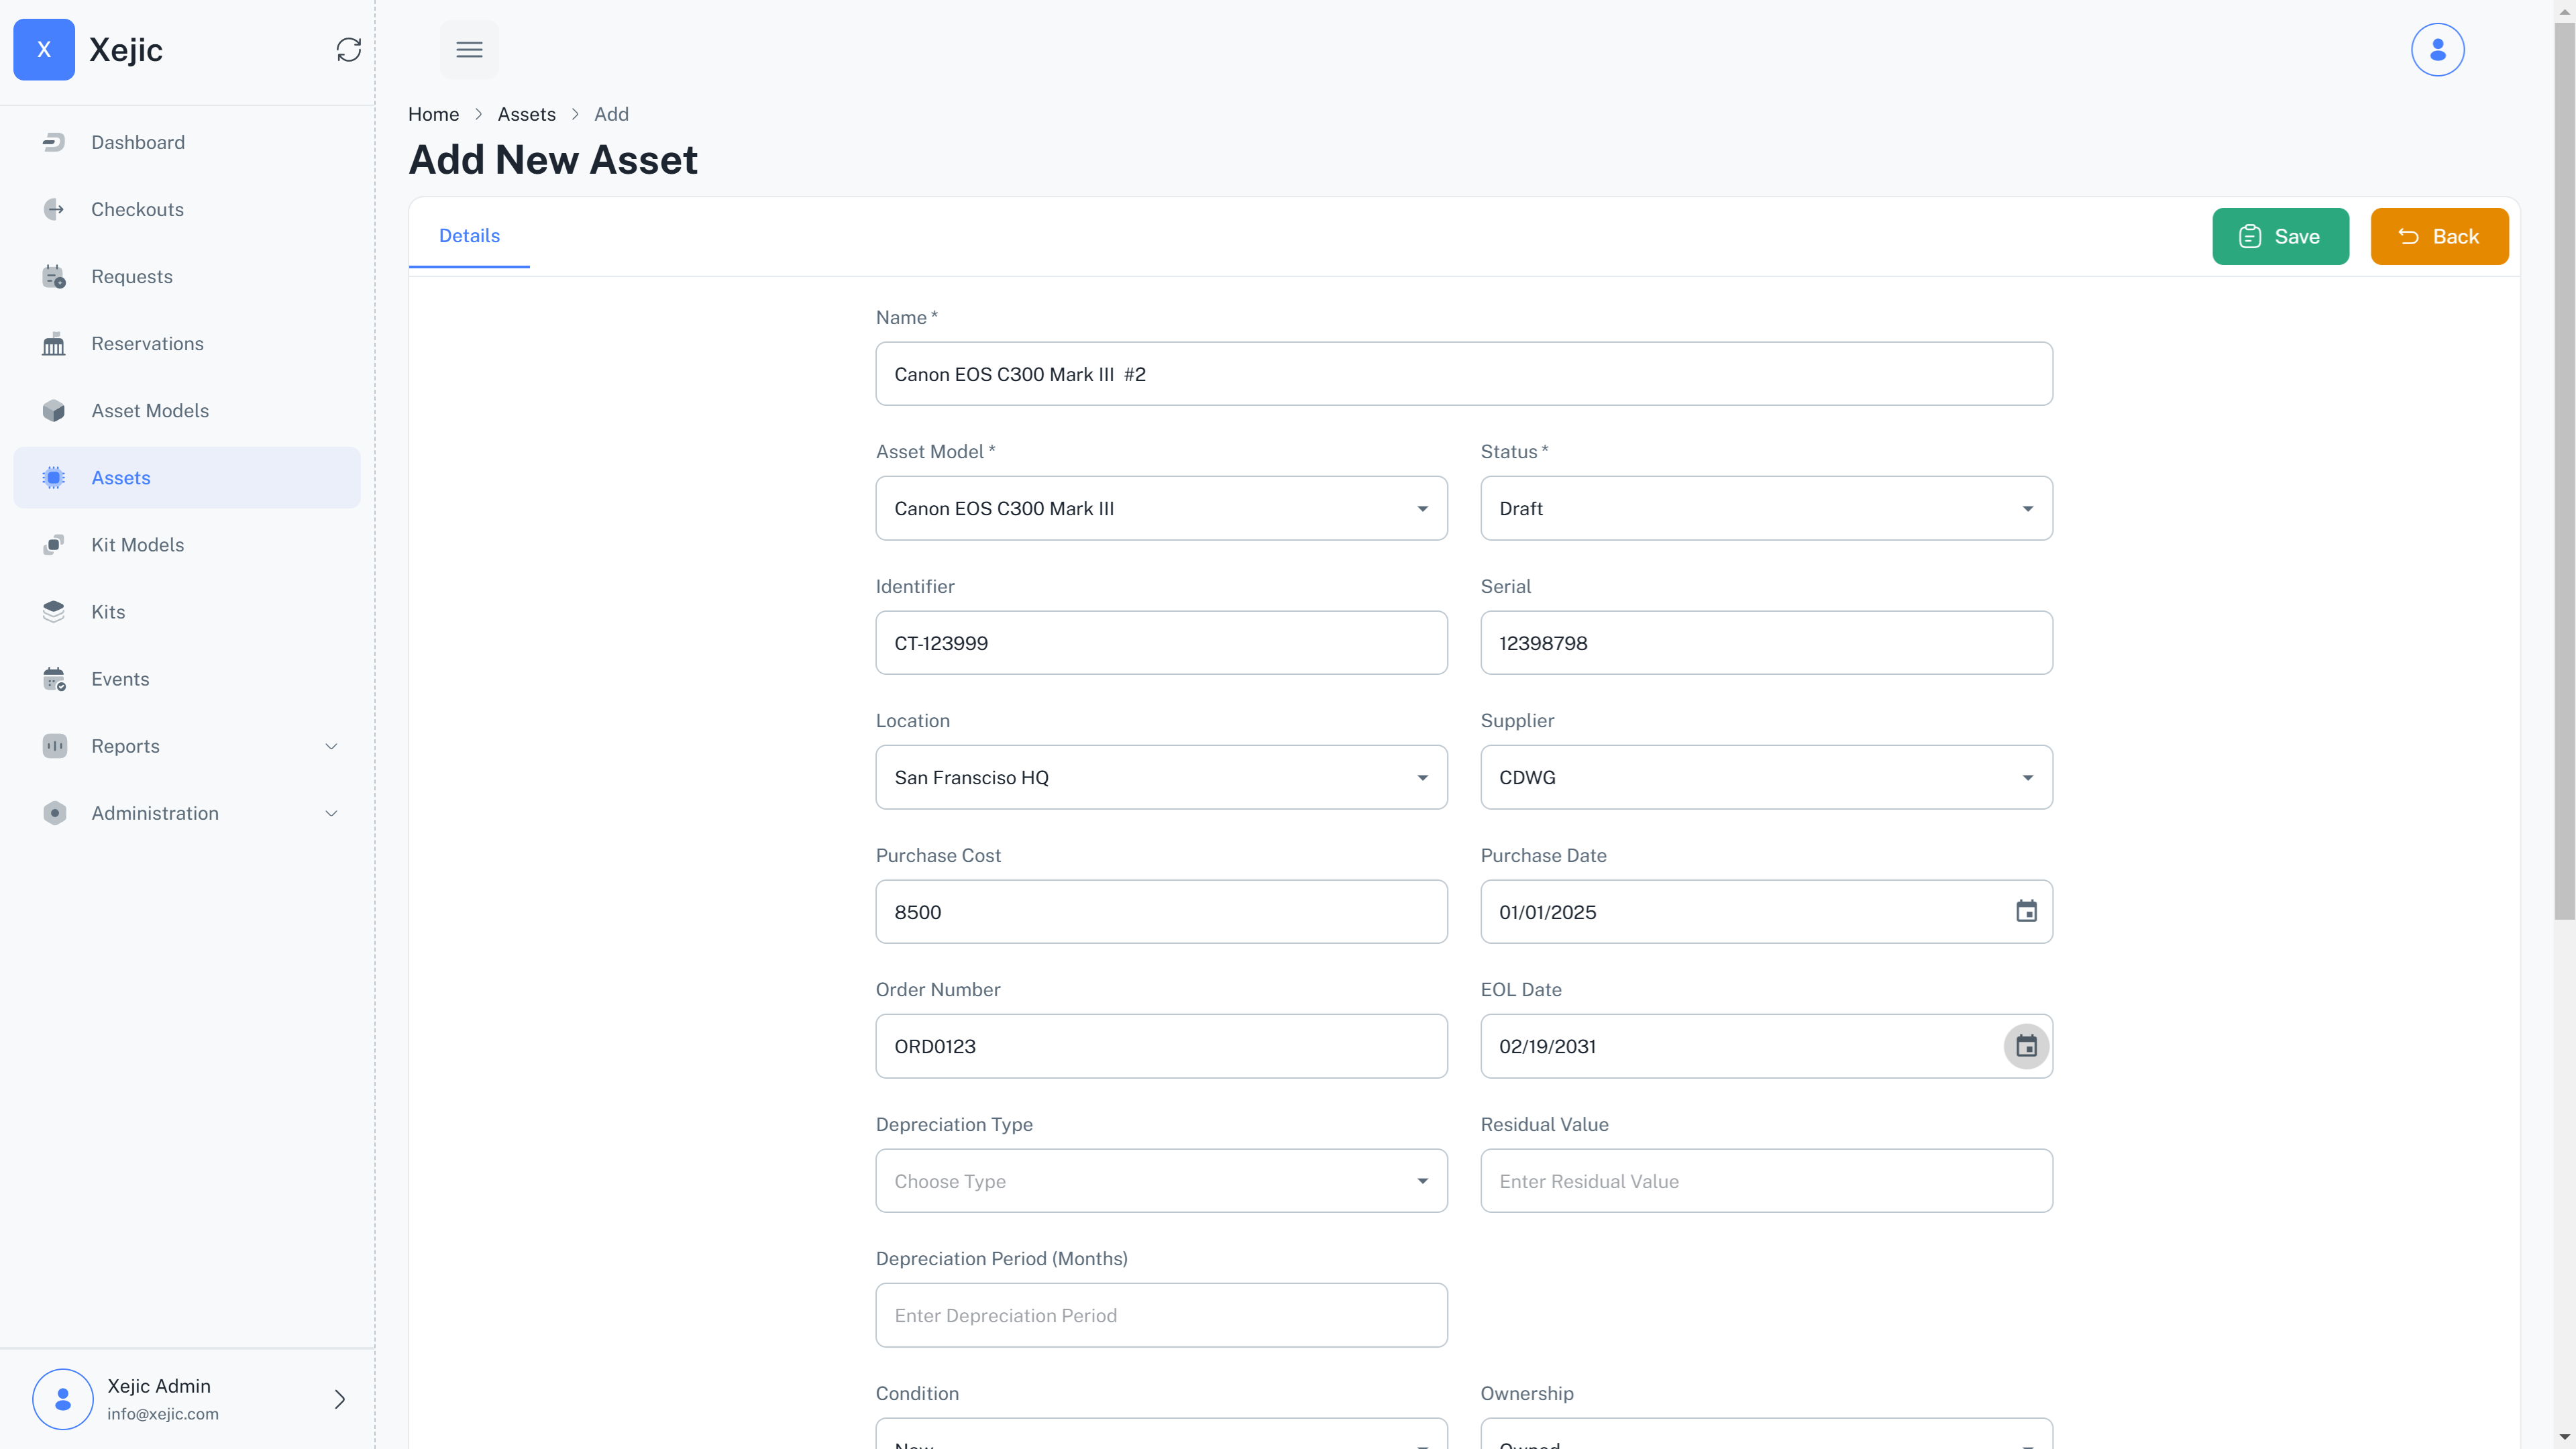
Adding an asset
Once your asset model is created you can start to create your assets. Navigate to the Assets Menu in the sidebar to see a list of assets. To add a new Asset click on the new button. Fill out the relevant information and save the asset.
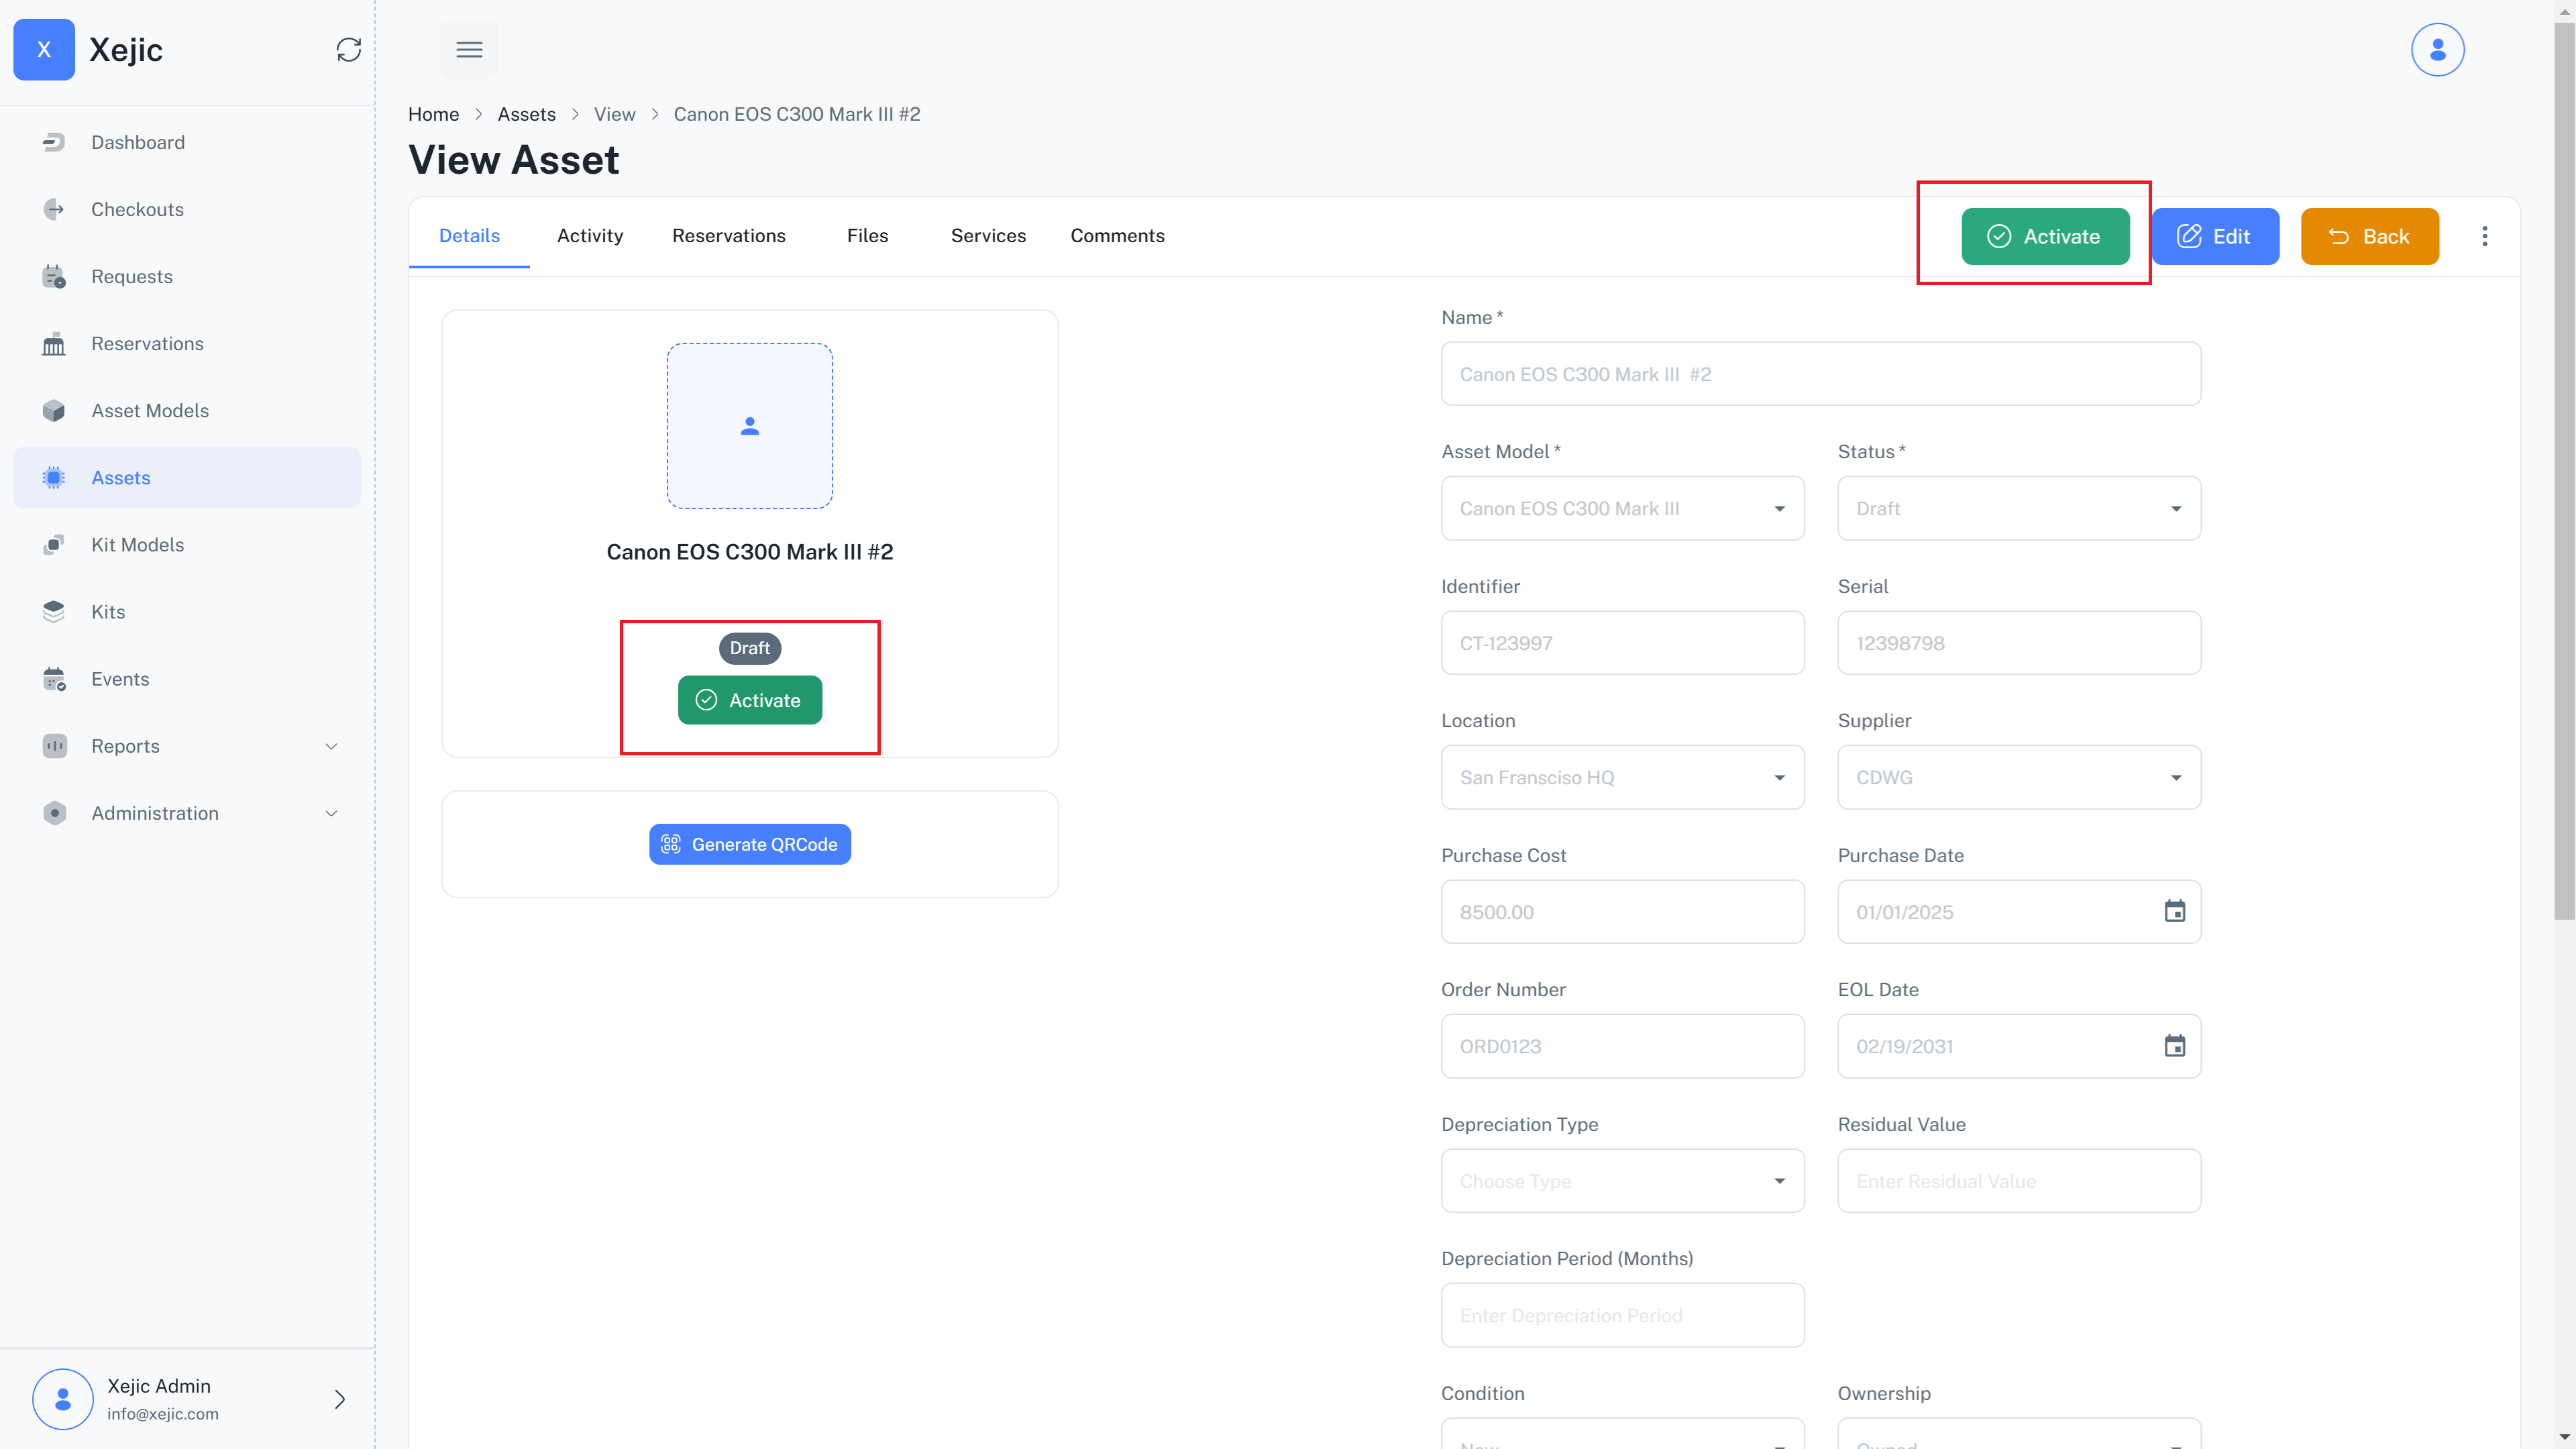
Activate an Asset
By default Assets are saved as Draft. Click on the Activate button to make the Asset active
Archiving an asset
Archiving an asset permanently removes it from active use, making it unavailable for operational activities. This action is irreversible. Archived assets are accessible only through reports for historical reference
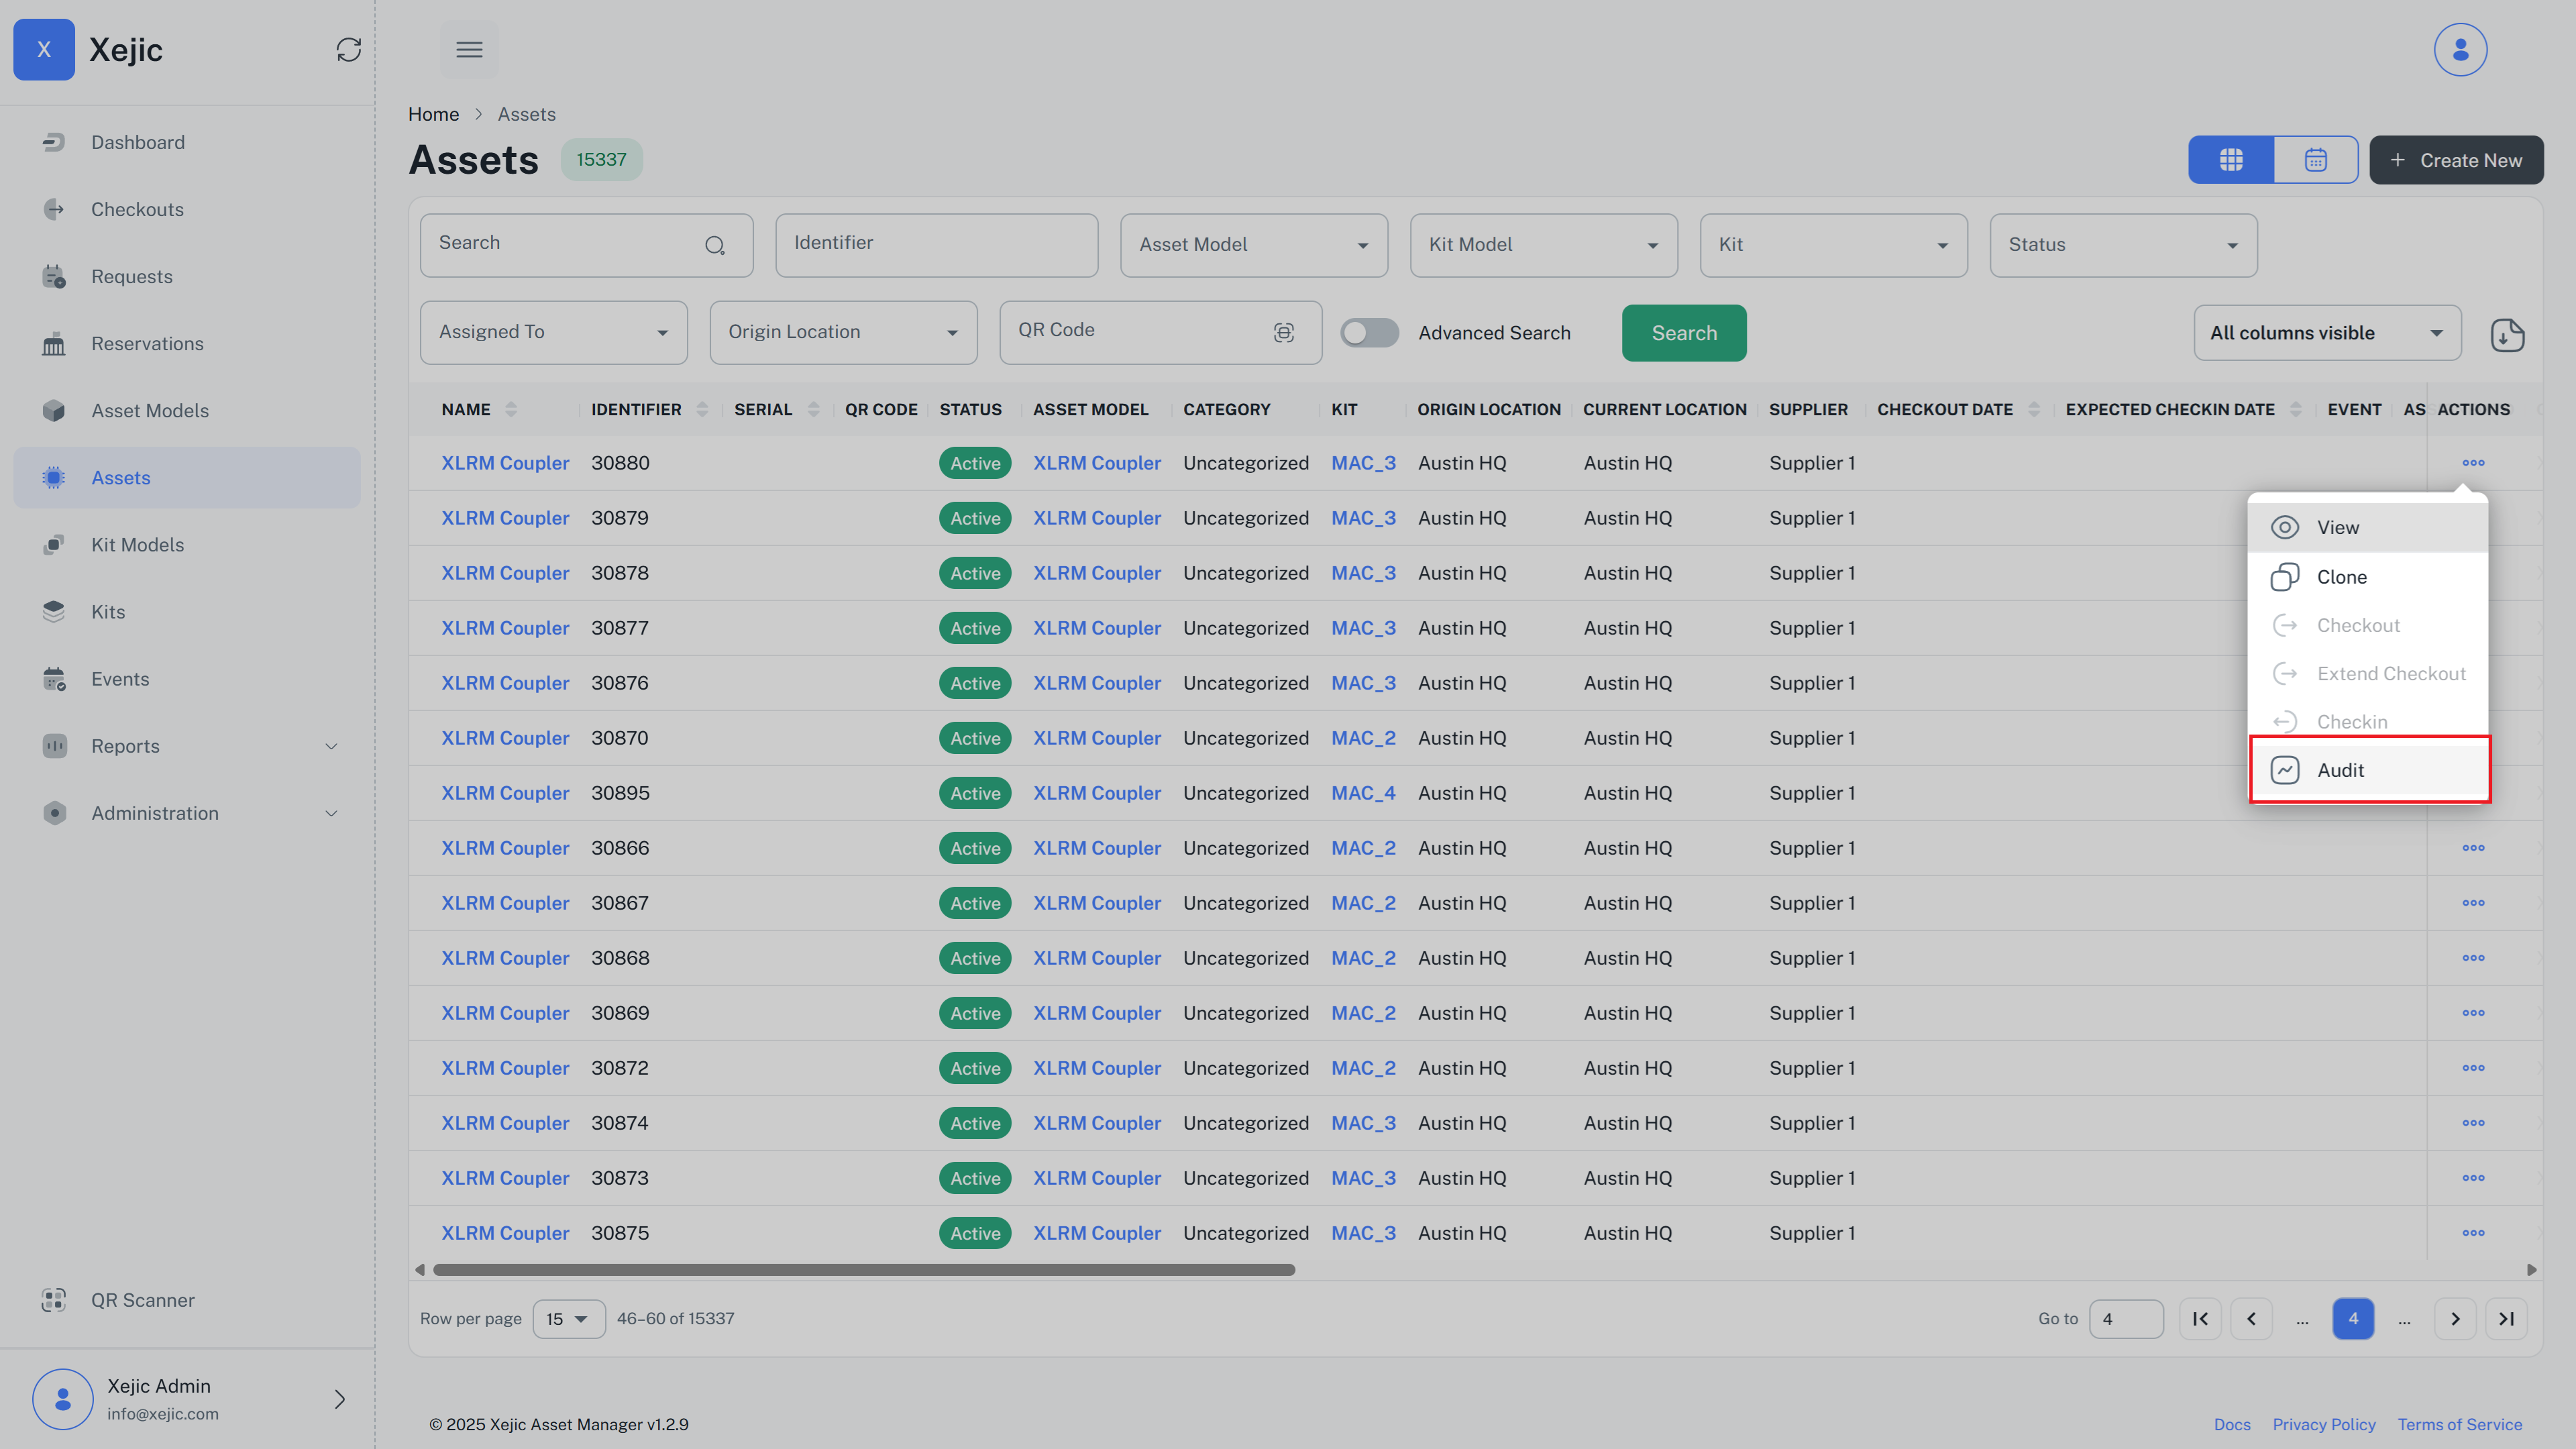
From the Asset List Page
- Go to the Asset List Page.
- Click on the three dots in the last column.
- Select Audit Asset from the dropdown.
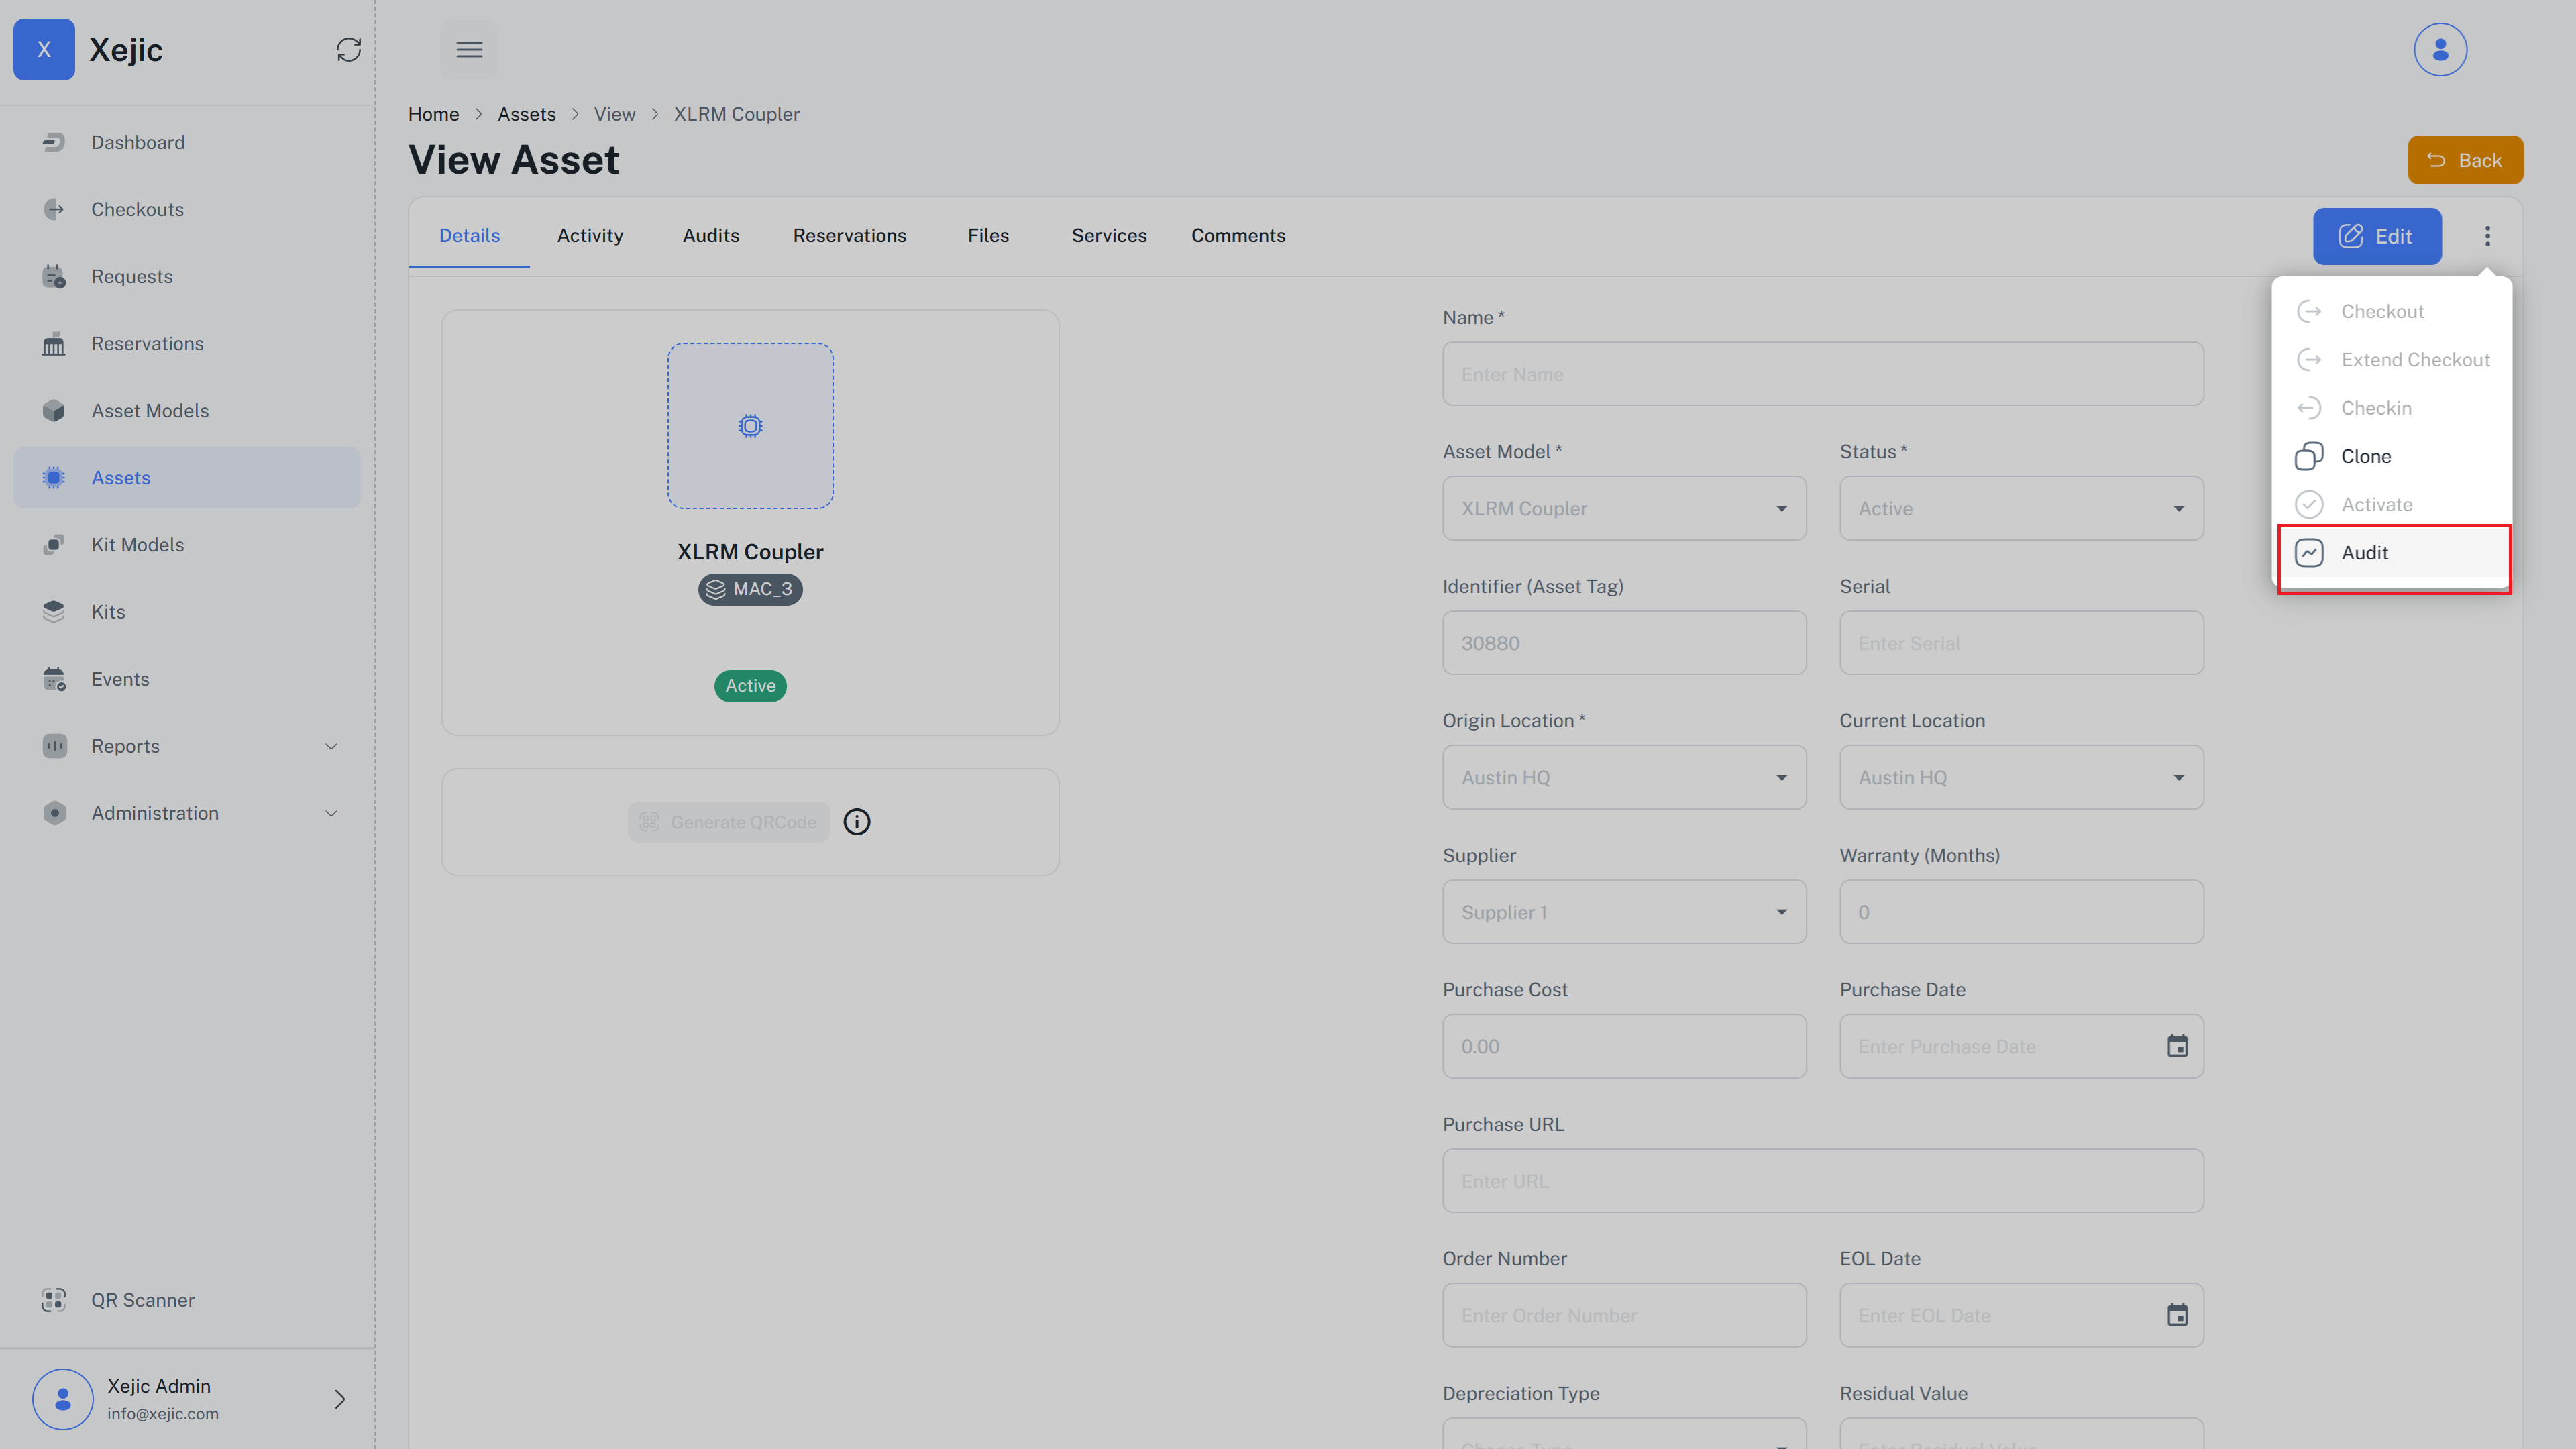
From the Asset Page
- Go to the Asset Page .
- Click on the three dots next to the edit and back button.
- Select Audit Asset from the dropdown.
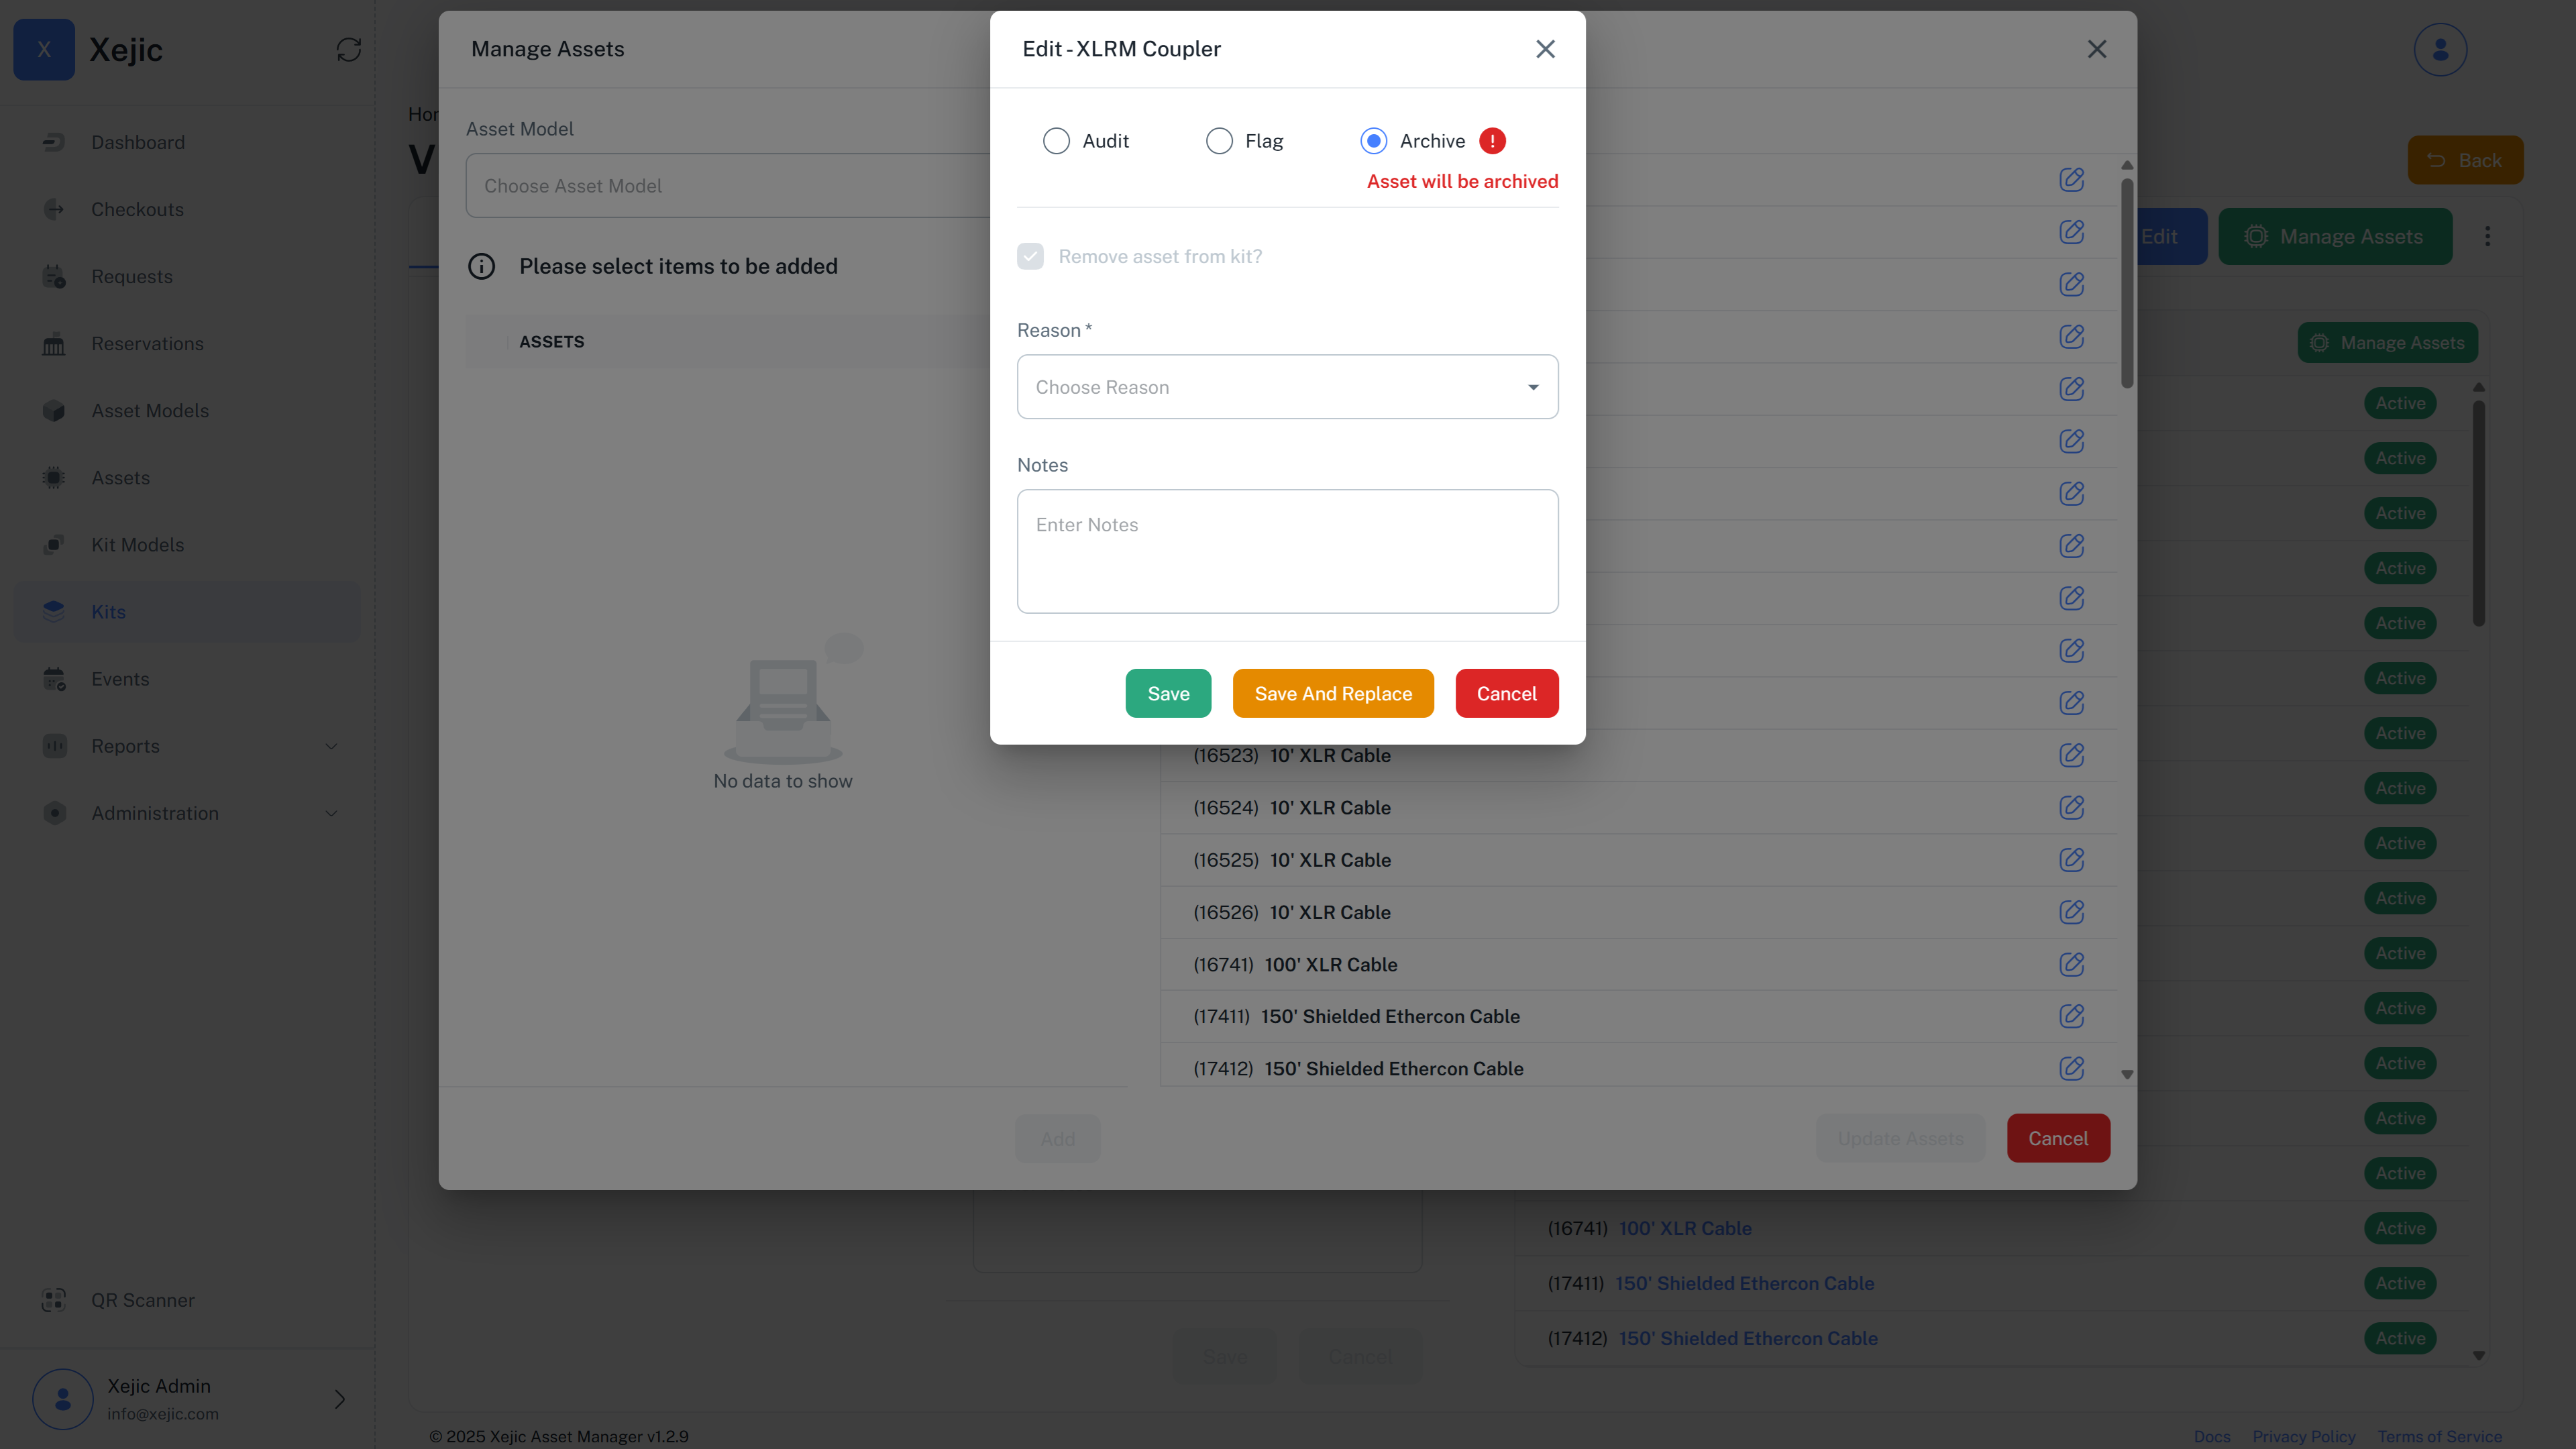
- To archive an asset select the Archive radio button in the pop up.
- You must select a reason. Reasons are maintained in your reasons master data. This is mandatory.
- Optional - You can choose to add a note.

Archiving an asset that is a part of a Kit
- If the archived asset is part of a kit, it will automatically be removed from the kit and the kit will be marked as defective.
- Kits marked as defective can still be checked out. If you want to prevent a defective kit from being checked out, you will need to manually mark it as inactive.
- In order to clear defects manually click on the kit and click the button clear defects to clear the defects and mark the kit as defect free
- You can archive an asset that is checked out as part of a kit and it will remove it from the kit.
Understanding Kits
Kit
A Kit is a group or collection of multiple assets that are bundled together for specific purposes. Kits are useful when you need to manage and check out multiple assets as a single unit. For example, a kit might include several pieces of equipment required for a specific task, and it can contain assets of different types or models.
Kit Model
A Kit Model represents a grouping that defines the common characteristics of a specific kit. Multiple individual kits belong to the same kit model.
Examples:- Remote Work Kit: This kit might include a laptop, a mouse, a monitor, and a docking station, all bundled together for employees who work from home.
- Camera Kit: A kit used for events that includes a camera, tripod, and memory cards, all of which are individual assets grouped together as a set.
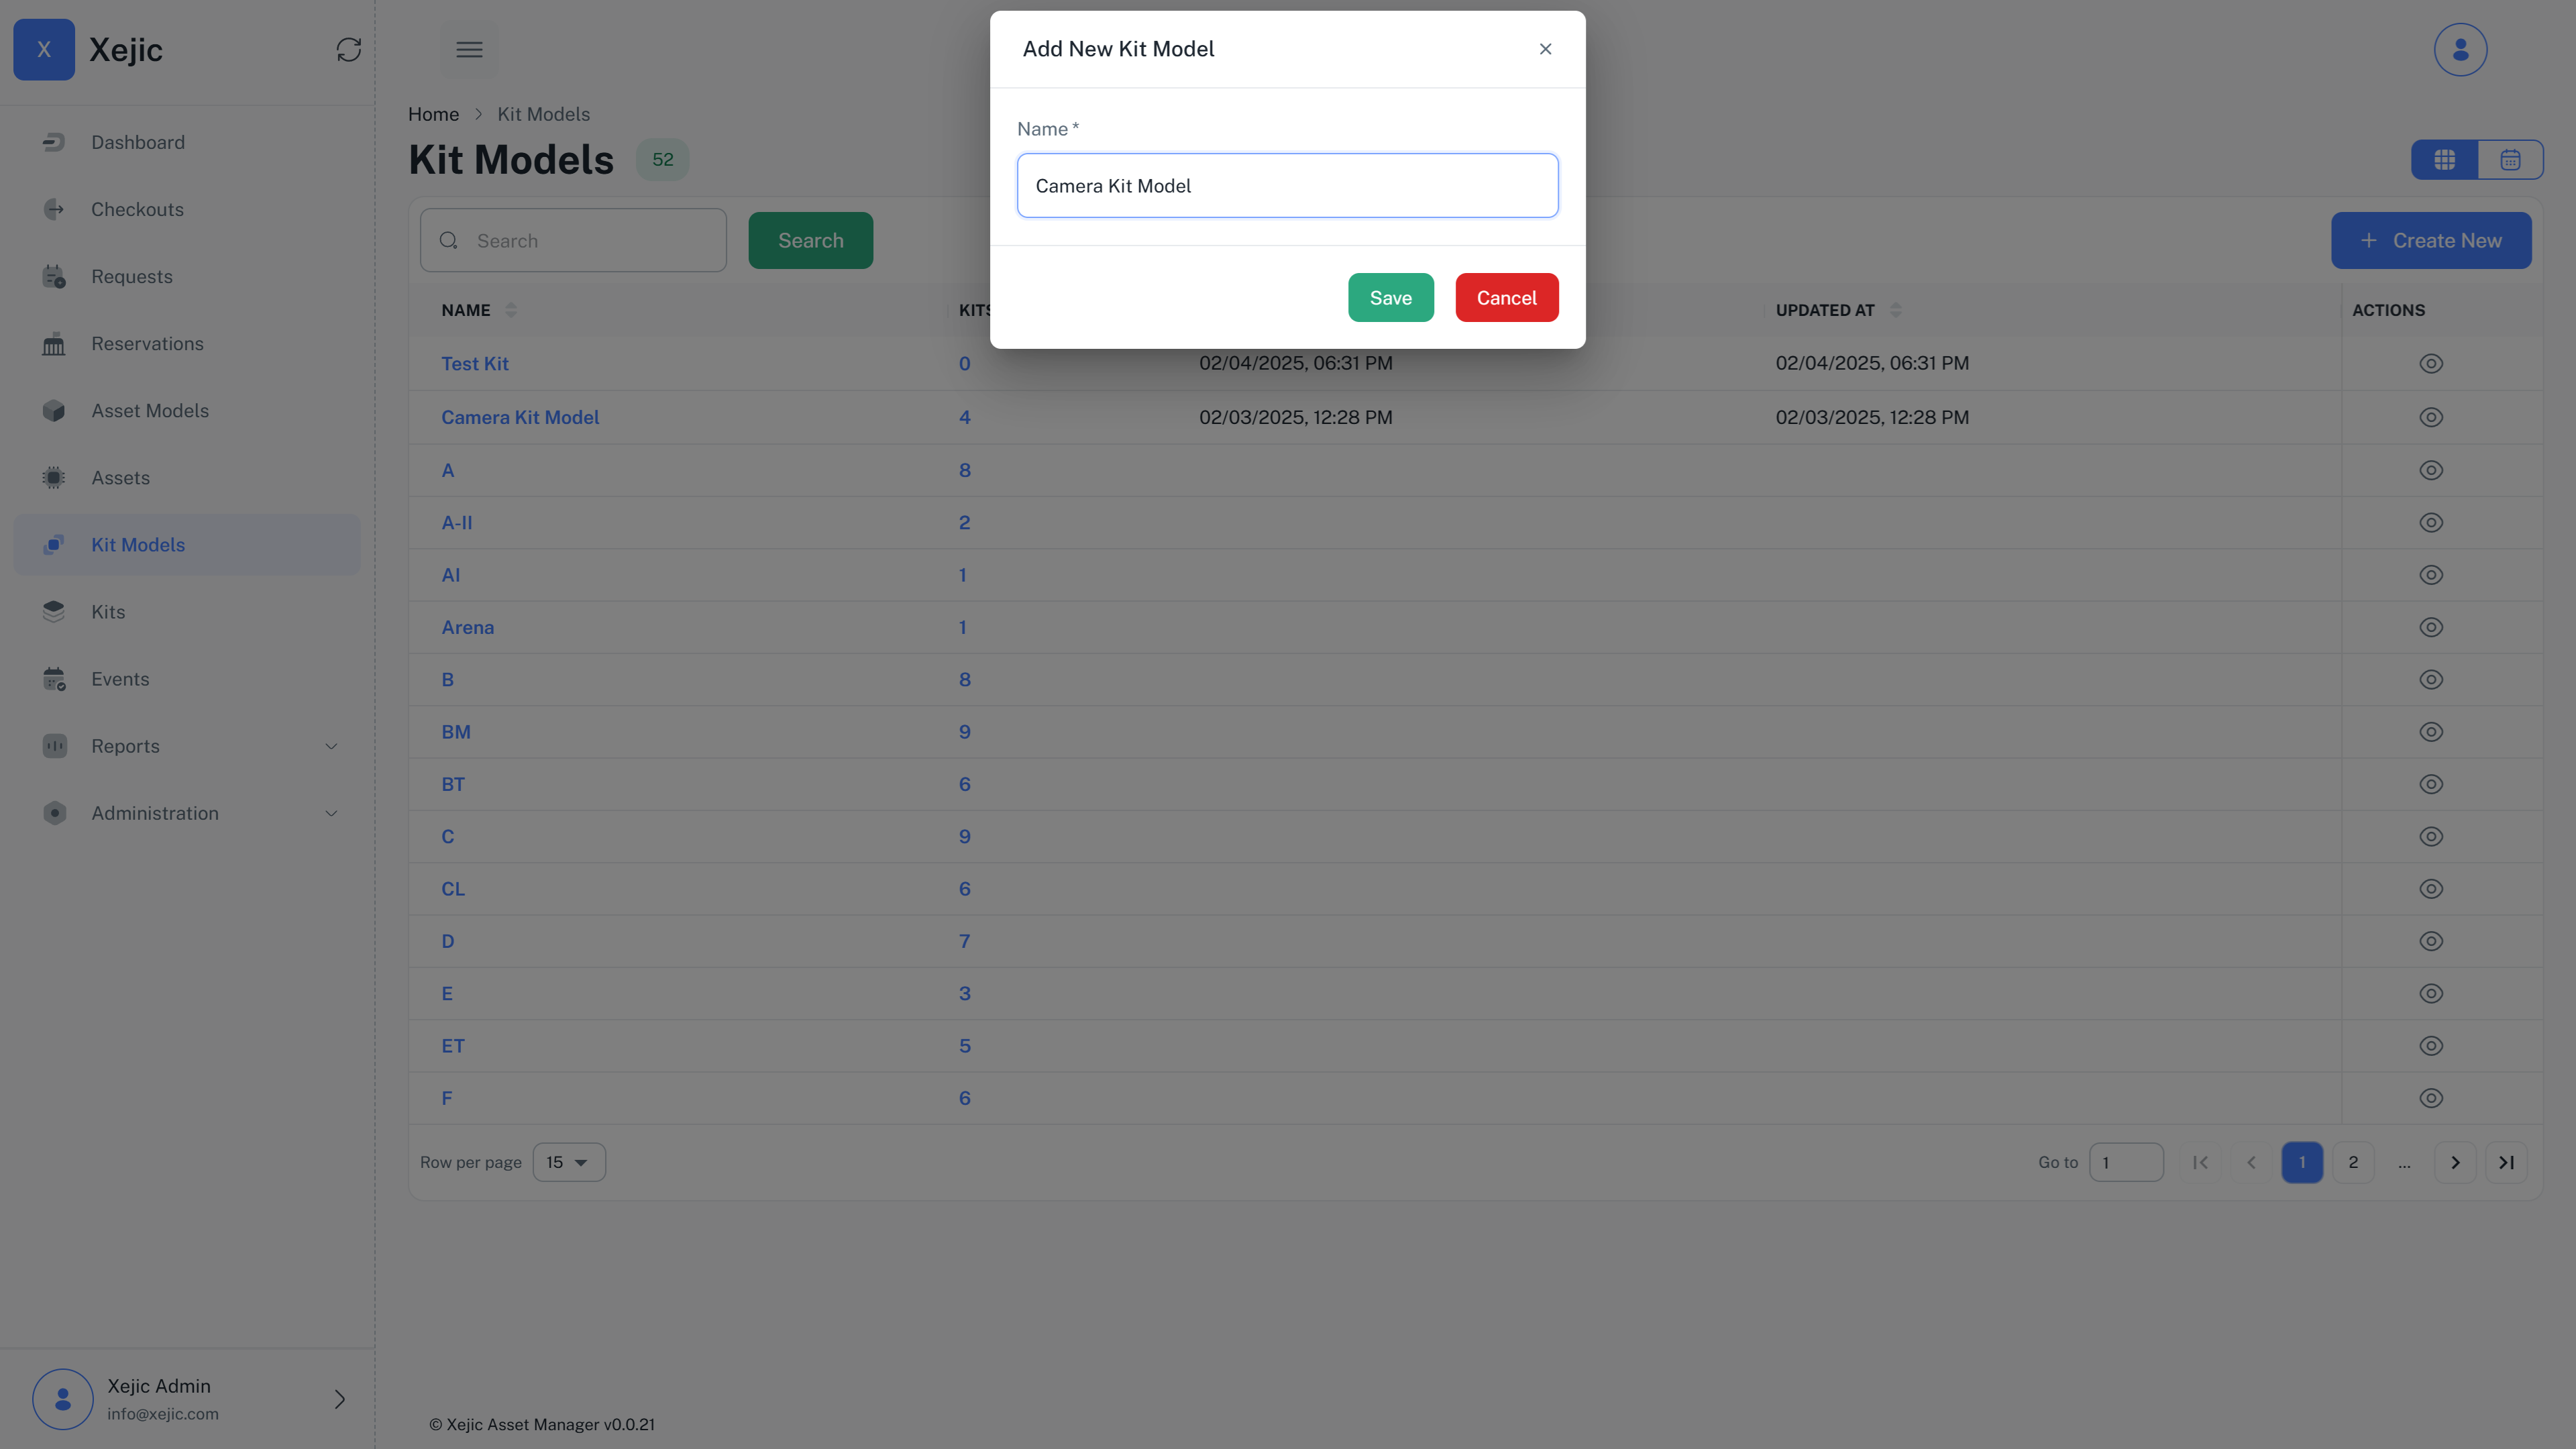
Adding a Kit Model
Create an Kit model which is a template for a collection of assets. Navigate to the Kit Models menu in the sidebar to see a list of kit models. To add a new kit model click on the new button. Fill out the relevant information and save the kit model.
Creating a Kit
A kit is a collection of assets. Now that you have created a kit model navigate to the Kits menu in the sidebar and click on New to create a new kit. Save the Kit as a draft if you want to remove assets from the kit without providing a reason. Once the kit is live, you will have to provide a reason for removing an asset from a kit.
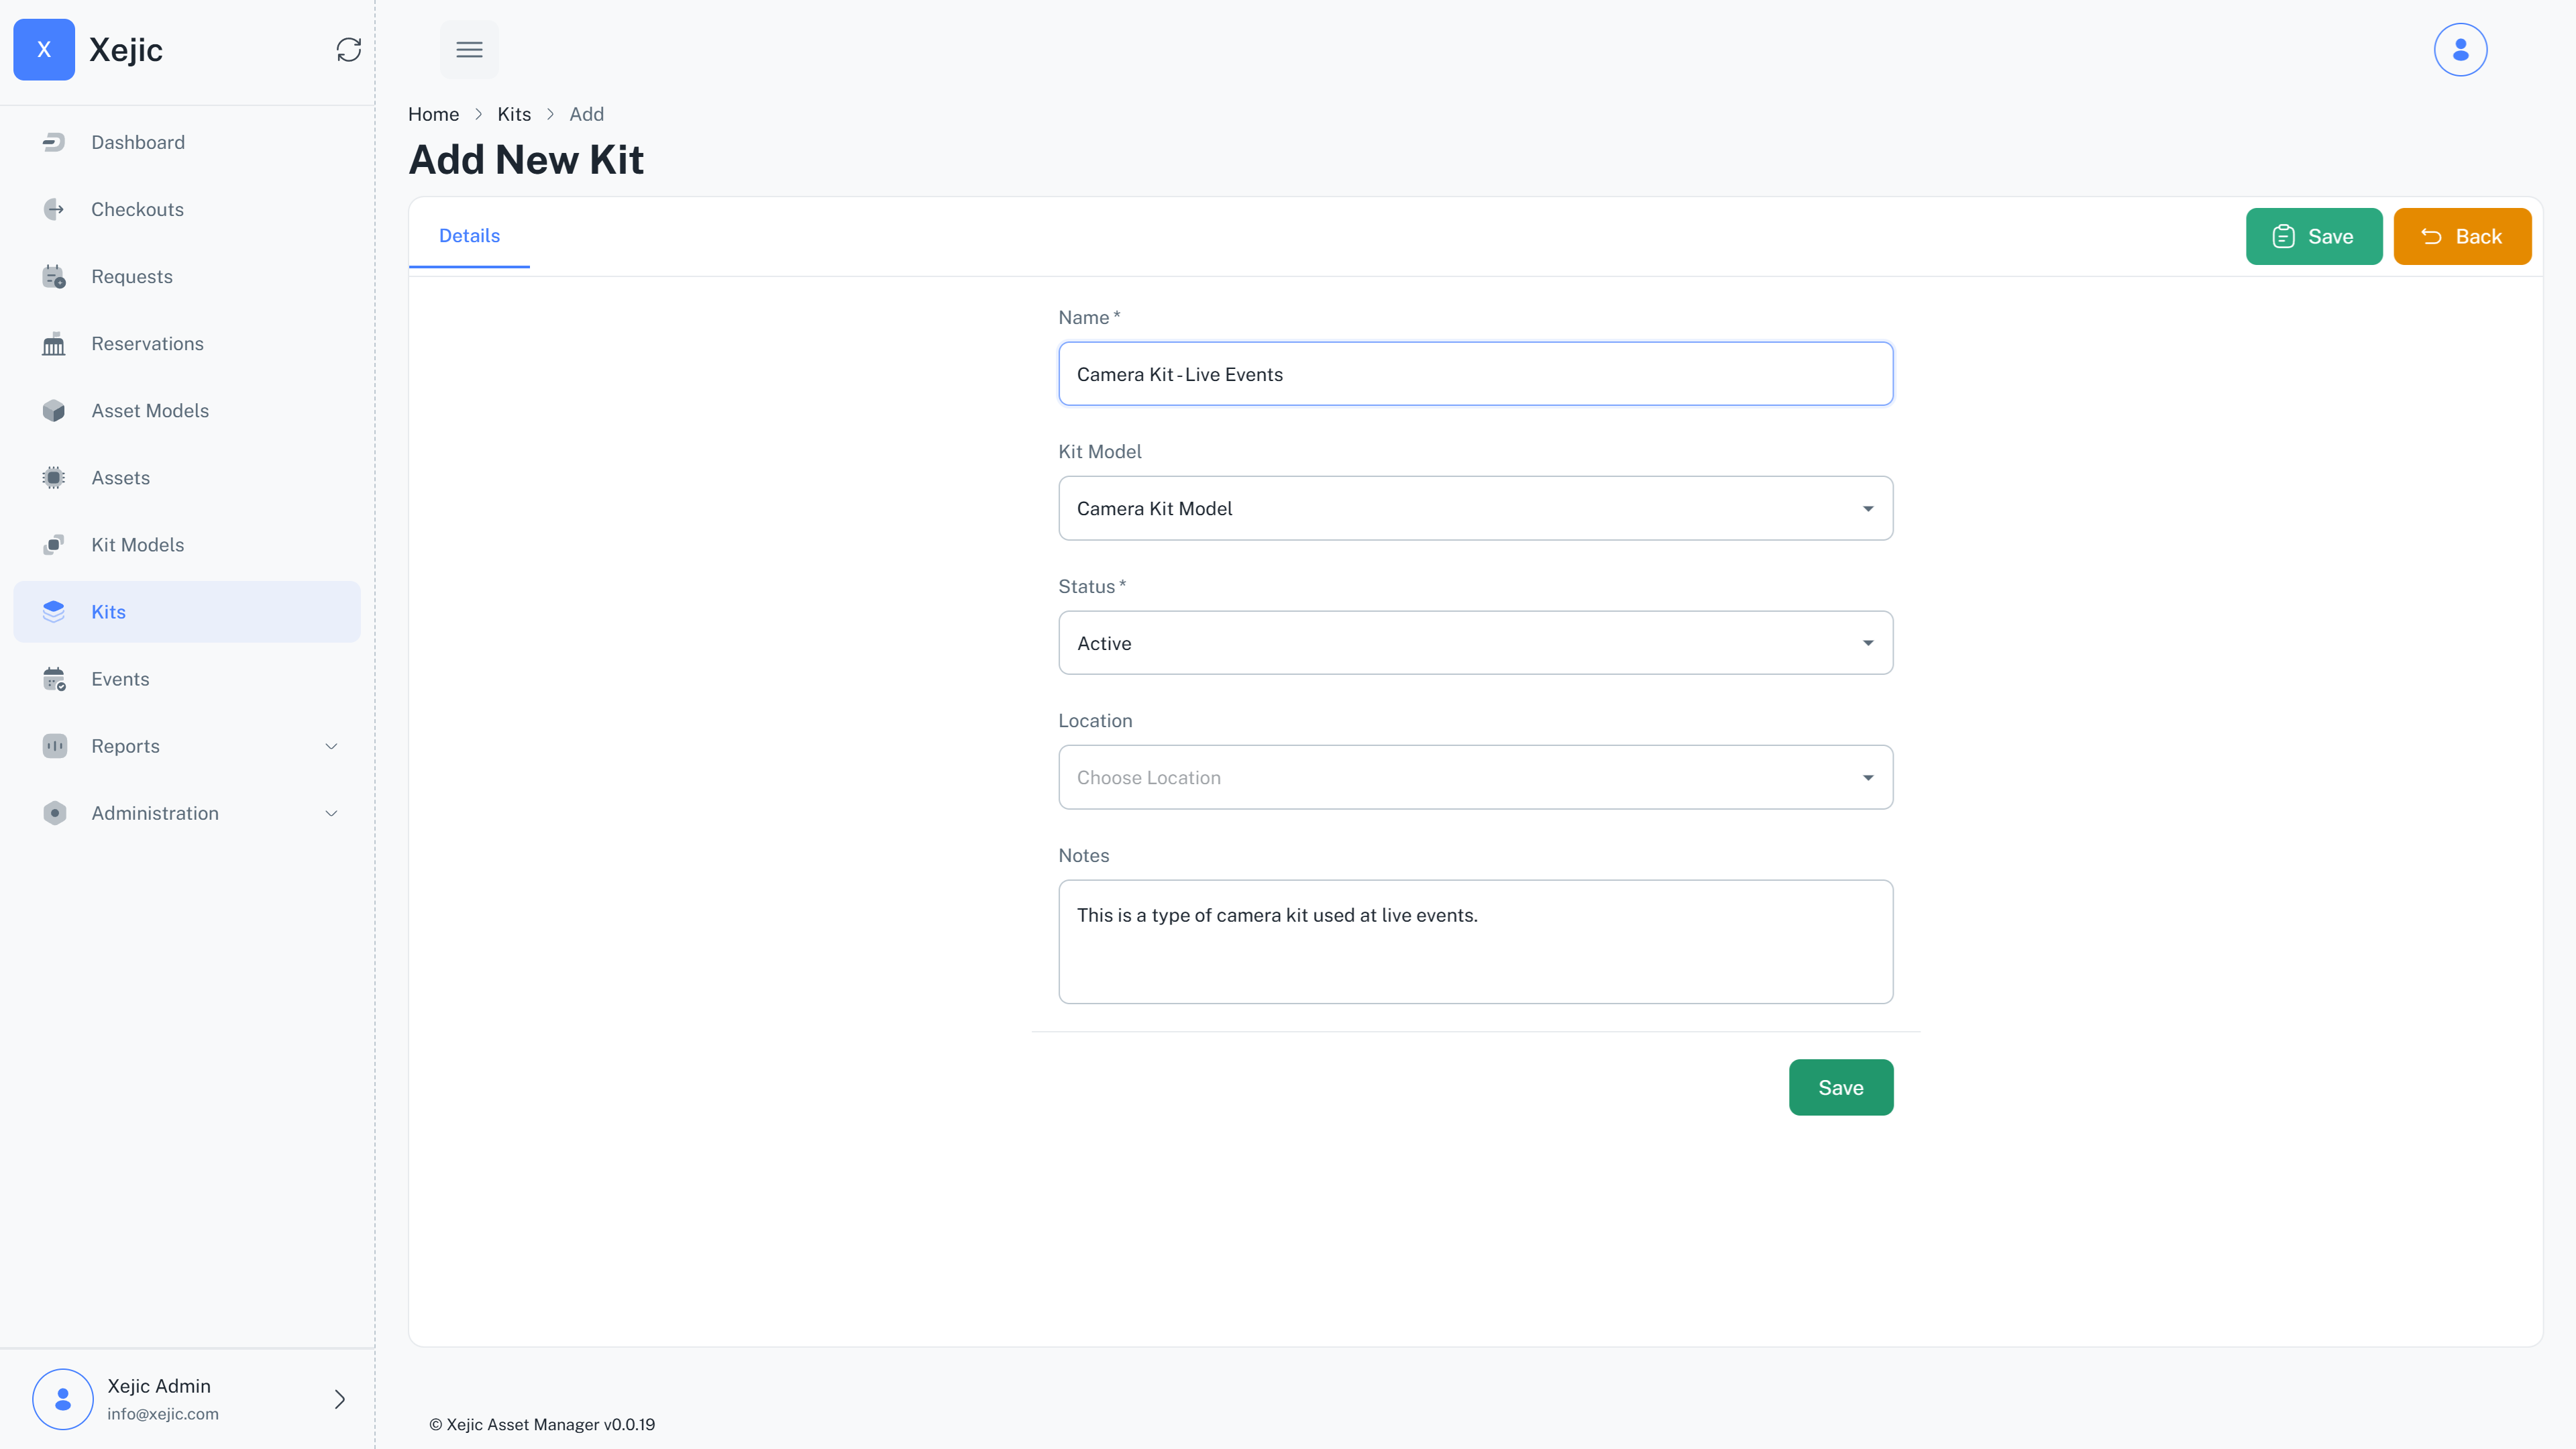
By default Kits are saved as Draft. Click on the Activate button to make the Kit active
Adding an asset to a kit
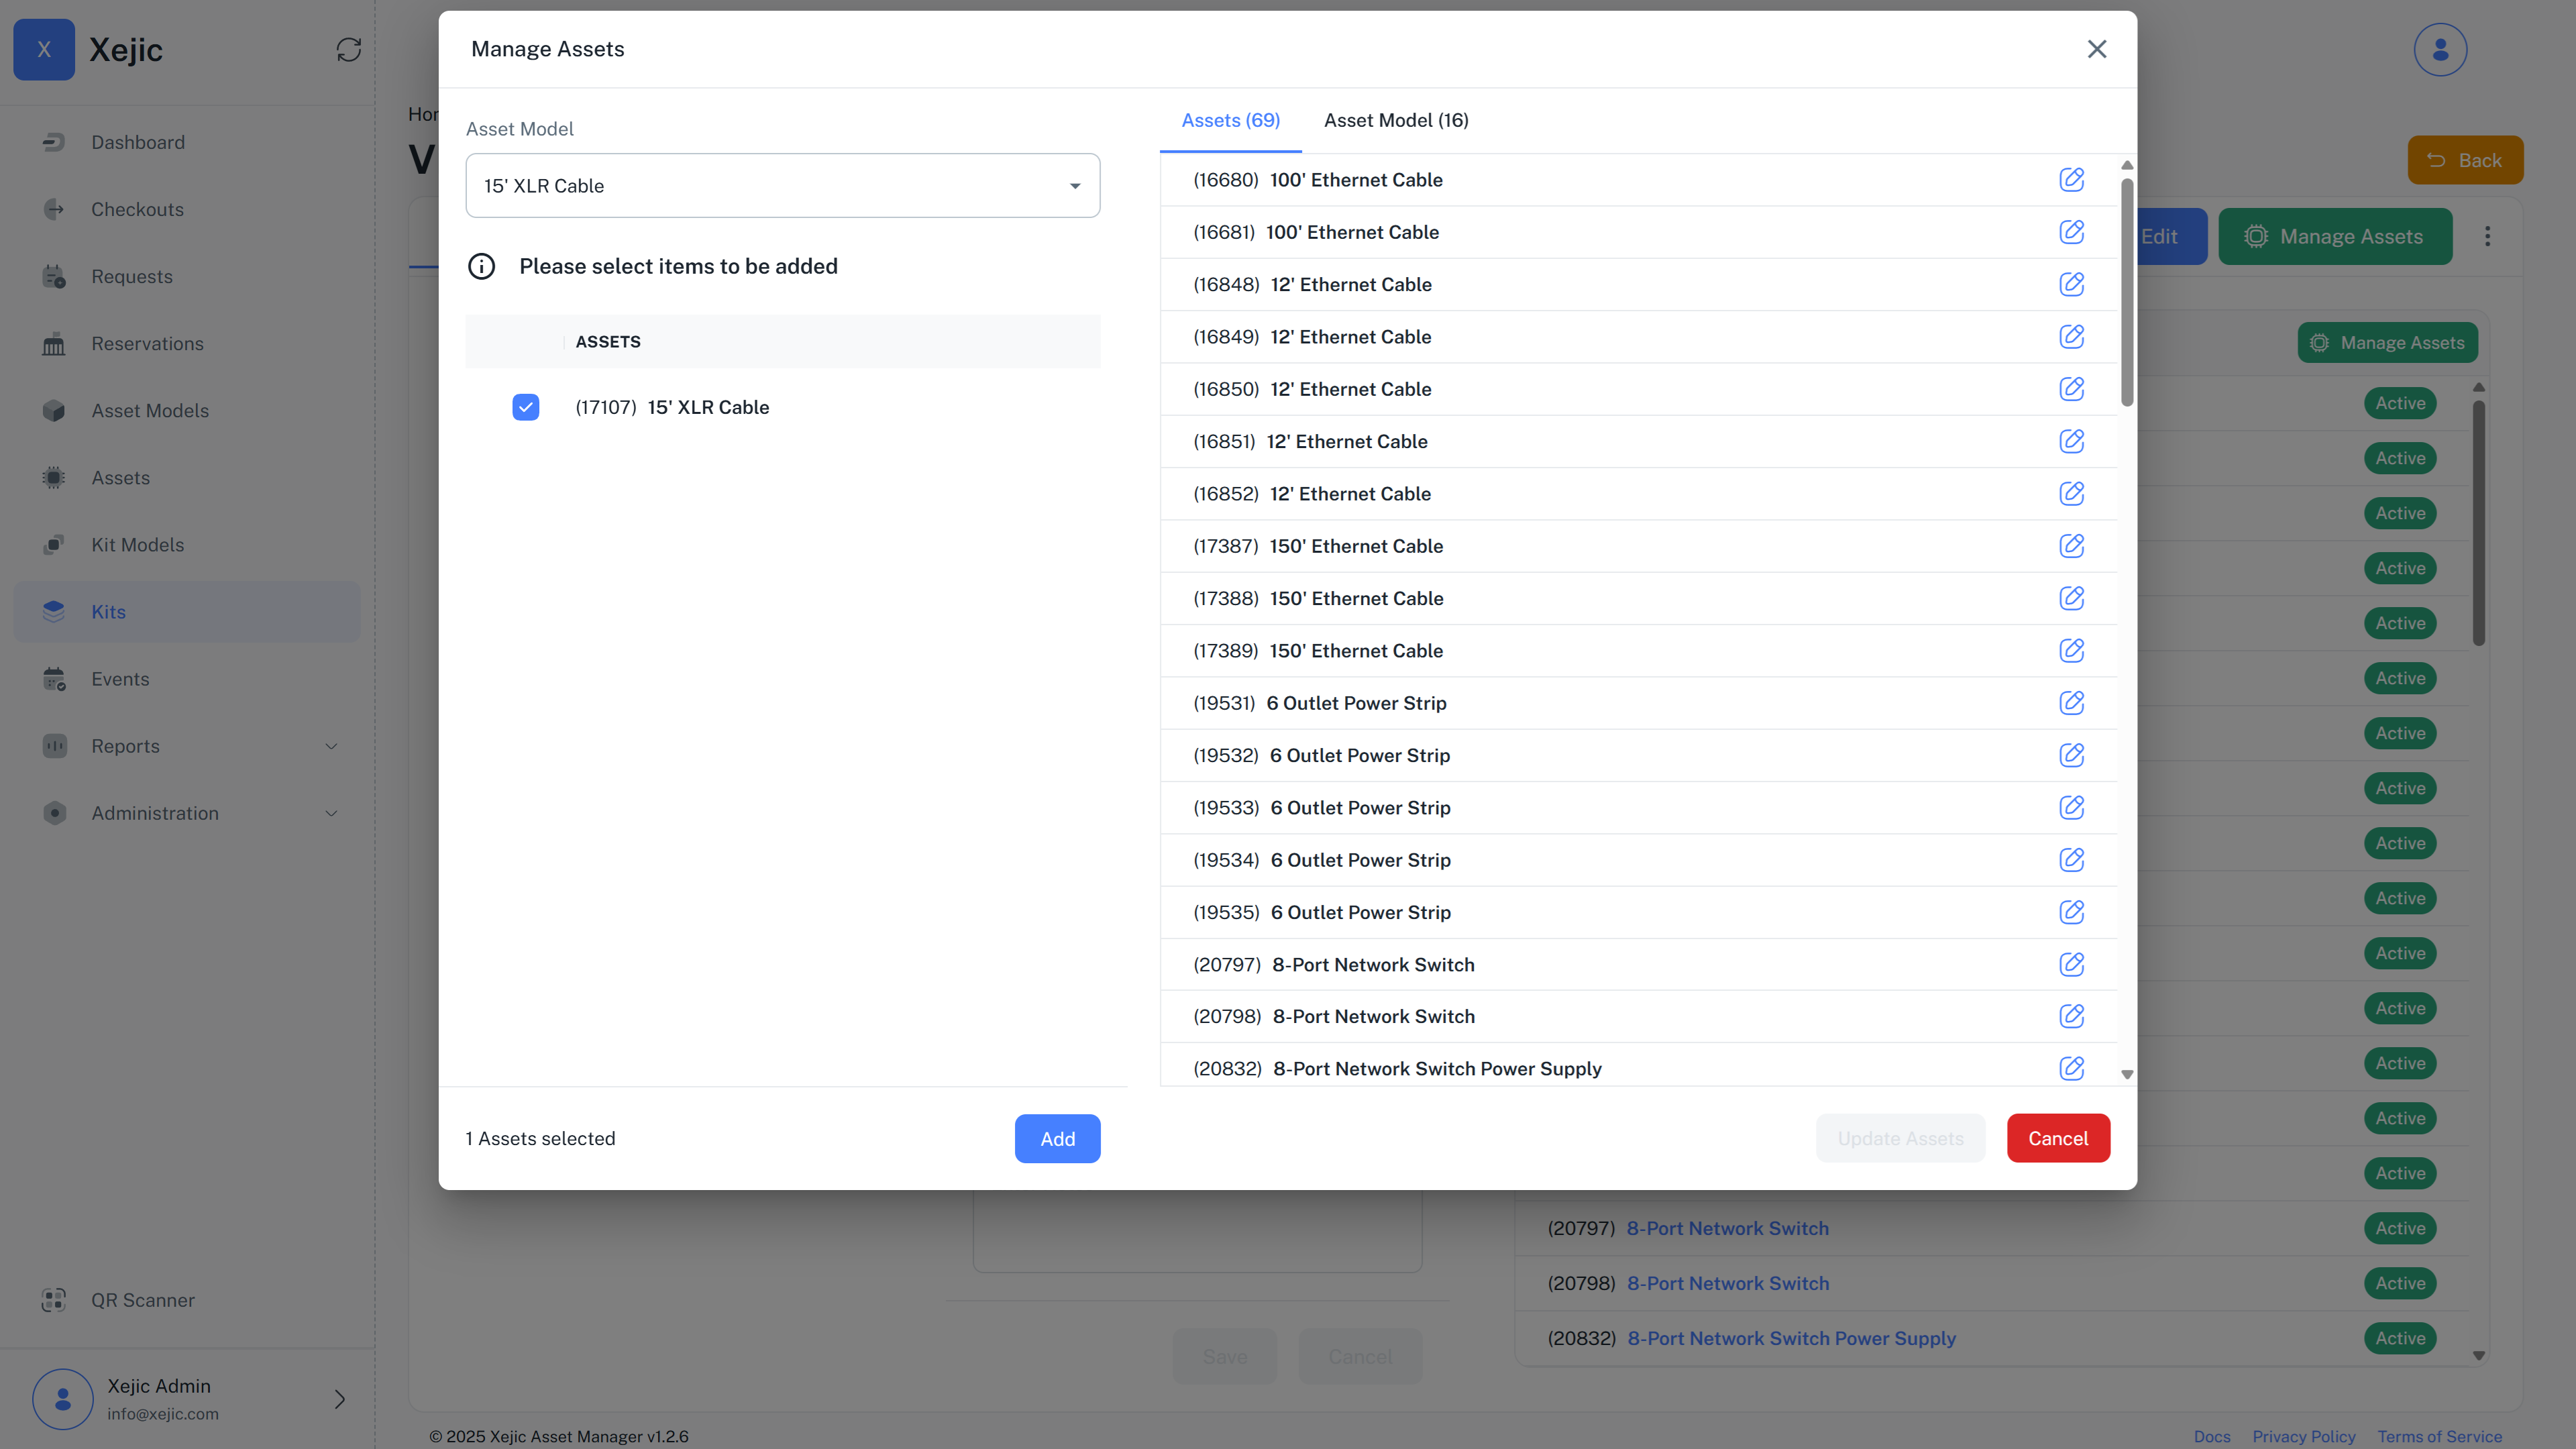
After creating a new Kit, you can click on Manage Assets to add assets and manage the Kit.
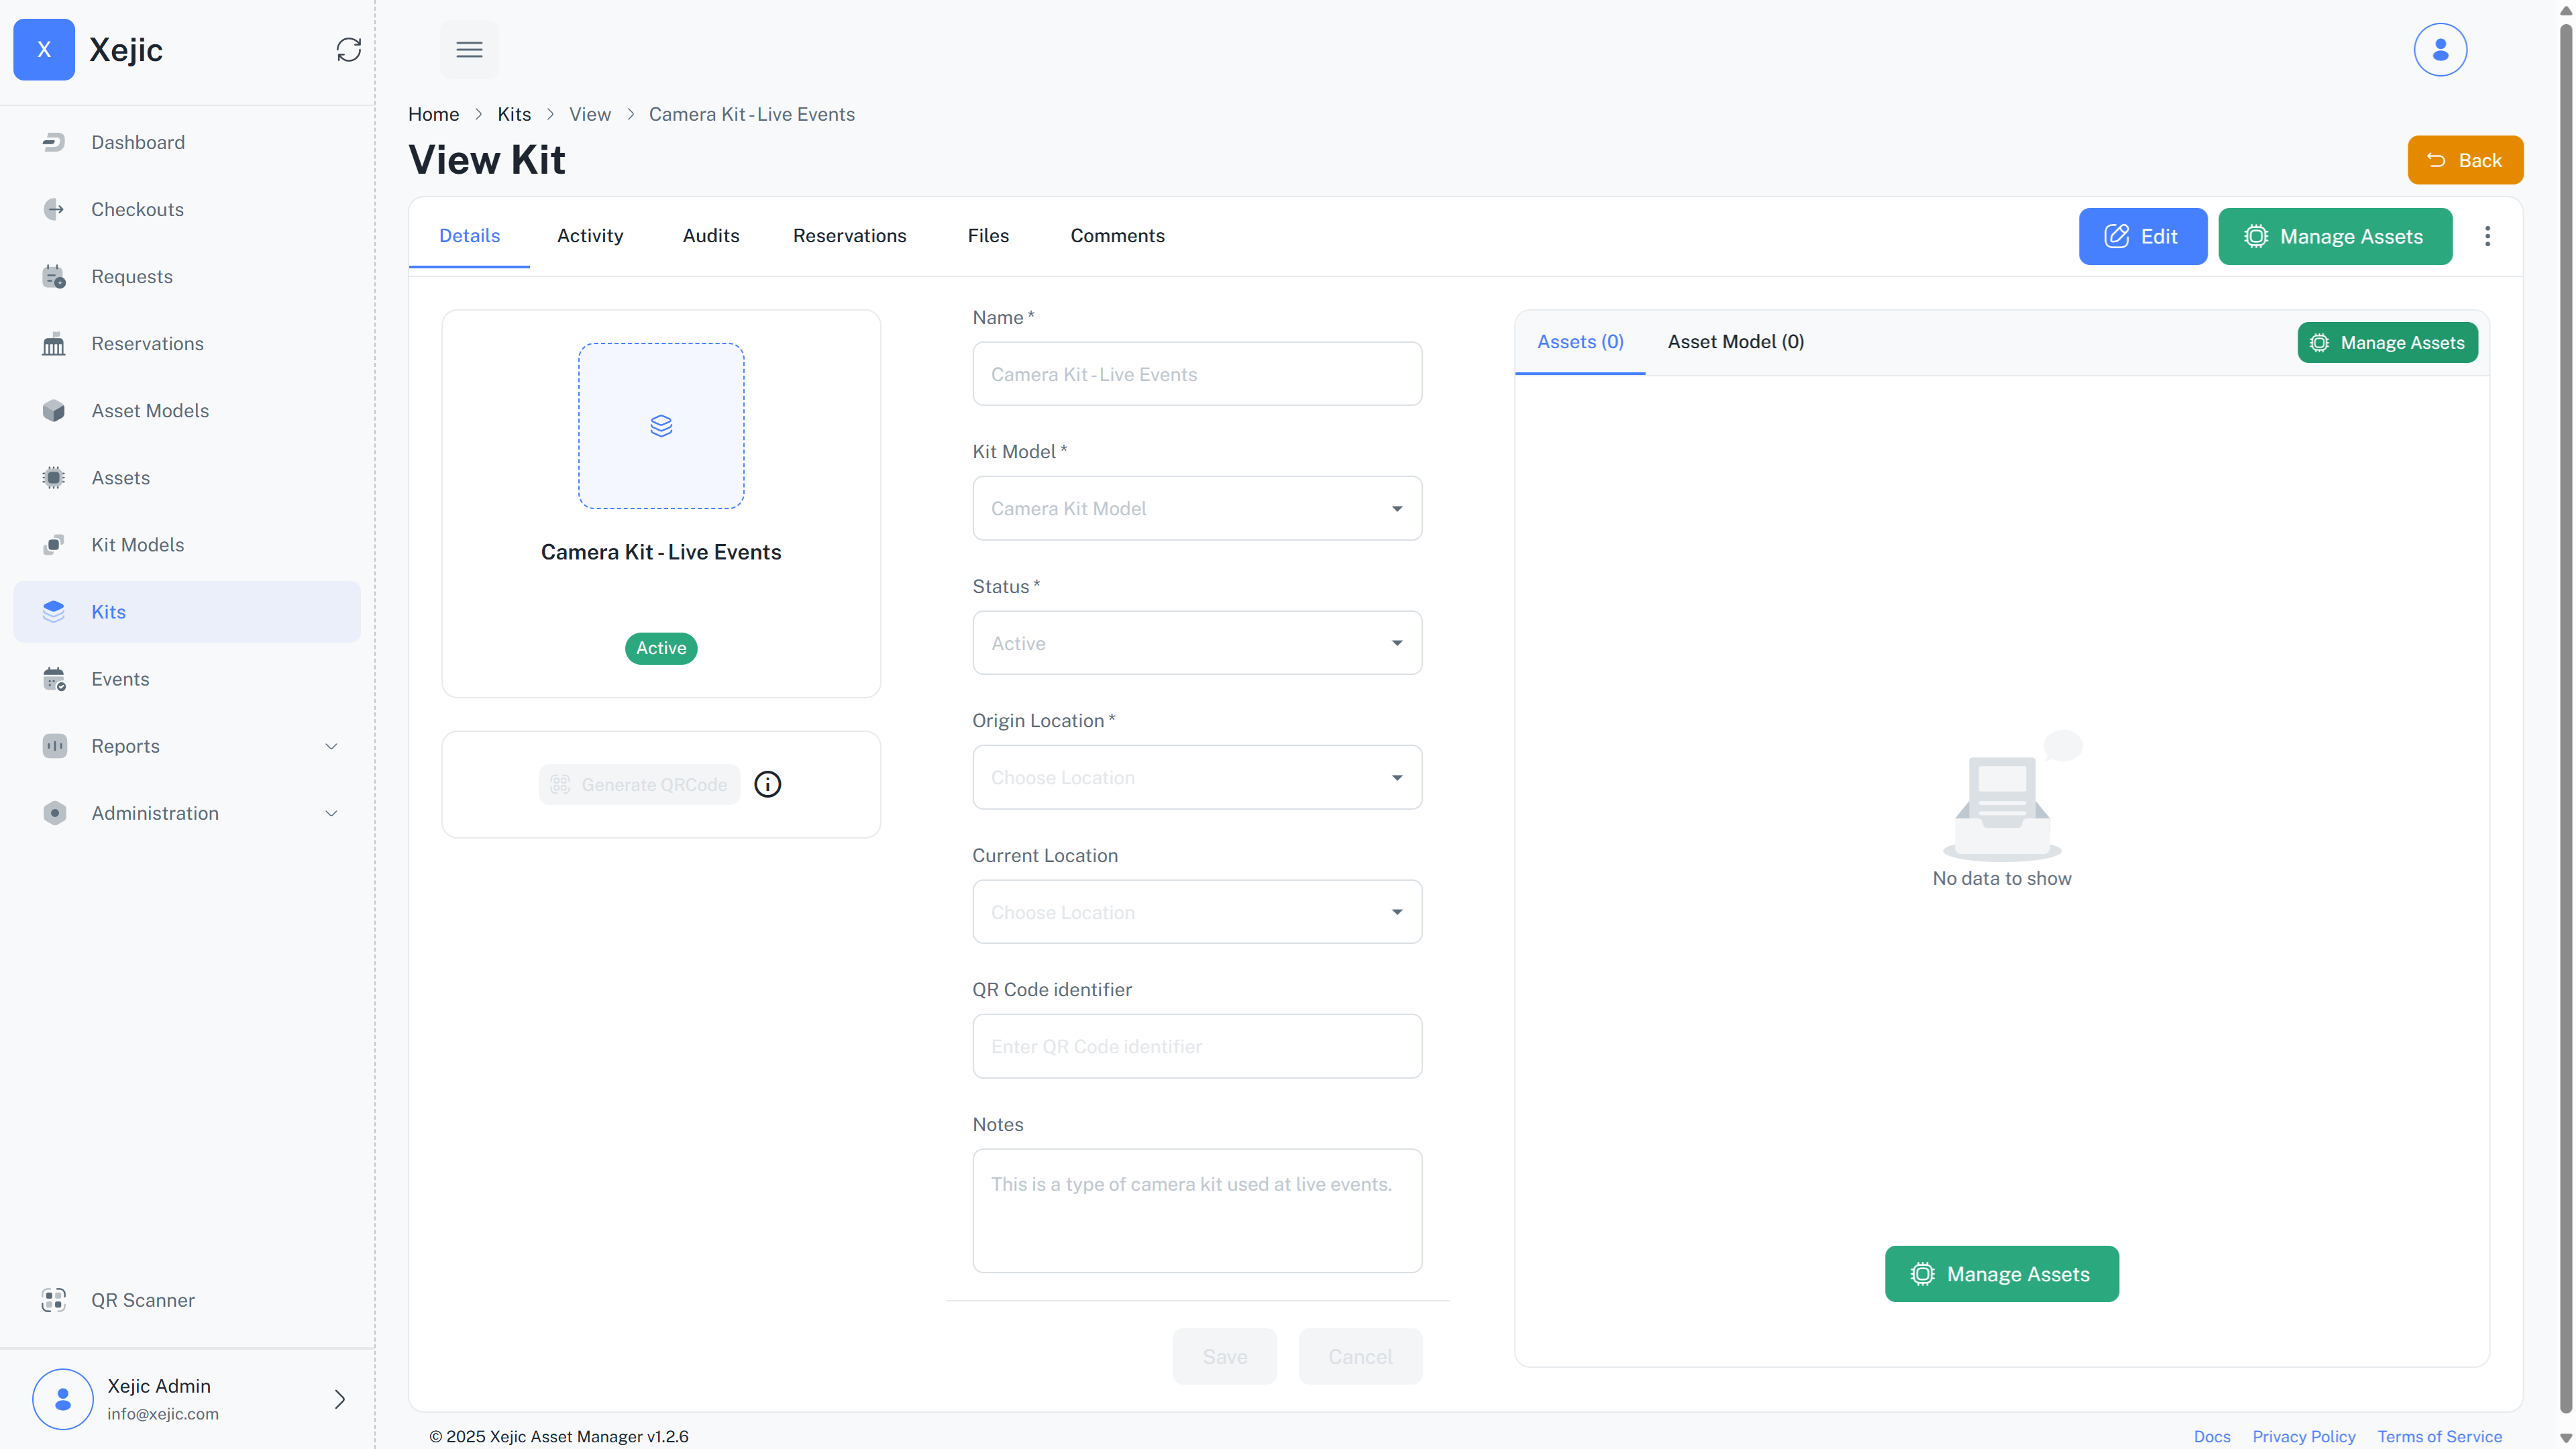
There will be a pop up where you can search and add assets to the kit.
Adding an asset to a checked out Kit
In some cases, you may need to add an asset to a kit that has already been checked out. The asset manager allows this functionality. However, when doing so, the system enforces the following conditions:
- Only active assets with no upcoming reservations can be added.
- The asset will be automatically marked as checked out, and all checkout details (such as checkout date, location, and assigned user) will be inherited from the kit.
Removing an asset from a Kit
Once assets are added, you can use the tiny edit button beside an asset to manage the assets within a kit. Click on it to open the audit dialogue. To remove the asset from the kit you can select the checkbox that says remove asset from kit. You can optionally choose a reason.
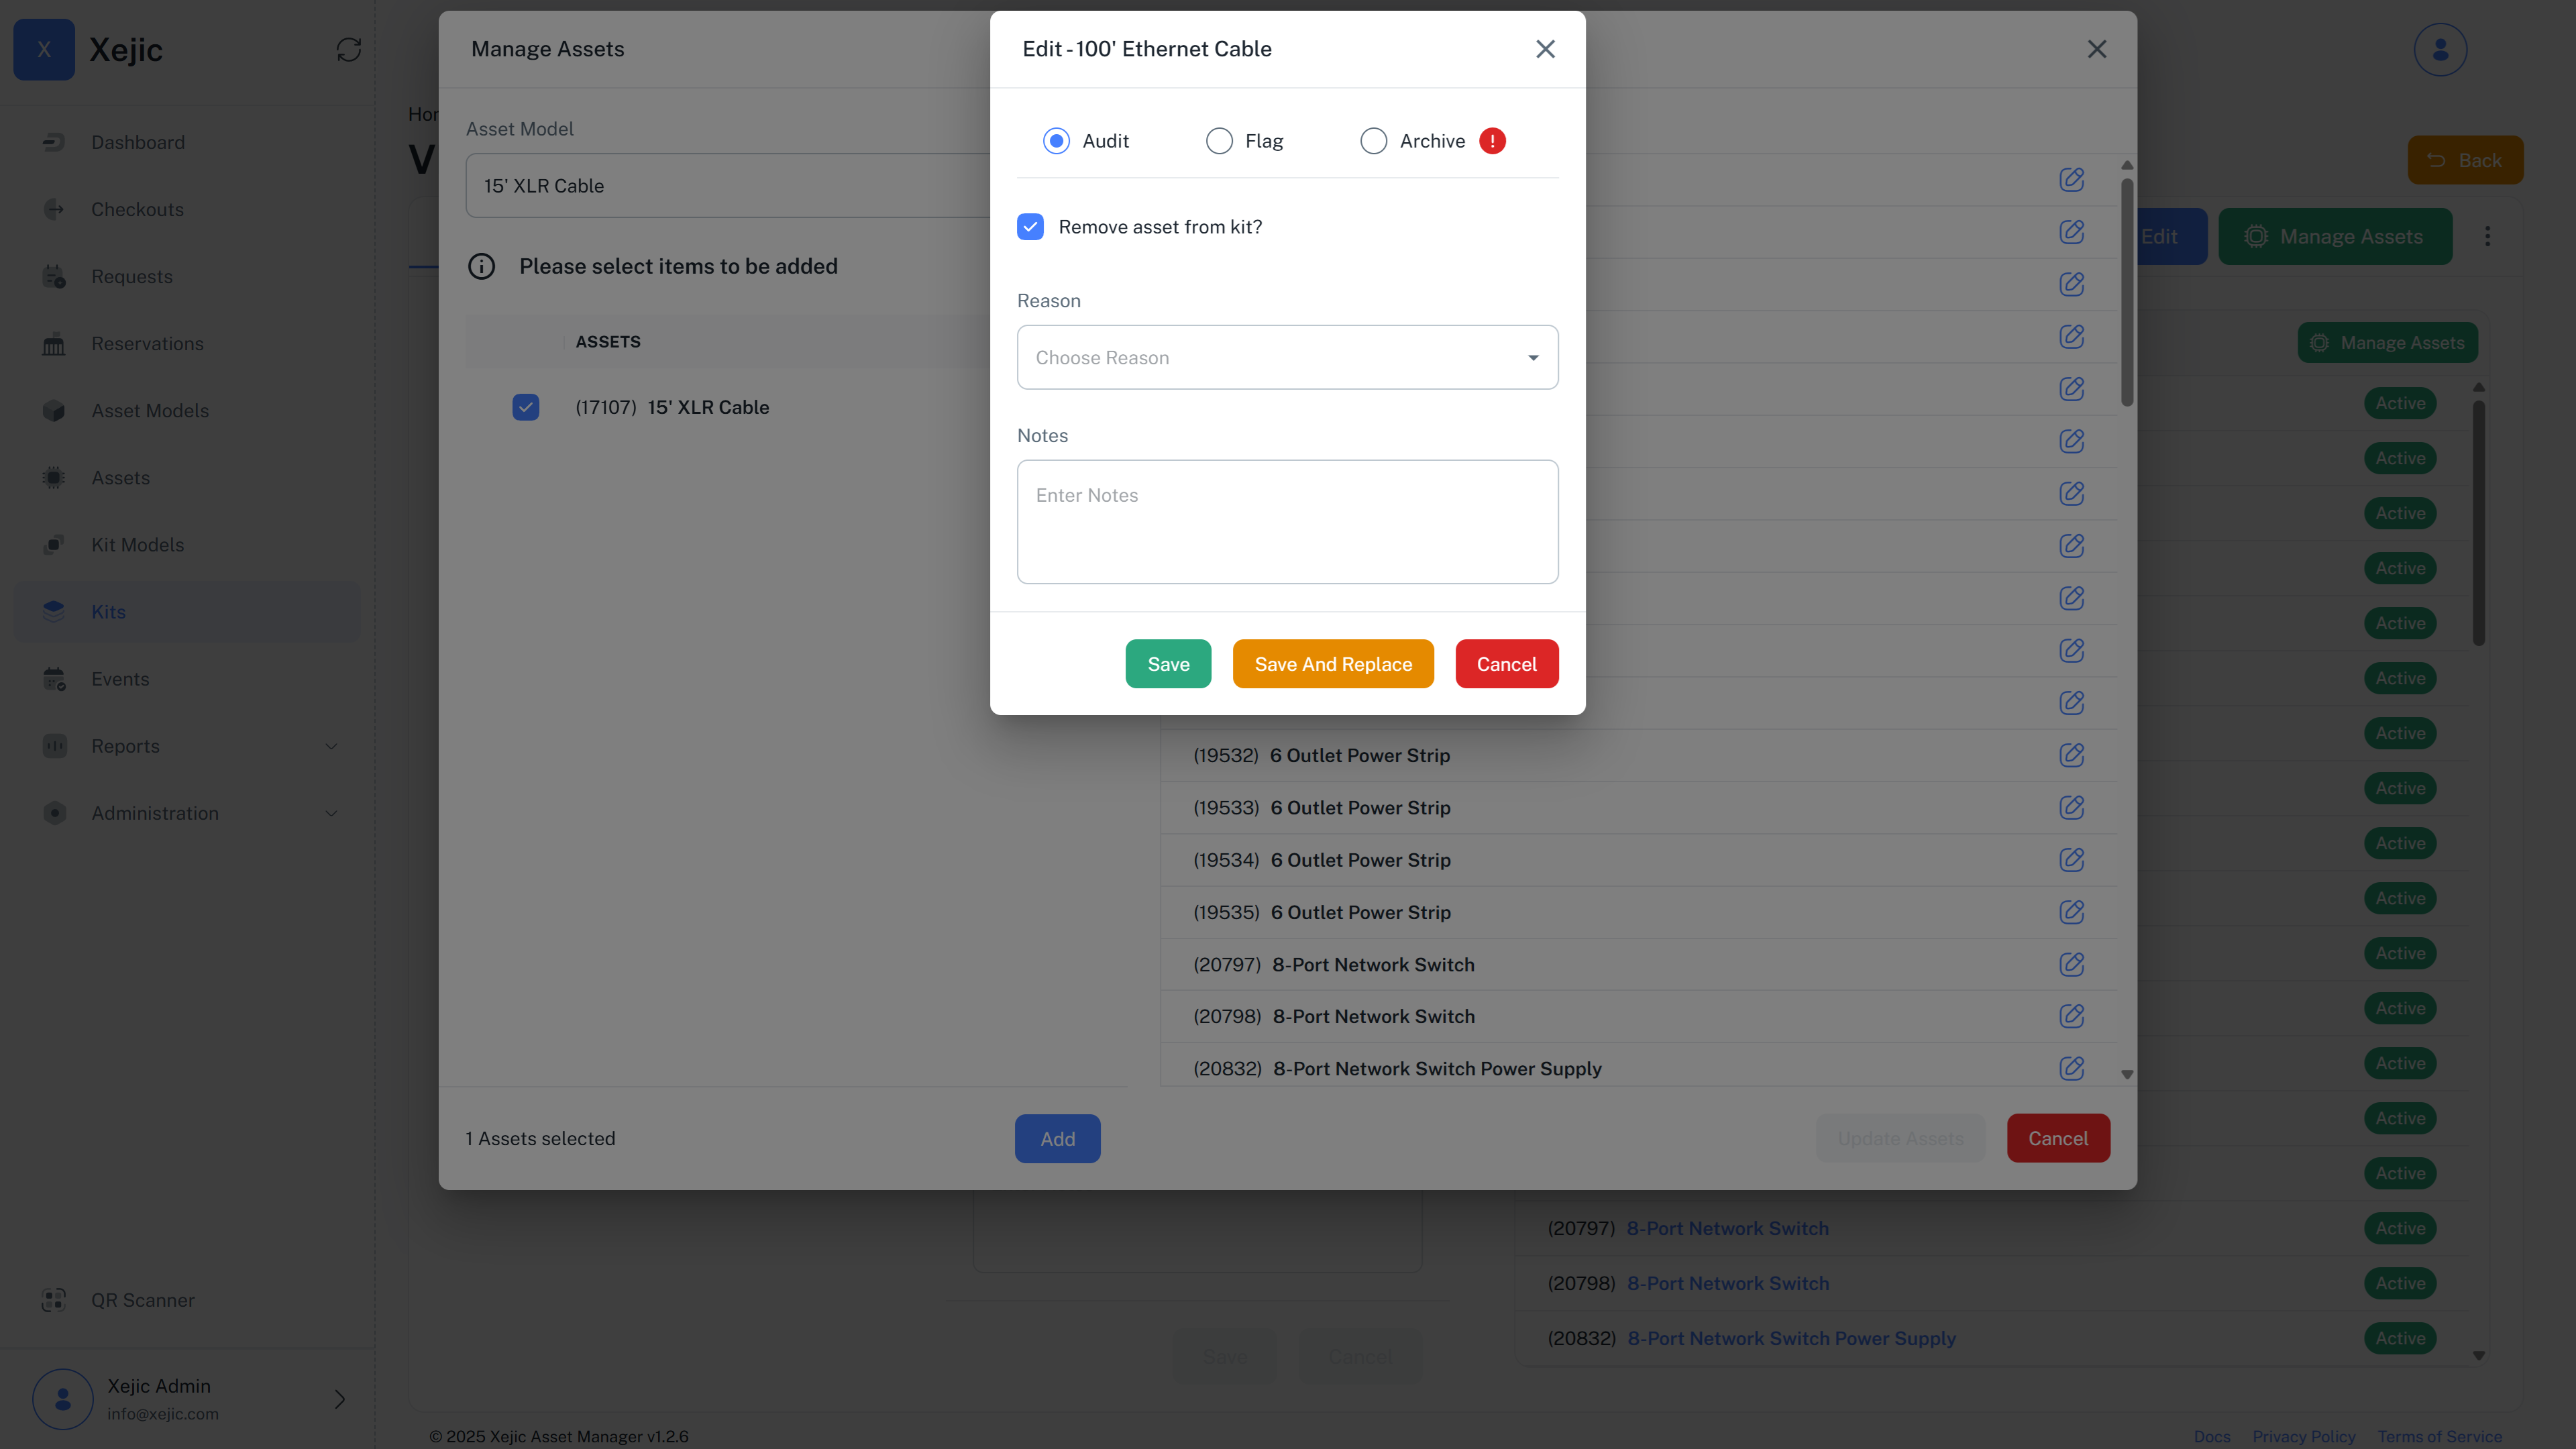
- These actions will be tracked in the asset audit reports
- Clicking on Flag and checking remove will remove the asset from the kit and archive the asset.
- Clicking on Archive will remove the asset from the kit and archive the asset.
- Clicking on Save and Replace will try and select another available asset of the same asset model for your convenience.
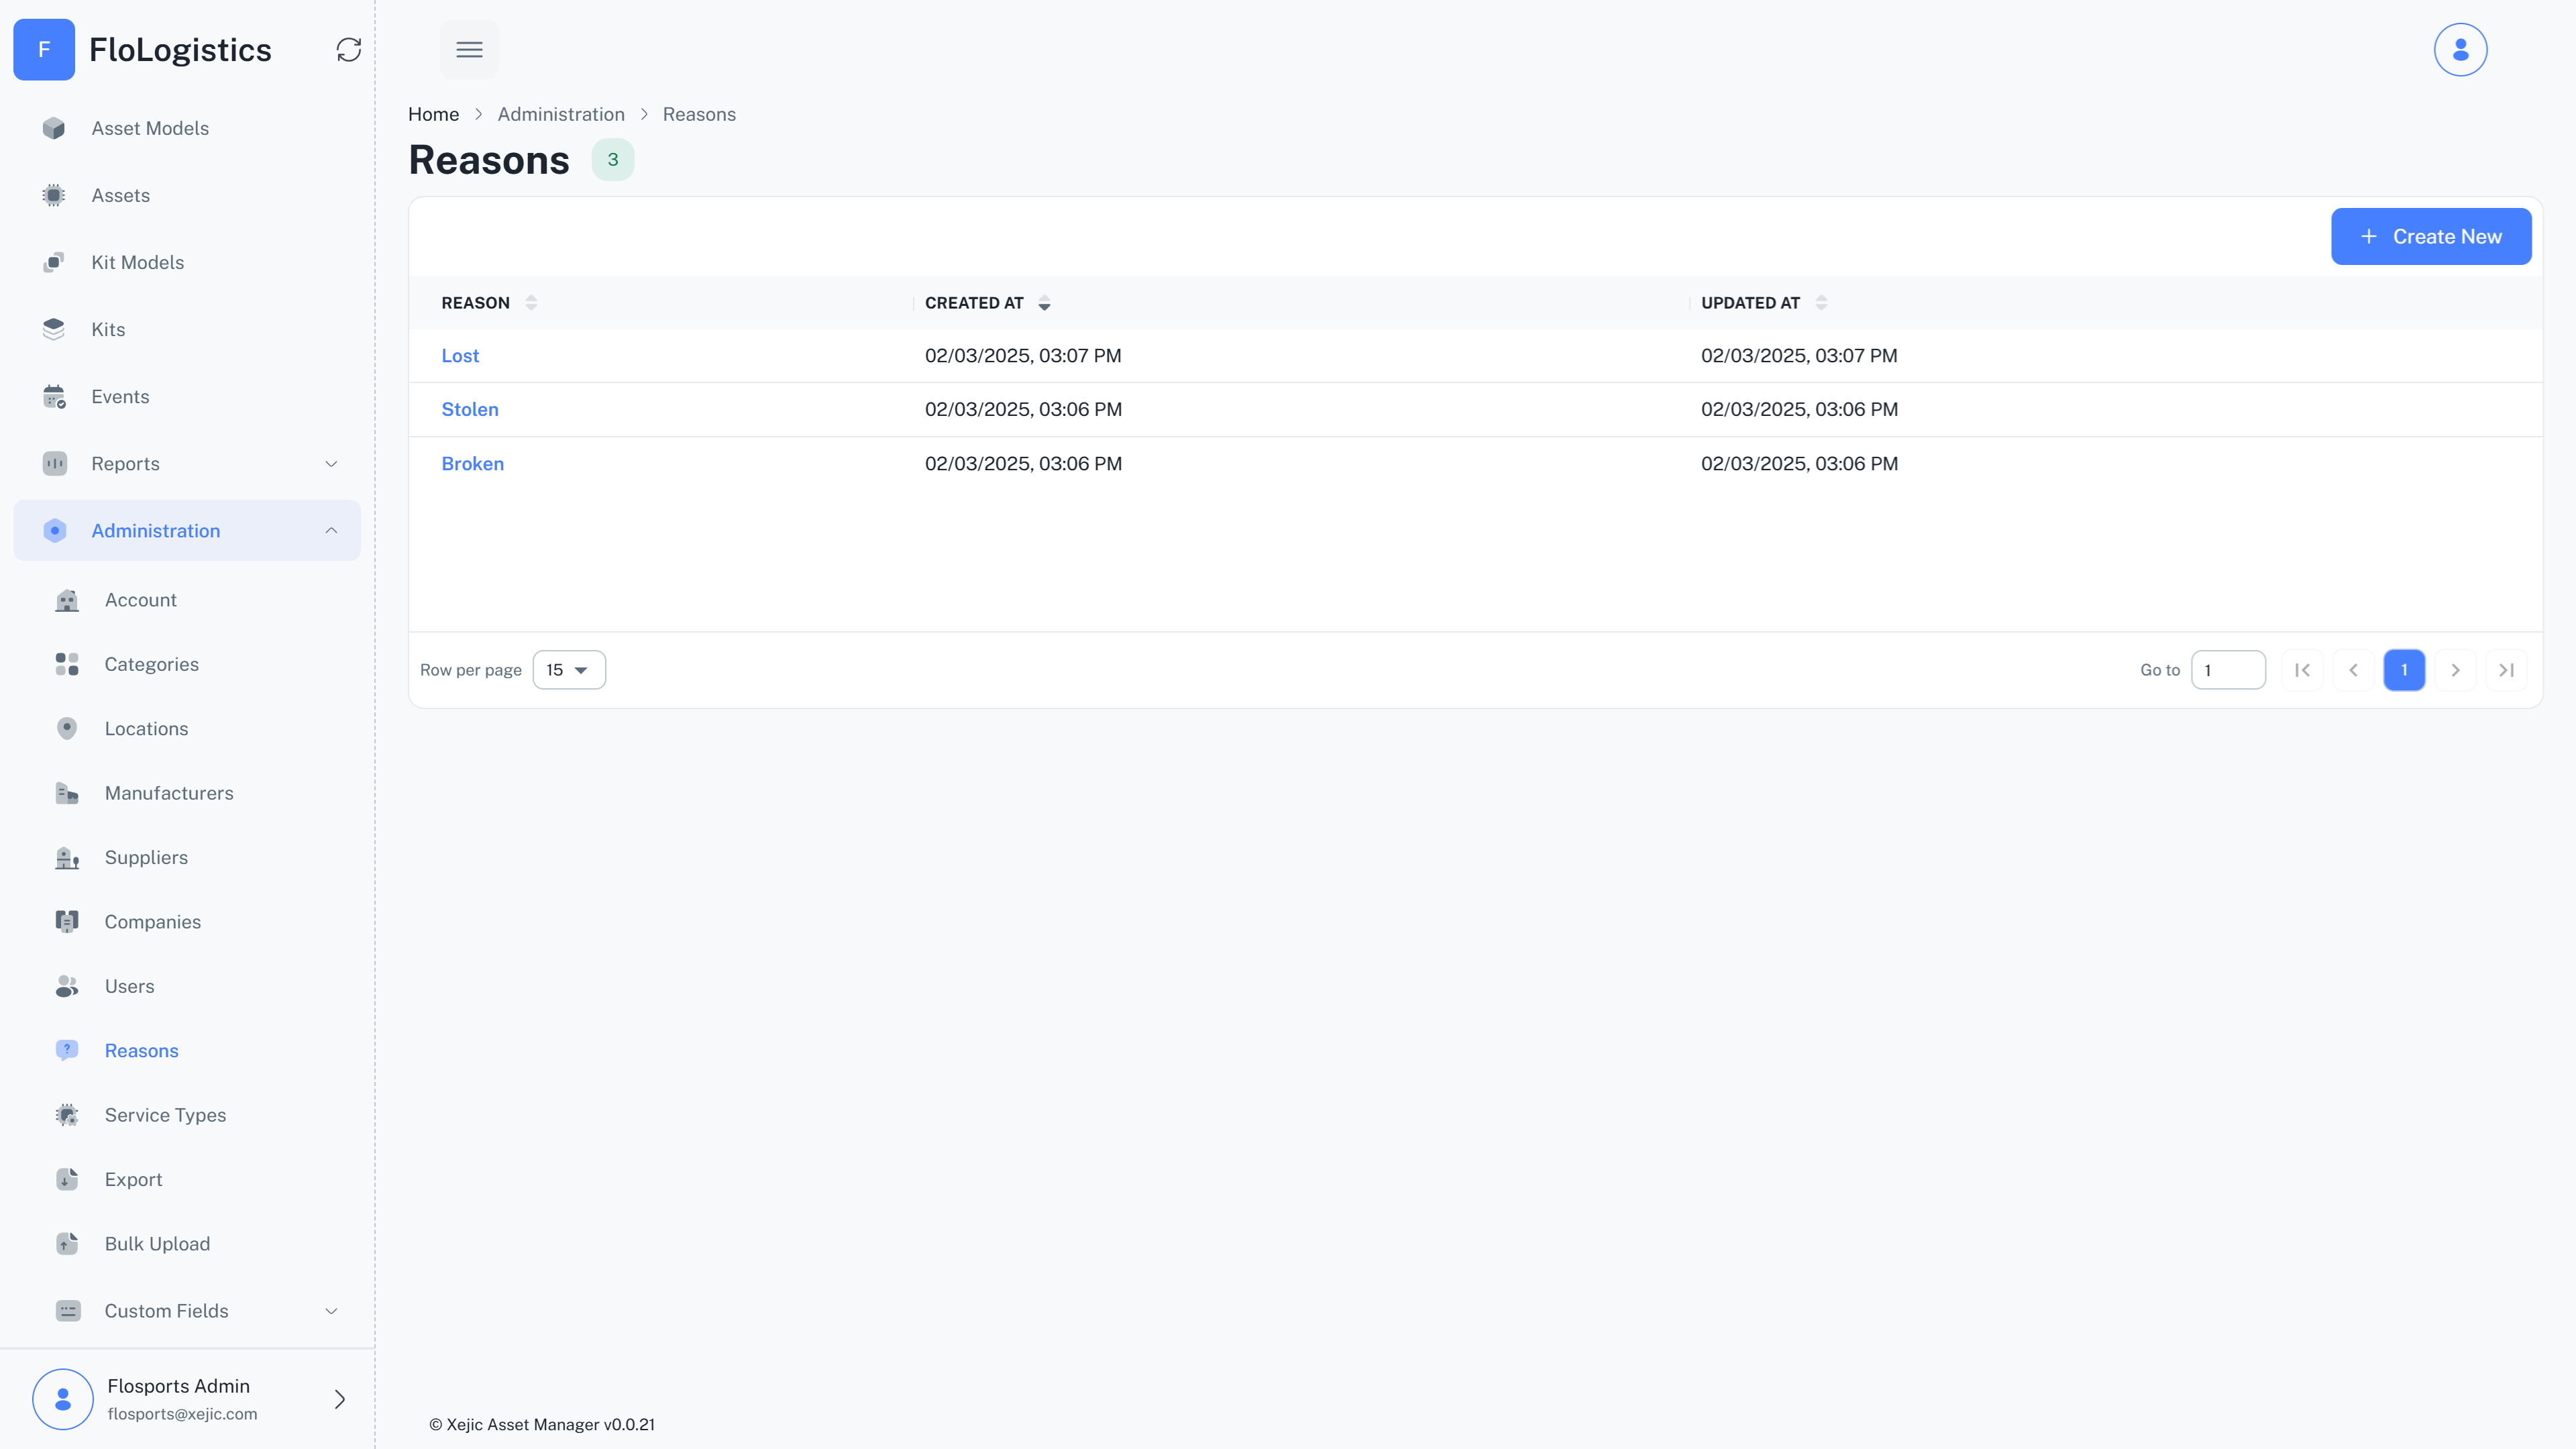
Reasons can be set up in the Reasons master data section under Administration > Reasons.
Requests
Our asset management system provides a structured process for users to request, reserve, and check out assets or kits. This three-step workflow ensures efficient allocation and tracking of assets from request to usage.
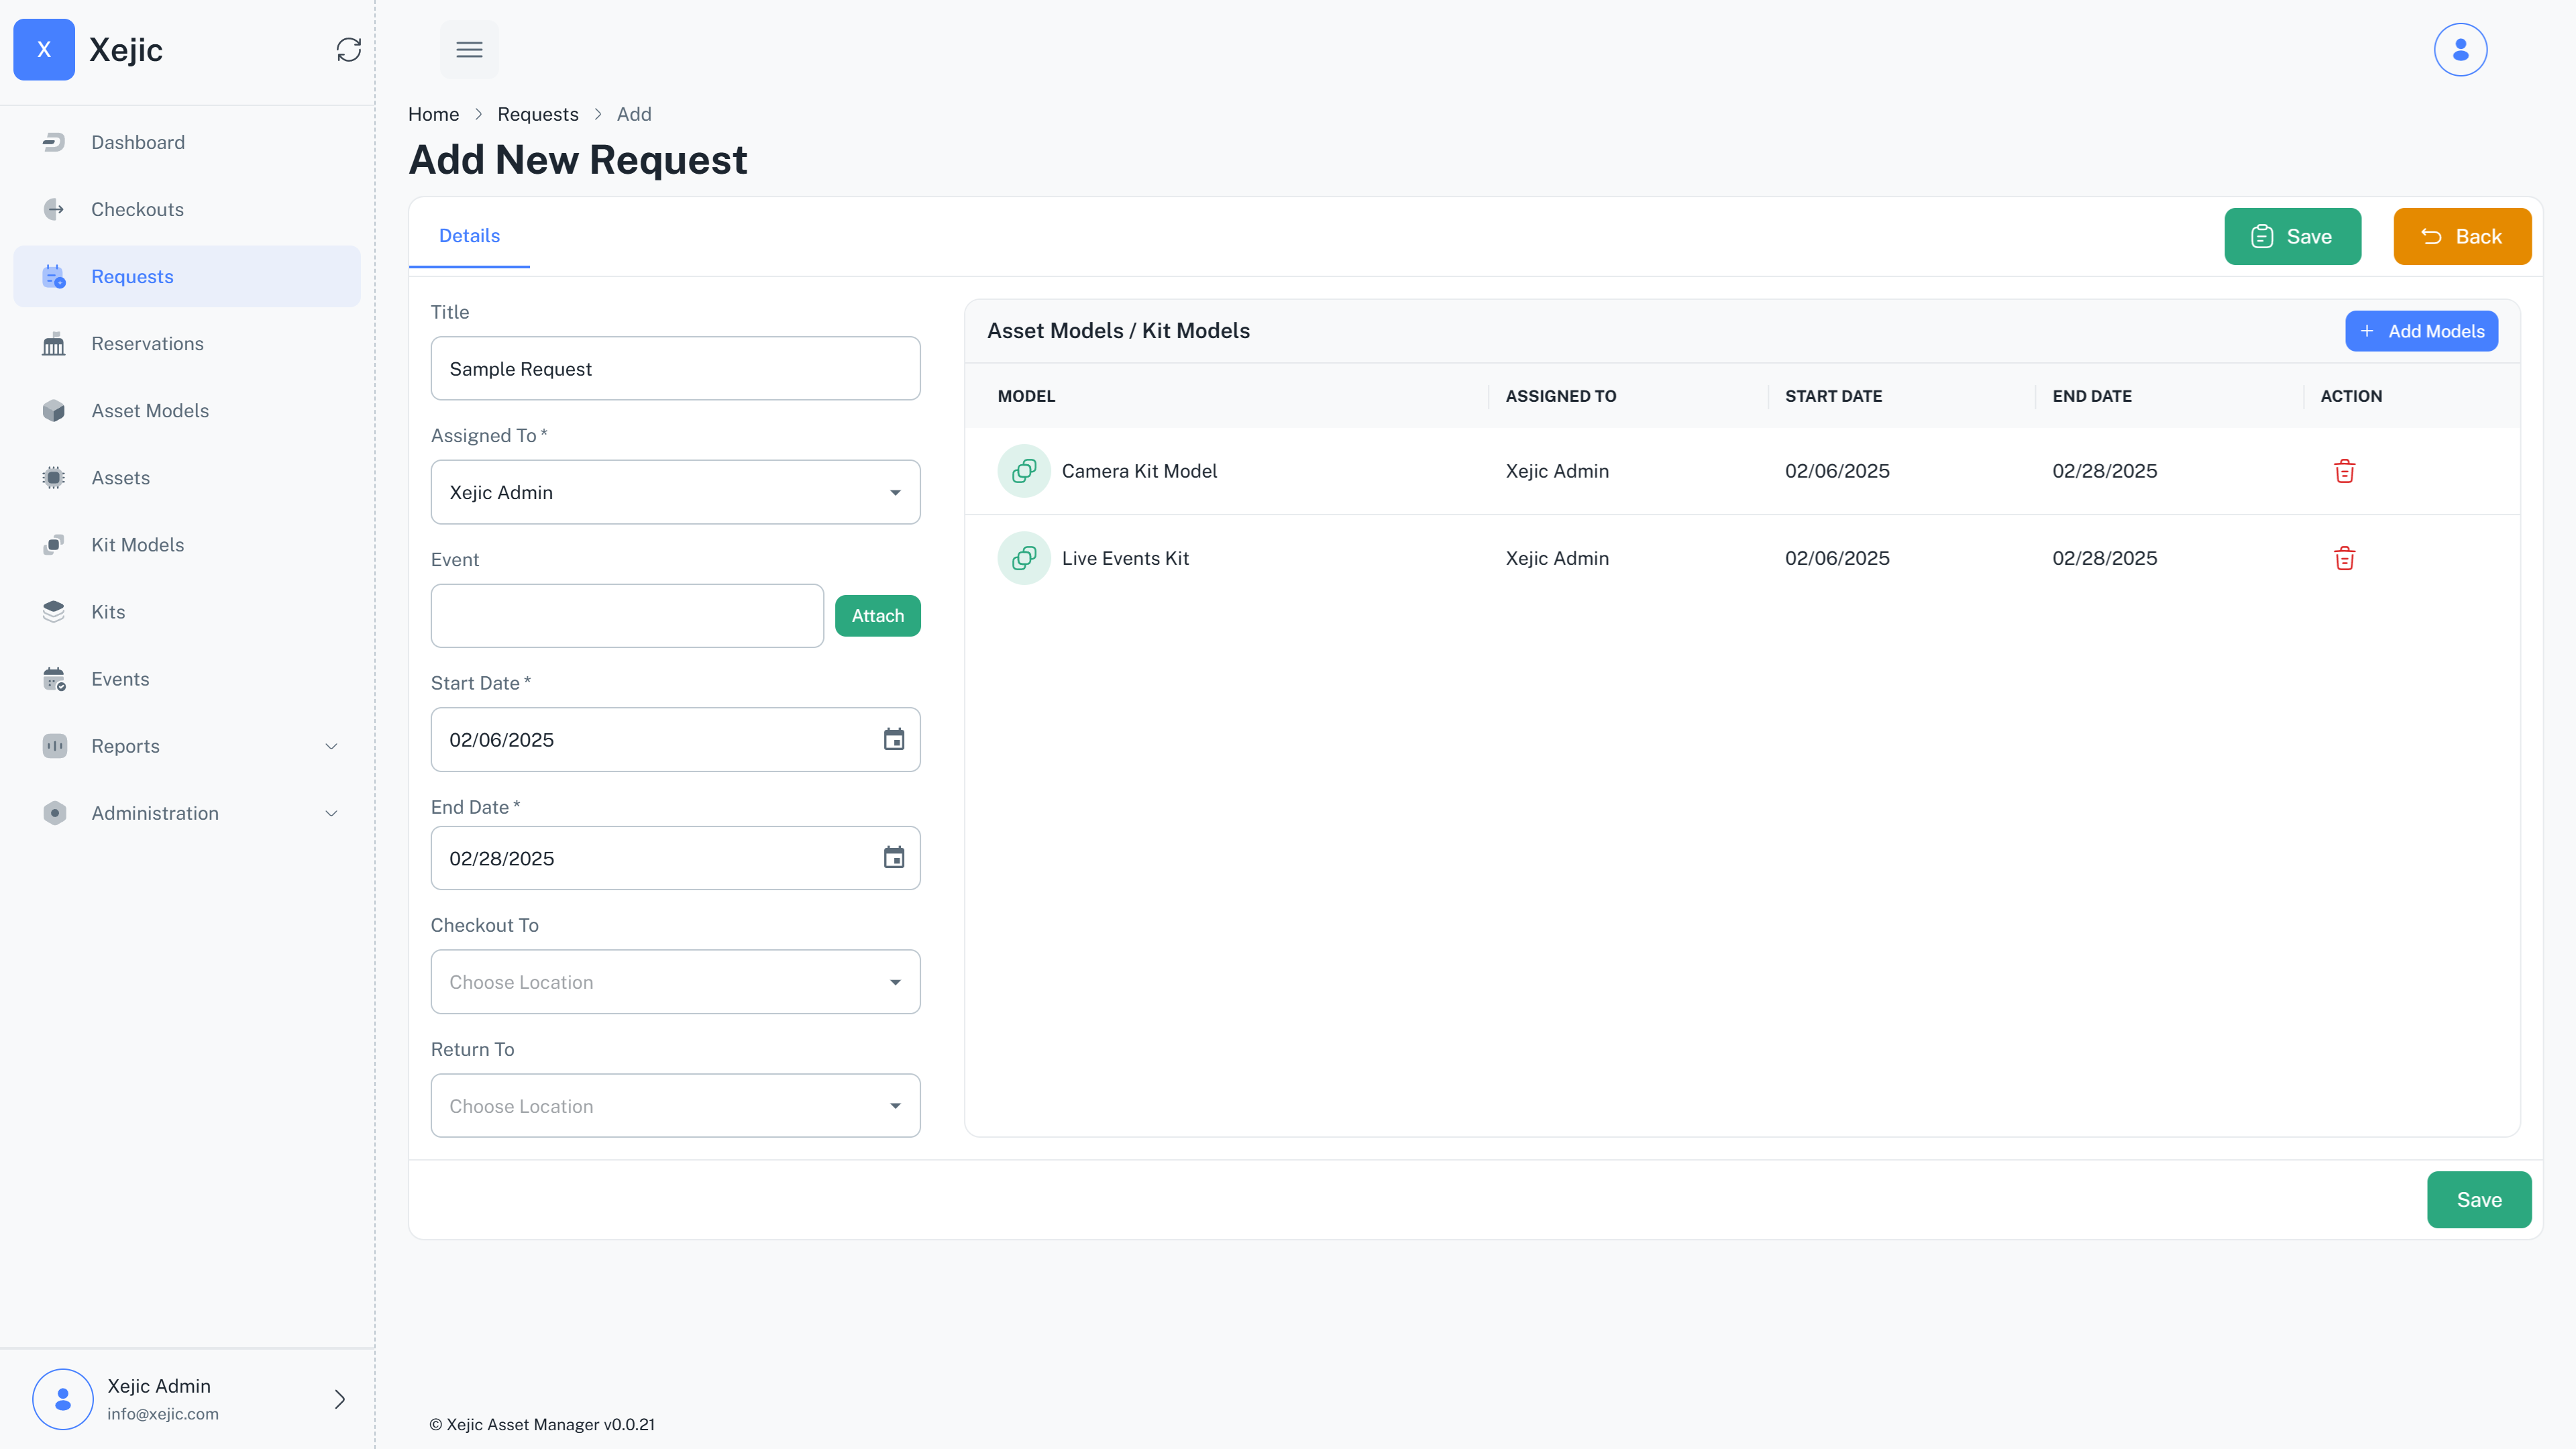
In order to reserve an asset or a kit, users initiate the process by submitting a Request. This request is done at a Kit model/ Asset model level. It does not guarantee an asset’s availability; rather it shows the demand for a specific type of asset or kit. Users enter the start date and the end date for which they require the asset.
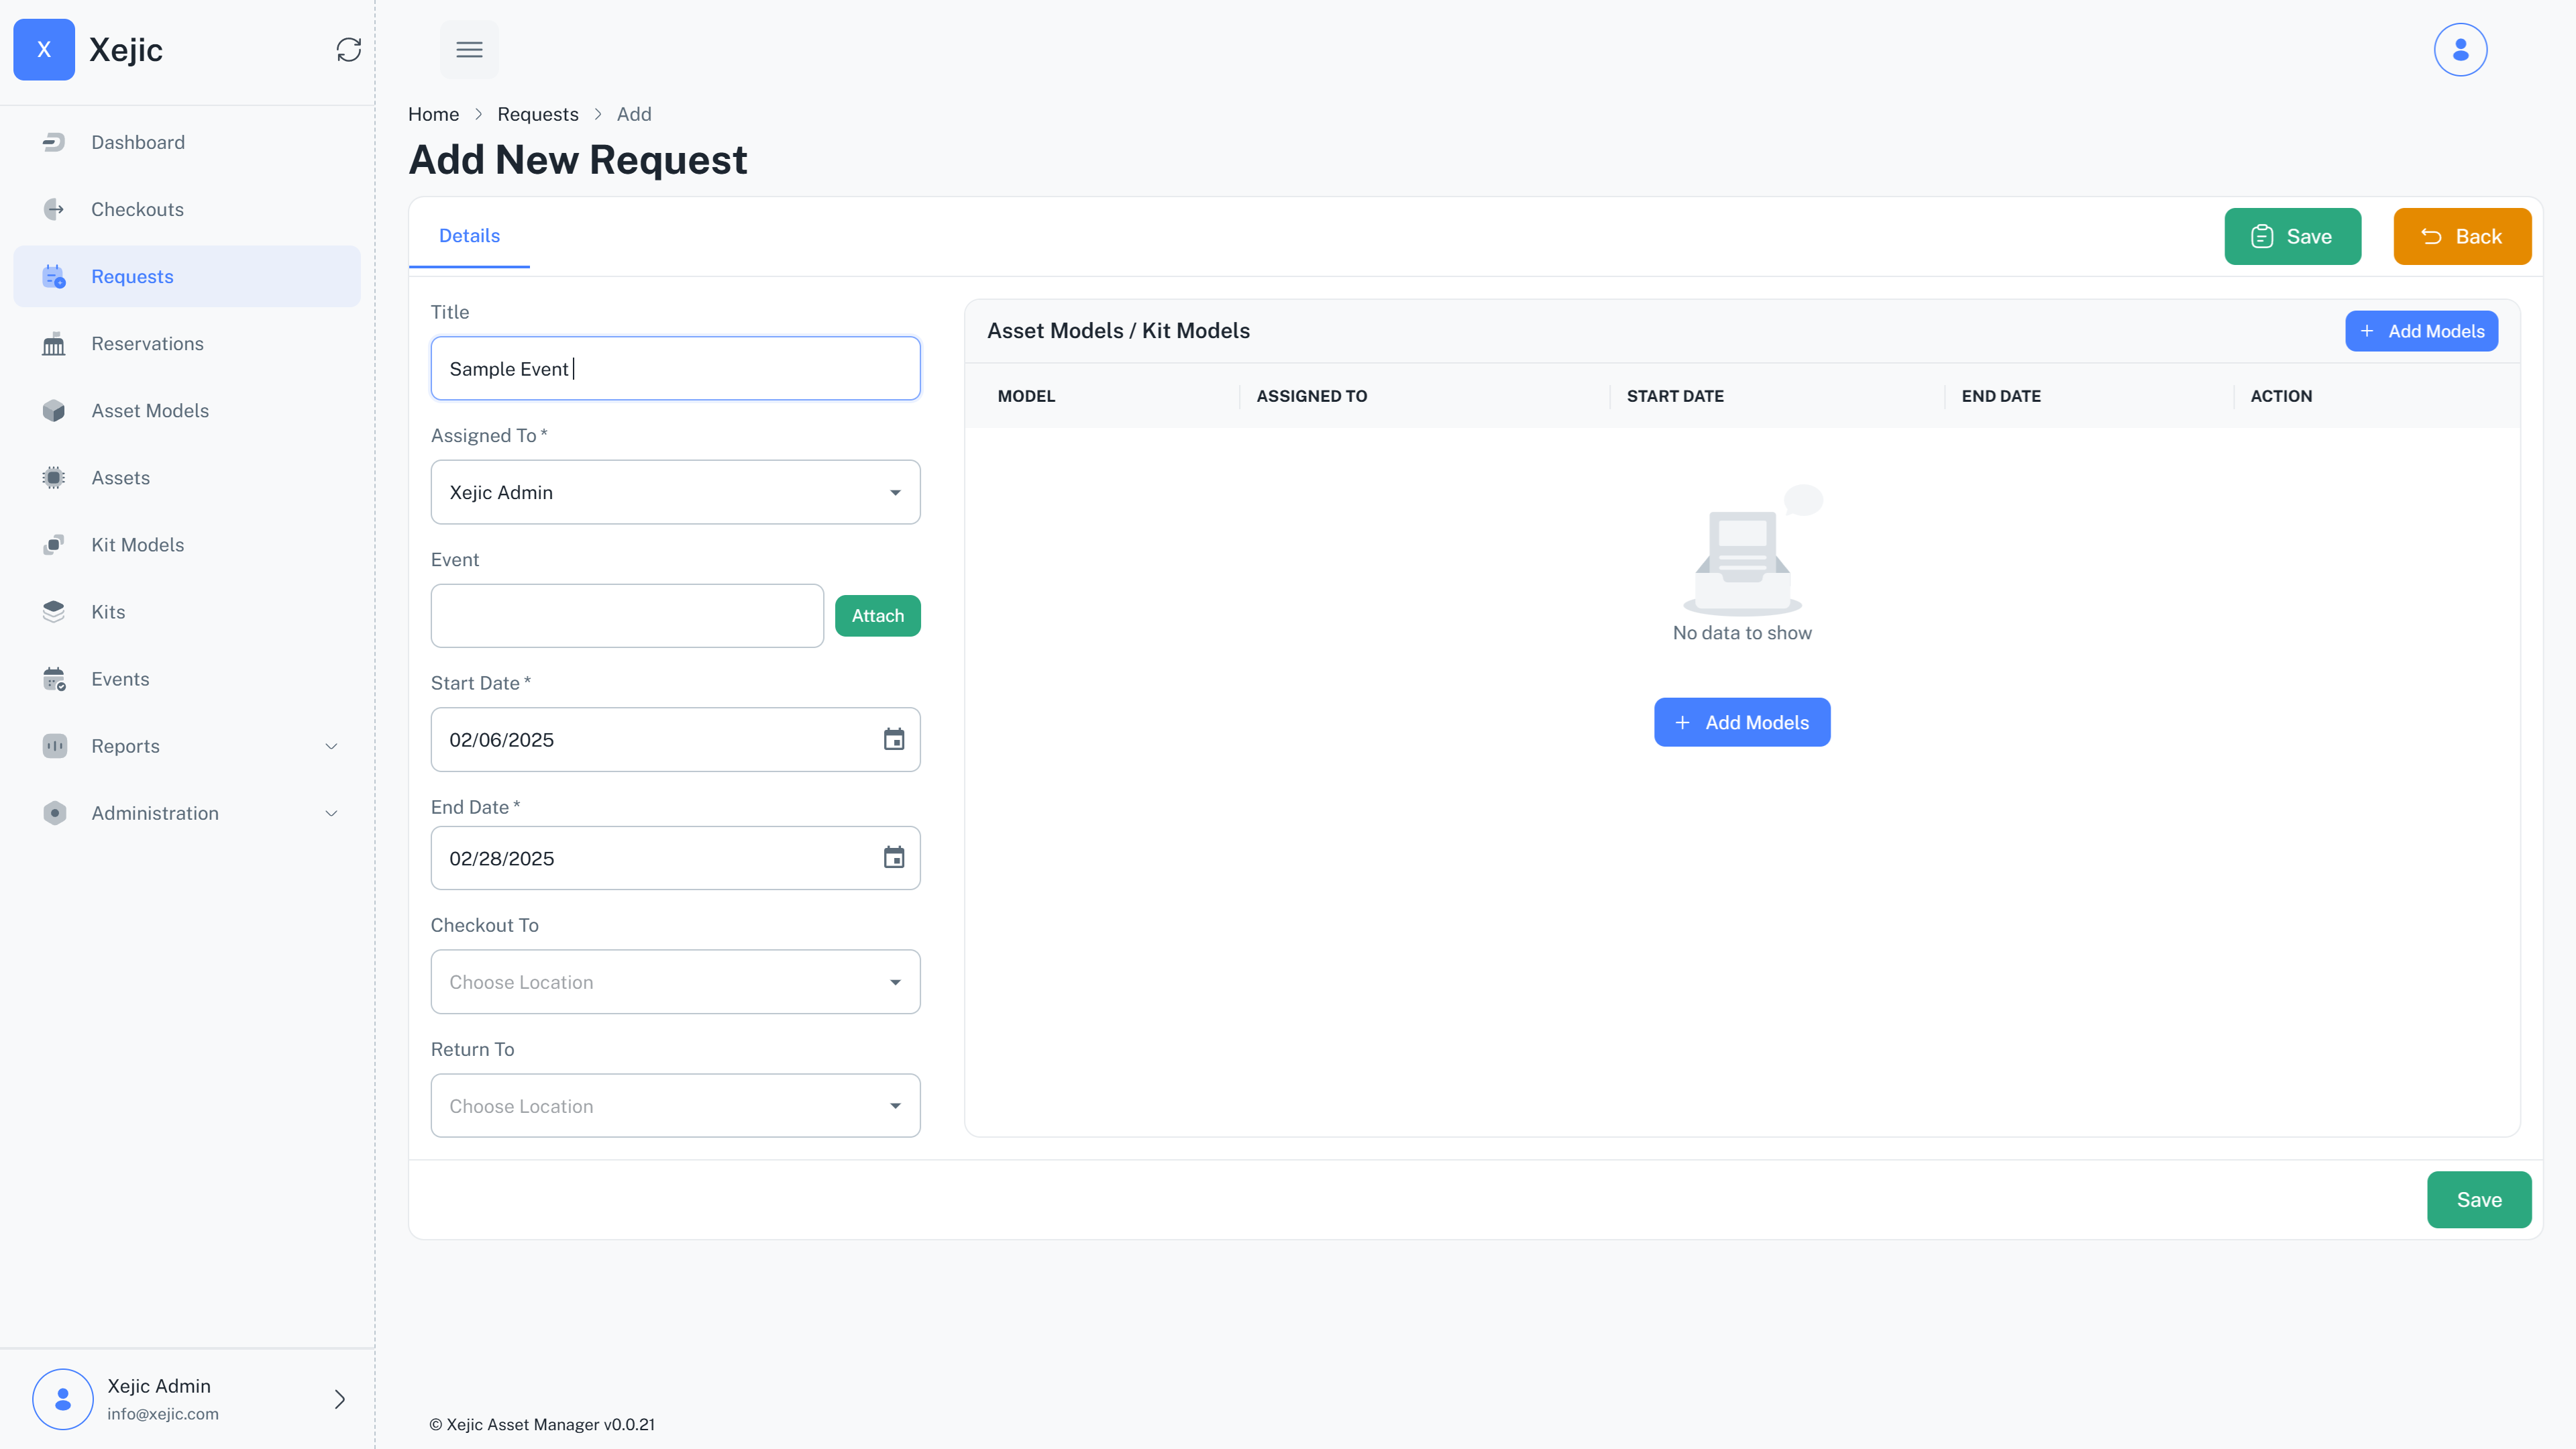
They then select asset models/ kit models that they would like to reserve and place a request. Once the request is placed, they are reviewed by administrators to start the actual reservation process.
Reservation
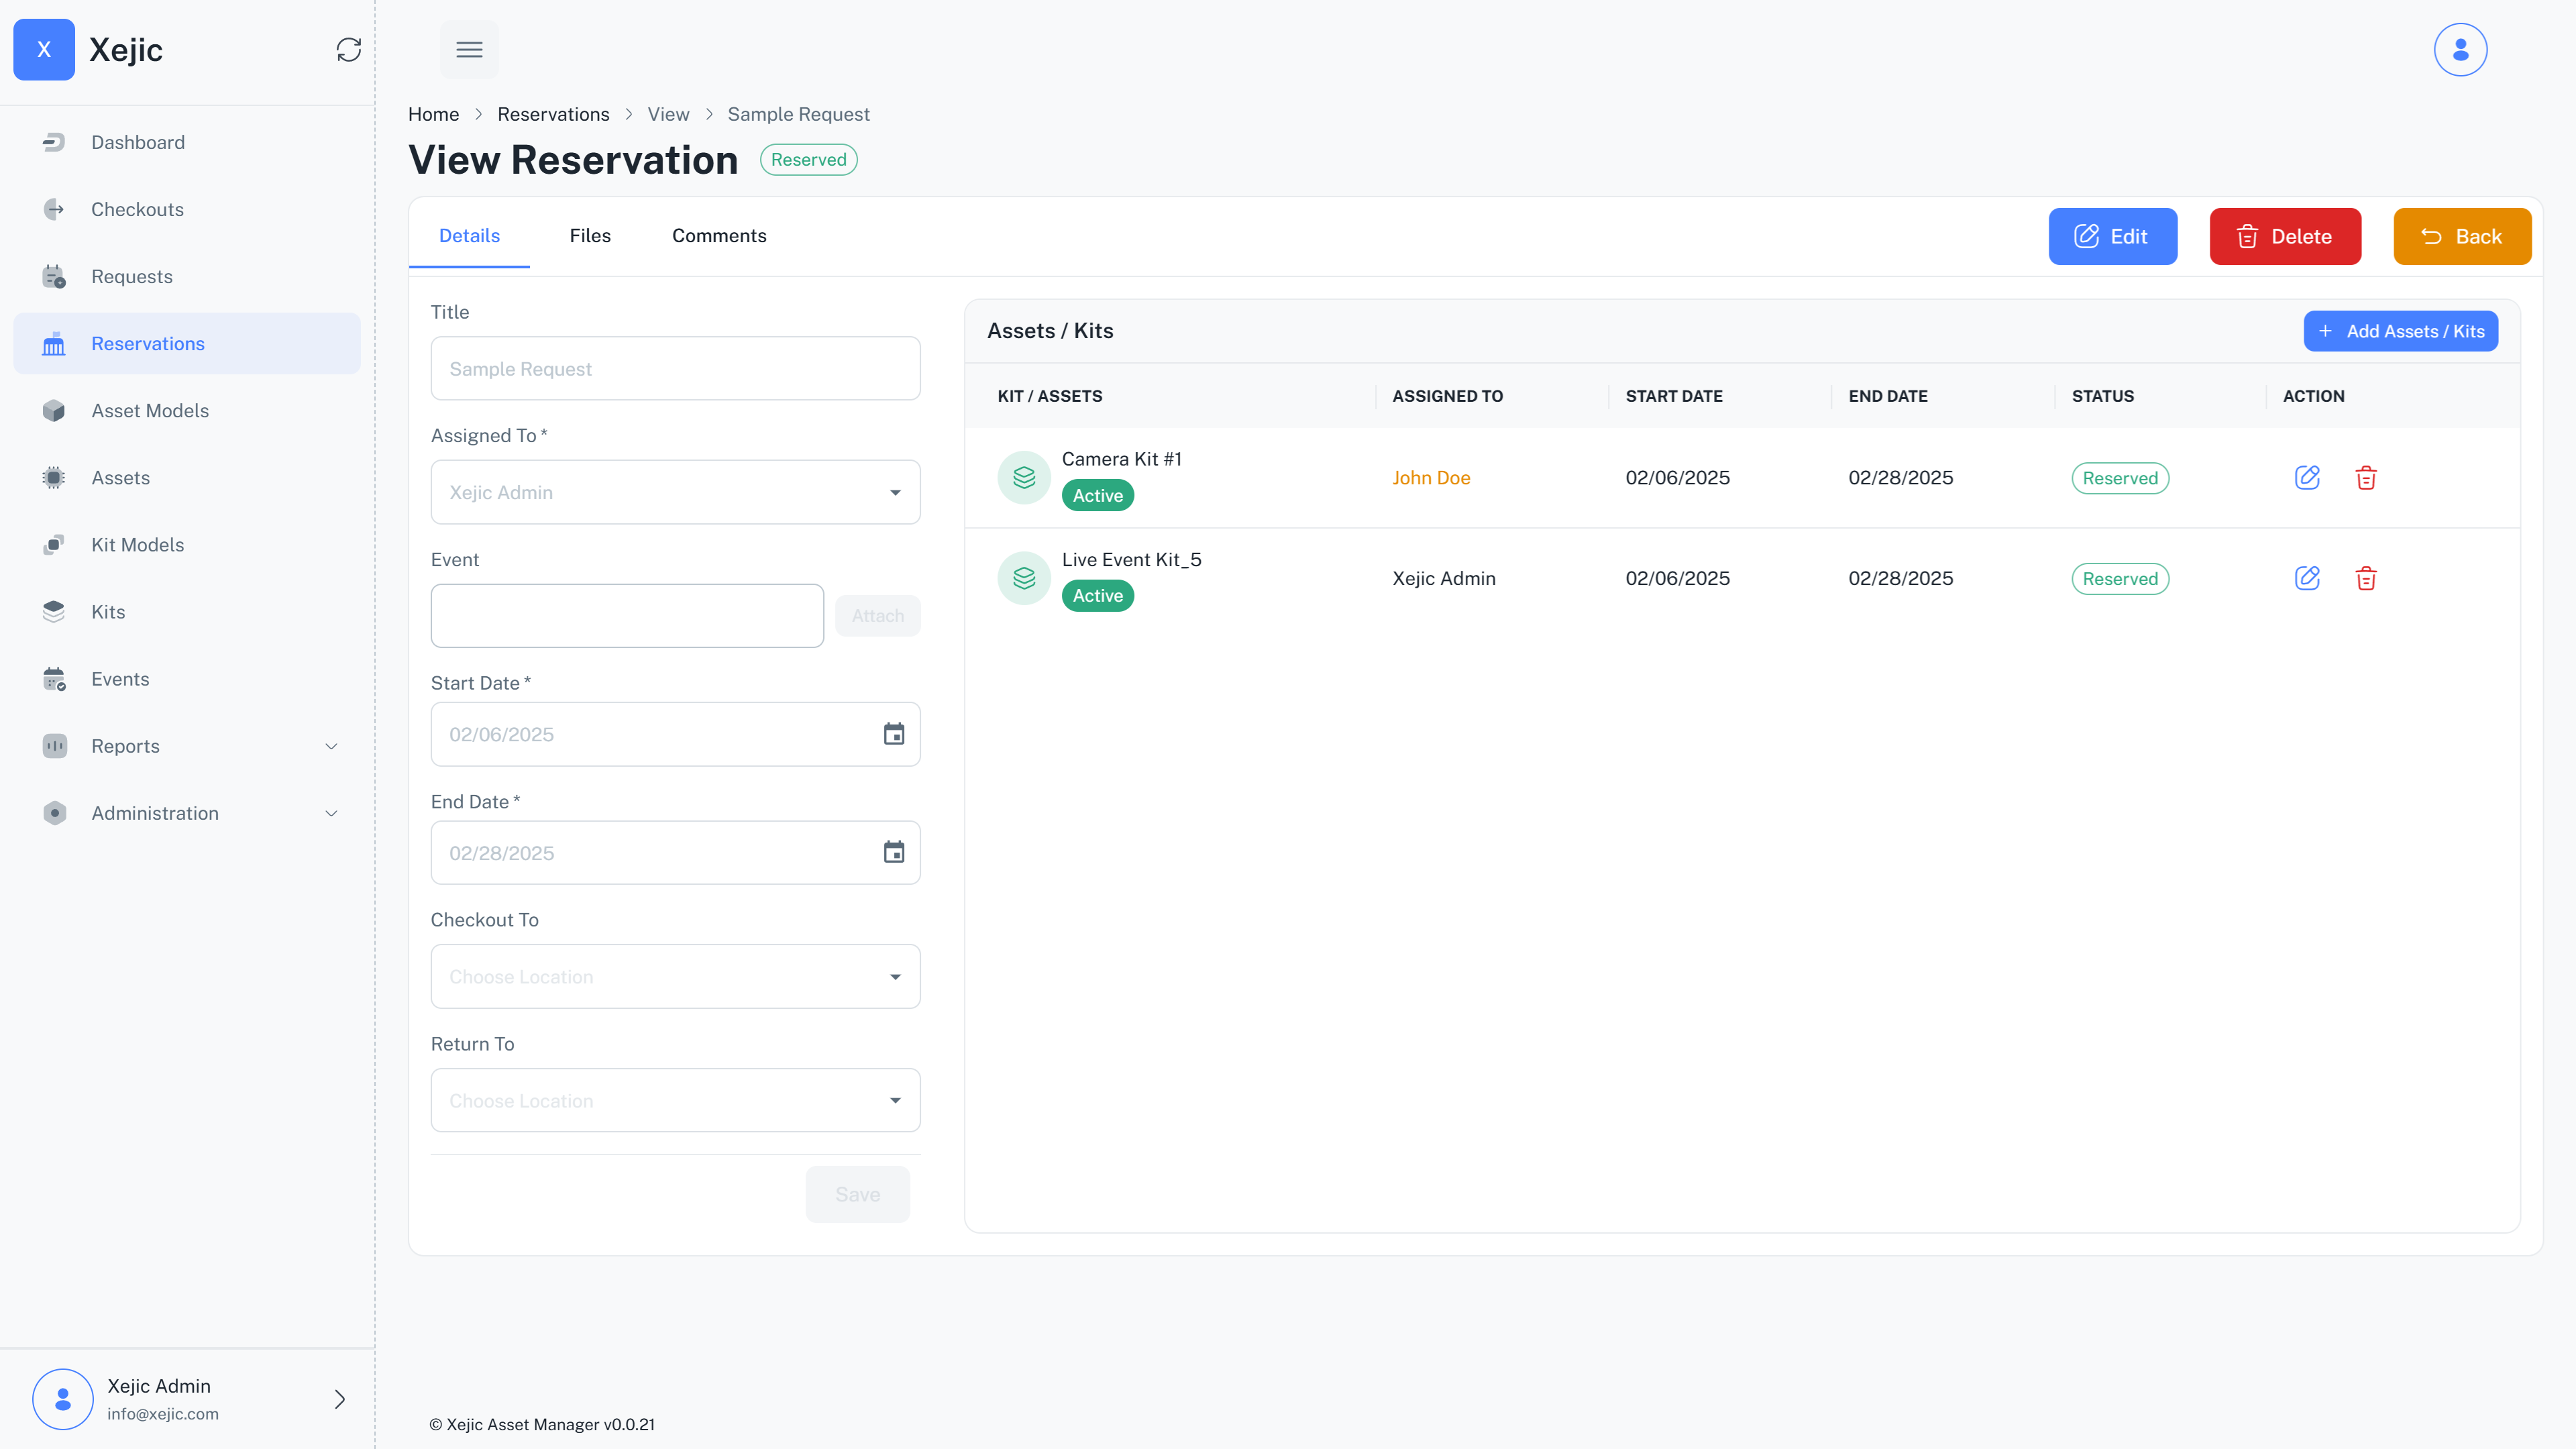
In the next step, an administrator reviews submitted requests and converts them into Reservations if the assets /kits for the specified models are available. This is the step where an actual asset or a kit is reserved against a user request. Kits/Assets that are already reserved during the dates specified will not be shown here. The administrators select available Kits and Assets and reserve it against the user.
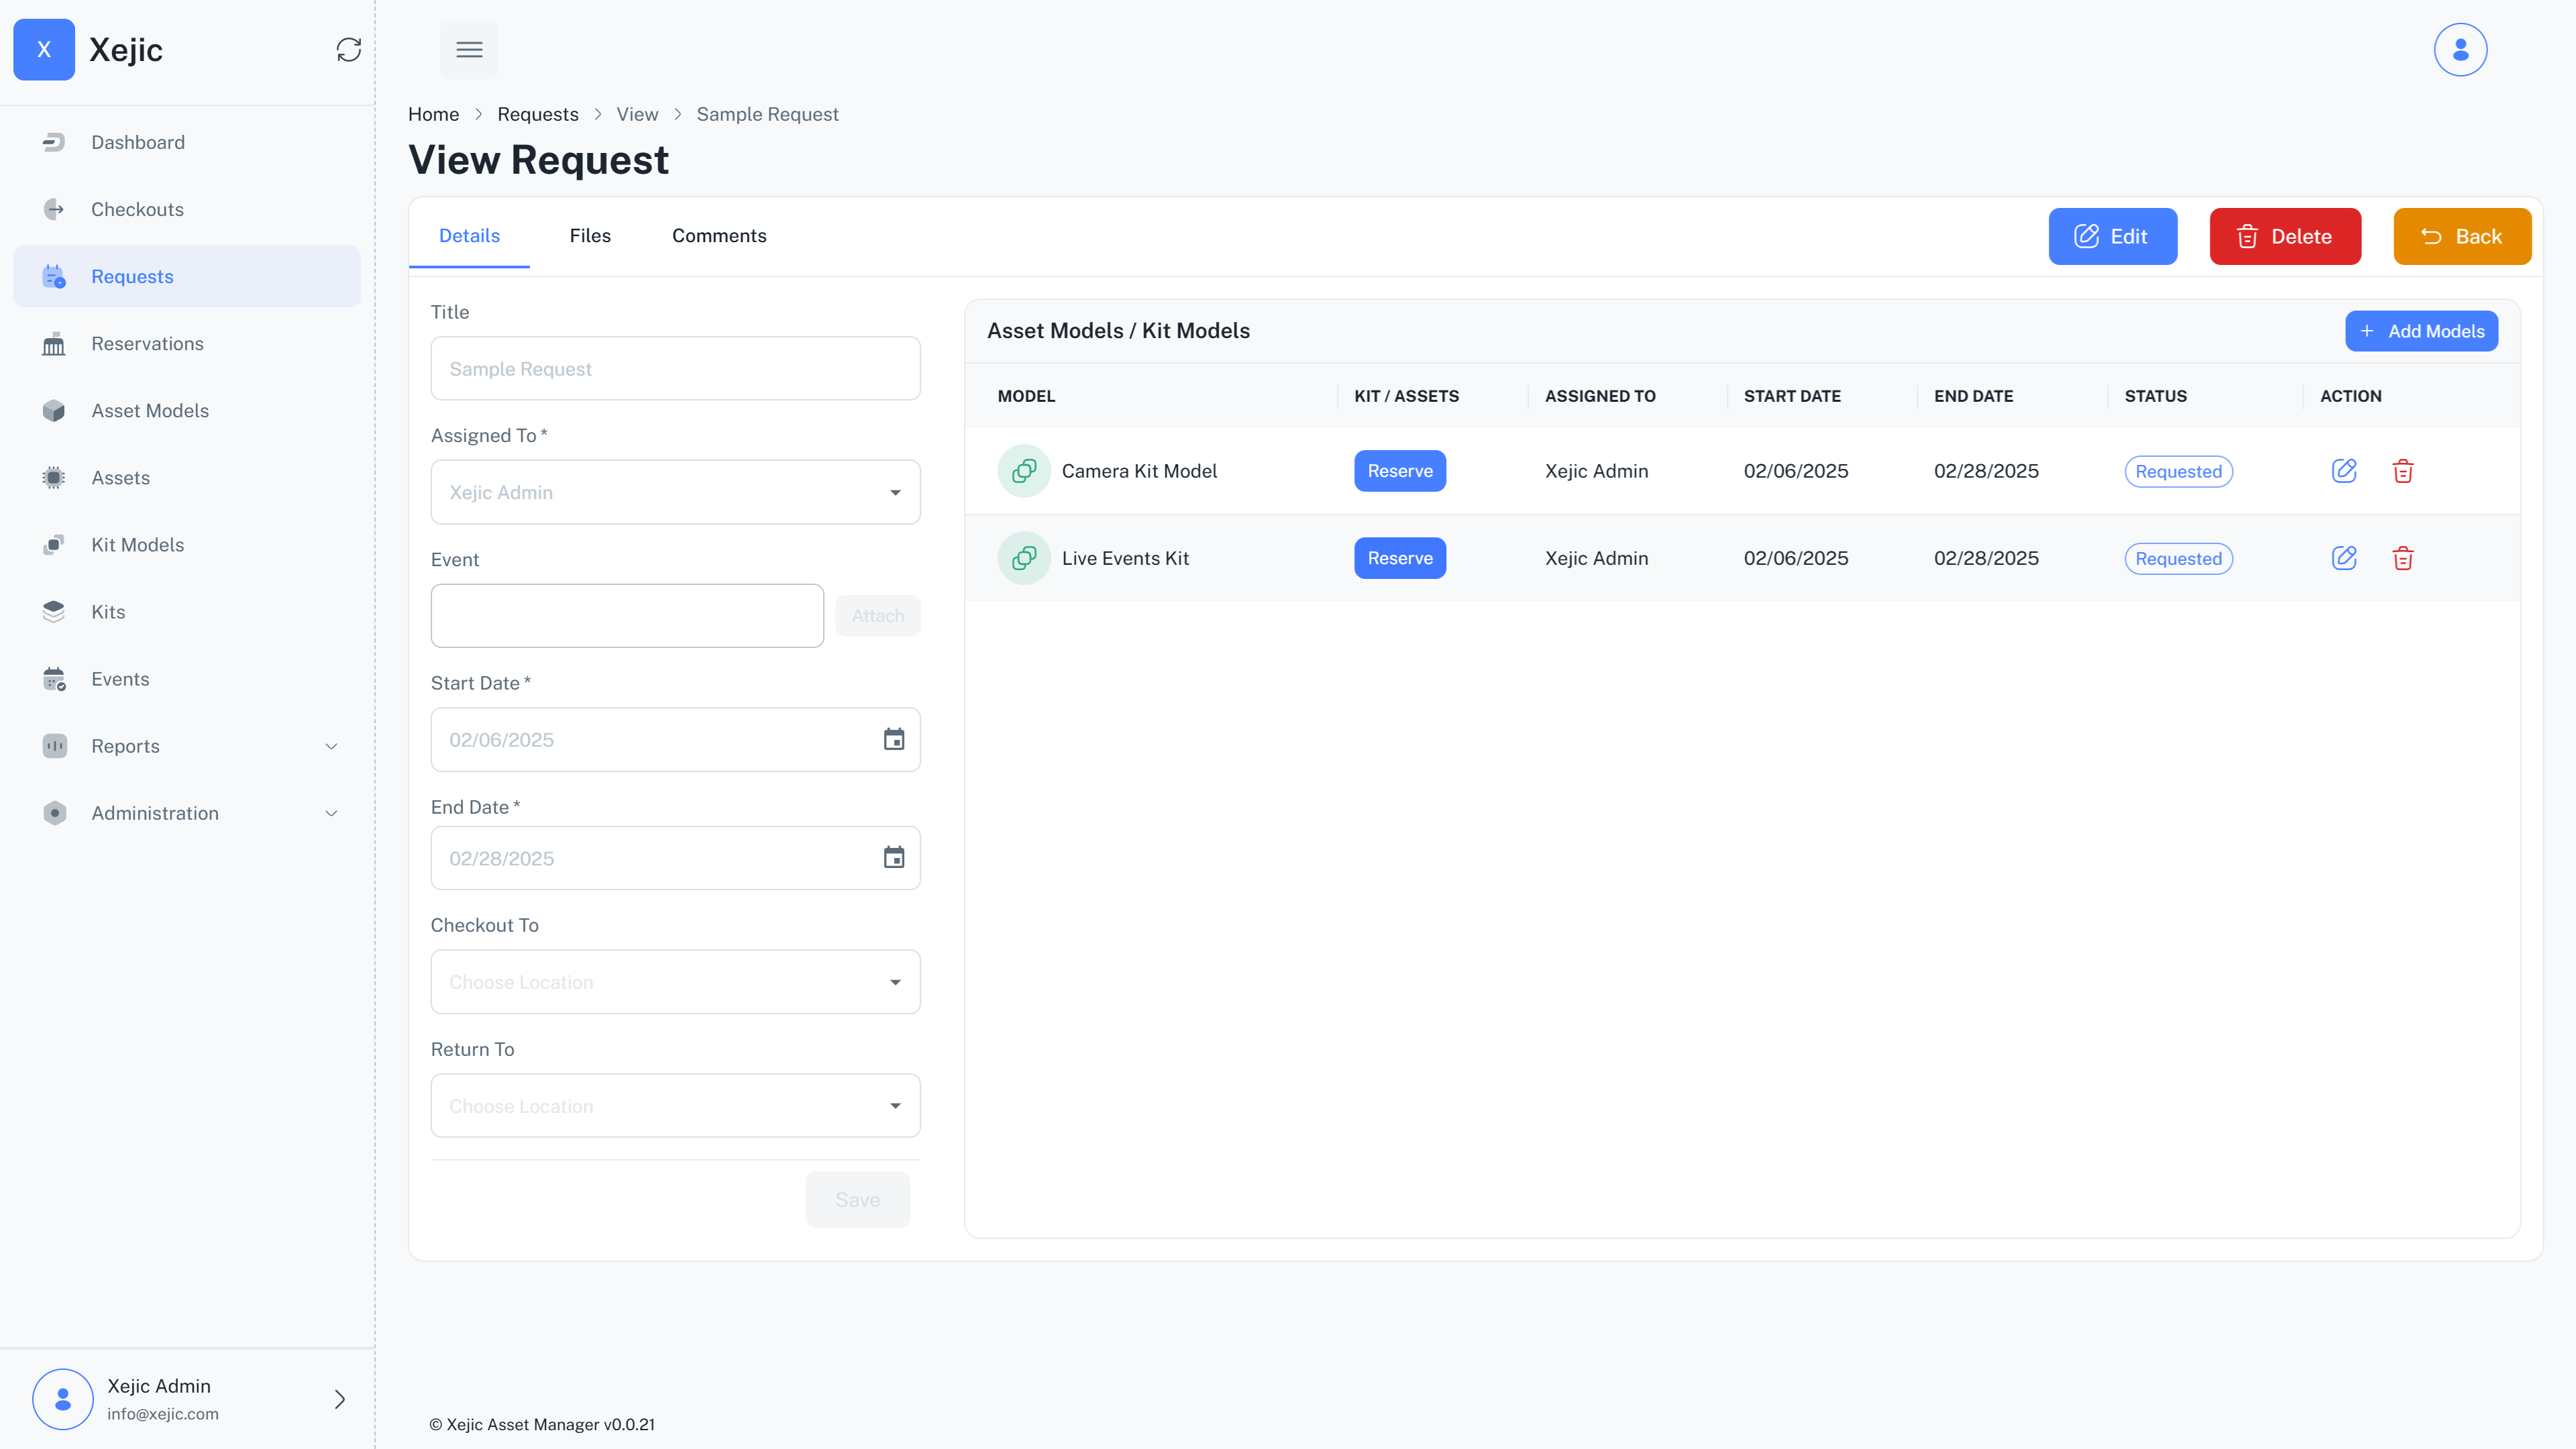
Individual items in the request/reservation can be assigned to different users. The dates can also be changed within the range specified. This ensures great flexibility in resource allocation.
Checkout
On the scheduled reservation date, the user checks out the allocated asset. The system updates the asset’s status to reflect that it is actively assigned to a user. The asset remains checked out until it is returned at the end of the reservation period via a checkin process.
- Direct Checkout - Assets and Kits can be checked out by the adminstrator without reservations as well.
- An asset that is part of a kit cannot be checked out individually.
Reservation Inspections
An inspection is a process where the asset is verified and reviewed. This may be useful for documentation purposes. The system allows audits to be performed on assets and kits that have been reserved through a reservation. These are the scenarios in which an inspection/audit can be performed:
- Administrator-Initiated Inspection – Conducted by an admin as part of routine kit or asset audit.
- User-Initiated Inspection – Conducted by the user who received the asset or kit via a reservation or a checkout. This is the pre usage inspection done as soon as the user receives the shipment.
- Receiving Inspection - This is the pre usage inspection done as soon as the user receives the shipment.
- Shipping Inspection - This is the post usage inspection done as soon as the user receives the shipment.
During an Inspection, the following actions are available:
Audit
An audit is a process where the asset is verified and reviewed. This may be useful for documentation purposes.
- To audit an asset select the Audit radio button in the pop up.
- You can select a reason. Reasons are maintained in your reasons master data. This is optional
- You can choose to add a note. This is optional
- If the asset is a part of a kit, you can choose to remove it from the kit unless the kit is checkedout.
- Clicking on save will add an audit entry along with the action
Flag
Flagging an asset indicates that it needs attention, but the issue is not severe enough to justify archiving it. You can select a reason for flagging, which will be saved for future reference. If the flagged asset is part of a kit, you can choose to remove it from the kit without marking the entire kit as defective.
- To flag an asset select the flag radio button in the pop up.
- You can select a reason. Reasons are maintained in your reasons master data. This is optional
- You can choose to add a note. This is optional
- If the asset is a part of a kit, you can choose to remove it from the kit unless the kit is checkedout. If an asset is checked out, it can be flagged but not removed from the kit. To remove the flagged asset, ensure the kit is checked in first. For example, if you suspect an asset is broken, flag it, check in the kit, and then proceed with removing the asset.
- Clicking on save will add an audit entry for a flag
- If you click on Audit of a flagged asset it will give you an option to Unflag
- Kits with flagged assets are automatically flagged. When all flags are cleared from the assets the kit flag is automatically cleared
Scanning
Overview
Our system gives you the ability to quickly identify and manage assets directly via a QR code or a barcode. By scanning the code, you can instantly open the corresponding asset and perform actions.
- Barcodes and QR Codes must be assigned to each asset in order to be able to use the respective scanning feature.
- QR codes are two-dimensional square codes (not the same as traditional barcodes).
- Every asset should be assigned an unique QR code or a barcode
- You can either scan the QR code by clicking on the icon which opens a camera or if you use an external scanner just place focus on the textbox and scan with your scanner. This will output the code onto the textbox.
- When you scan a code, the system recognizes the identifier and performs the page-specific action (open asset, add to reservation, add to temporary list).
Where to find it?
The app has fields for QR scanner and Barcode Scanner in multiple pages.
Sidebar
For scanning multiple items in order to do audits click the Scanner icon on the left side bar. Scanning from the left sidebar adds the item to a temporary list of scanned items, which can be used for batch actions.
Other pages
You can find the QR code field and the bar code in the asset page and in the pages to add assets to reservations or checkouts. This helps you select the asset or kit easily within the context of the action you are trying to perform.
Assigning QR Codes and Barcodes to Existing Assets or Kits
If an existing asset does not already have a QR code or a barcode, you can assign one by going to the asset page and typing the unique code in. If you are using an external scanner, you can just scan and add the code to the QR Code or Barcode textbox.
If you plan on using in-app camera scanner, and pre-printed QR Codes
- Go to the asset’s or kit's details page.
- Locate the QR code text box and click the QR code scan icon next to it.
- Scan one of the pre-printed QR codes using the camera.
- The scanned code will populate the QR code text box.
- Click Save to assign that QR code to the asset.
Best Practices
- QR codes should ideally contain internal identifiers or URLs, never sensitive information.
- Label size: The minimum recommended size is 2x2 cm for reliable scanning.
- Durability: Use weather-resistant or tamper-proof labels for outdoor/field use.
- Placement: Stick labels in easy-to-scan positions; avoid edges, curves, or obstructed surfaces.
Common Issues & Solutions
Camera scanner doesn’t open
- Ensure camera permissions are enabled for your browser.
- On iOS Safari or Android Chrome, refresh if prompted.
QR doesn’t scan
- Ensure the label is not smudged, torn, or distorted.
- Improve lighting or adjust the camera distance.
- Confirm you’re using the in-app QR scanner, not an external app.
Scanned code not found
- May happen if the asset was deleted but old labels remain.
- Re-generate or reassign the QR code from the asset’s page in the system.
Barcode doesn’t scan
The camera scanner is QR-only. Barcodes will not work. How to tell the difference?
| QR Code (✅ Supported) | Barcode (❌ Not Supported) |
|---|---|
 |  |
| Square, pixelated pattern | Vertical black-and-white lines |
| Can be scanned by the camera scanner | Cannot be scanned by the camera scanner. Use external barcode scanner |
Customer
Overview
A customer represents an external organization (for example, Acme Corp) that can receive, hold, and reserve assets or kits. Customer groups help organize customers for filtering and classification. They are optional. Use groups to narrow search results during checkout or reporting.
How to create a customer group
- Go to Administration → Customer Groups.
- You will see a list of customer groups
- Click Create New.
- Enter the customer group name and save
How to create a customer
- Go to Administration → Customers.
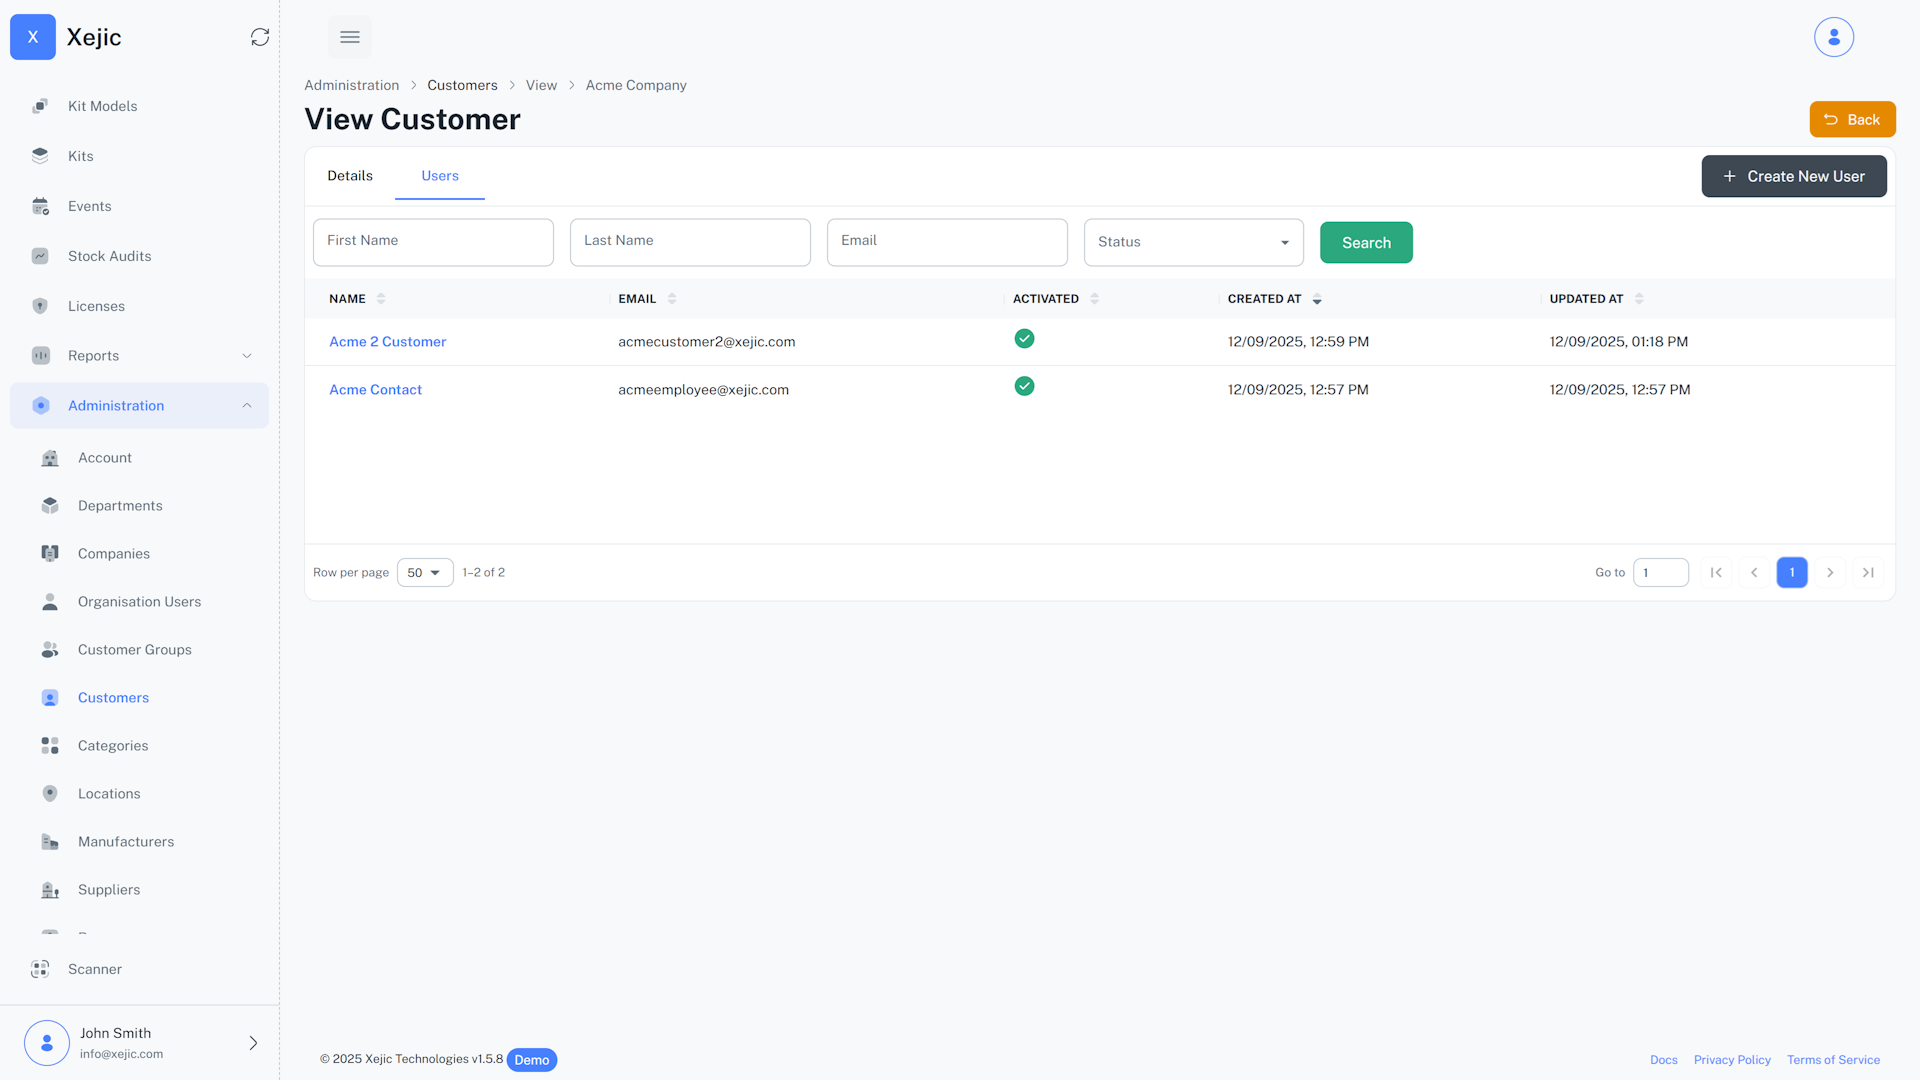
- Click Create Customer.
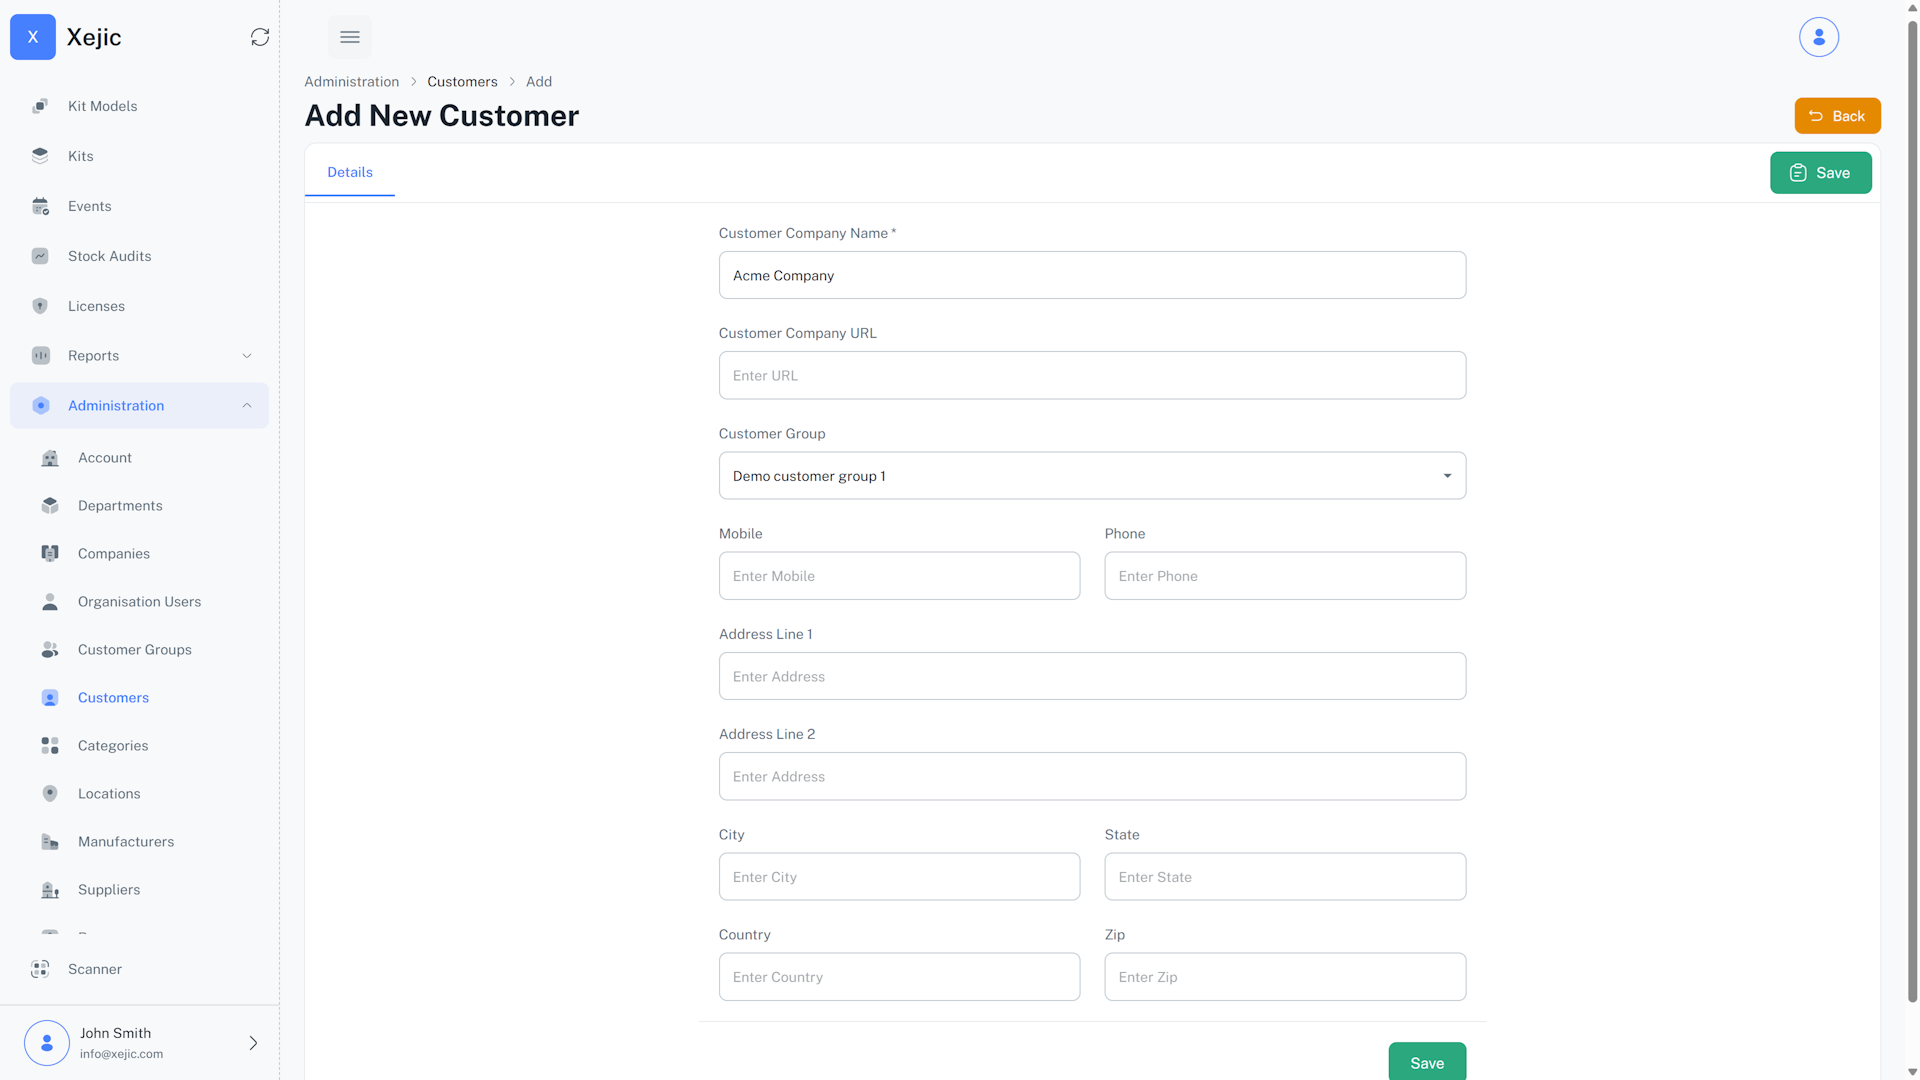
- After creation, a Users tab will appear next to the customer details.
- In the Users tab, click on create user add one or more customer users (emails) who can be checked out to or reserved against.
- Do not forget to activate the users.
If the customer module is enabled you should see filters in the checkout page that will allow you to filter users by customers/customer groups so that you can easily check out an asset or a kit against the customer
Services
The Services module is used to manage maintenance and servicing activities for assets in the system. It allows authorized users to create service requests, define service categories, assign responsibility, and track servicing progress from creation to closure.
This module helps ensure that routine maintenance, AMC servicing, and repair activities are recorded and monitored in a structured workflow.
Service Request
A Service Request is created when one or more assets require maintenance, inspection, or repair. A single request can include multiple assets, and each asset can also have multiple services, allowing servicing activities to be managed collectively under a single request.
Service requests store important details such as priority, due date, assigned user, and current status. Once created, the request appears in the Service Requests list for review and processing.
Service Request details include
- Title of the request
- Selected asset
- Priority (Low, Medium, High, Critical)
- Due date
- Description or notes
- Assigned user
- System-generated request number
- Status and timestamps
Status Flow
A service request moves through the following stages:
- Requested – The request is created.
- Approved – The request is reviewed and approved.
- In Progress – The assigned user begins servicing.
- Closed – Servicing is completed and finalized. Once closed, the request remains stored as a service record.
- Cancelled – The request is terminated before completion and can be reopened if required.
Each individual service within a request follows its own stage workflow:
- Requested – The service is created and awaiting approval. No actions can be performed yet.
- Assigned – Once the request is approved, the service is assigned to an individual user. Work can only begin after assignment.
- In Progress – The assigned user begins work. During this stage, forms/checklists can be filled out, notes added, and files uploaded.
- Completed – All required tasks have been finished and the service is finalized. The status can still be changed as long as the parent request is not yet closed.
- Cancelled – The service is no longer required. No further actions can be taken, though cancelled services can be reopened if needed.

Adding a Service Request
To create a new service request:
- Navigate to Services → Service Requests.
- Click Create New.
- Enter the Title of the request.
- Choose the Priority level.
- Set the Due Date.
- Enter any Description or notes.
- Click Save.
The request will be added to the Service Requests list and routed for approval.

Service Requests List
The Service Requests page displays all service requests created in the system and provides a centralised view for monitoring ongoing and completed servicing activities.
From this page you can:
- Search for requests by keyword.
- Filter by Assigned To, Status, or Priority.
- View the request number, due date, and creation date at a glance.
- Open a request to view or update its details.

Service Stages & Workflow
The Services module follows a structured workflow that guides users from request creation to service completion. Each service progresses through predefined stages, ensuring proper validation, assignment, and execution.
A service moves through the following stages: Requested → Assigned → In Progress → Completed / Canceled
1. Requested
When a service is first created its status is automatically set to Requested. At this point the service request is waiting for approval and no actions can be performed yet. This ensures that every service is properly reviewed before work begins.
2. Assigned
Once the service request is approved, the service must be assigned to an individual user. Only after assignment can the work begin. This step ensures clear responsibility for the task.
3. In Progress
After assignment, the assigned user can change the status to In Progress, indicating that work has started and the task is actively being handled. During this stage the user can:
- Fill out forms and checklists (if configured for the service catalog).
- Add notes and upload supporting files.
- Update any relevant service details.
4. Completed
Once the work is finished the service can be marked as Completed, indicating that all required tasks have been successfully finished and the service is finalized and recorded. The status can still be changed after a service is marked as Completed, as long as the parent service request has not been Closed.
5. Canceled
A service can be marked as Canceled if it is no longer required. This may happen due to a change of plans, service postponement, or a duplicate or unnecessary request. Once canceled, no further actions can be taken on that service, though canceled services can be reopened if required.
- Every service starts in Requested status automatically.
- Services must be approved and assigned before work can begin.
- Only the assigned user can move the service to In Progress or Completed.
- Completed status is final and cannot be changed once the request is closed.
- Canceled services can be reopened if required.
Service Catalog
A Service Catalog represents a predefined category of servicing activity. It helps organize requests and standardize maintenance processes. Multiple service requests can belong to the same service catalog.
Examples:- AMC
- Routine Maintenance
- Adhoc Service
Service Catalog details include
- Name of the service
- Optional cost value
- Creation and update timestamps
Adding a Service Catalog
To create a new service catalog:
- Navigate to Services → Service Catalog.
- Click Create New.
- Enter the Name.
- Enter the Cost (optional).
- Click Save.
The new service catalog will be available for use in service requests.

Editing or Deleting a Service Catalog
To modify an existing service catalog:
- Go to Services → Service Catalog.
- Select the service catalog from the list.
- Update the required fields and click Save.
To remove a catalog:
- Select the service catalog.
- Click Delete.
Deleted catalogs will no longer be available for new requests.
Service Checklists & Forms
Services can include customizable forms or checklists that must be completed during servicing. These forms help ensure that maintenance tasks follow defined procedures and that all required verification steps are recorded.
Forms are configured at the Service Catalog level. Only the forms attached to the selected catalog will be available during the service workflow.
Forms Based on Service Catalog
When a service catalog has forms configured, those forms become accessible automatically when the service moves to the In Progress stage. The assigned user must complete any required checklists before the service can be finalized.
If no forms are attached to the selected service catalog, no checklist will be shown and the request can proceed without form completion.
Mandatory and Optional Forms
- Mandatory forms must be completed before the service and request can be marked as completed or closed.
- Optional forms may be used to record additional details such as hardware replacements, software updates, or extended inspection findings.
For example, a Routine Maintenance service catalog may include a mandatory inspection checklist. If issues are detected, optional forms may be used to capture replacement or upgrade details.
Form Completion Workflow
- A service request is approved and the service is assigned.
- The assigned user updates the status to In Progress.
- Any forms attached to the selected service catalog become available.
- The user completes the required checklist items.
- After completing mandatory forms, the service can be marked Completed and the request Closed.

Customization
Service forms are fully configurable and can be:
- Created based on your organisation's specific requirements.
- Attached to particular service catalogs.
- Modified or updated whenever procedures change.
- Designed differently for various asset categories.
The number and type of forms shown in a request depend on the selected catalog and your organisational configuration.
Purpose of Service Forms
Service forms help organisations:
- Maintain consistent servicing procedures.
- Ensure required inspection steps are completed.
- Record maintenance outcomes and any changes made.
- Provide documented proof of servicing activity.
- Reduce ambiguity in future maintenance planning.
FAQ
Before auditing assets/kits, ensure your reasons are setup in the reasons section. Go to Administration -> Reasons. And setup the reasons.
To view reports navigate to Reports in the side menu.
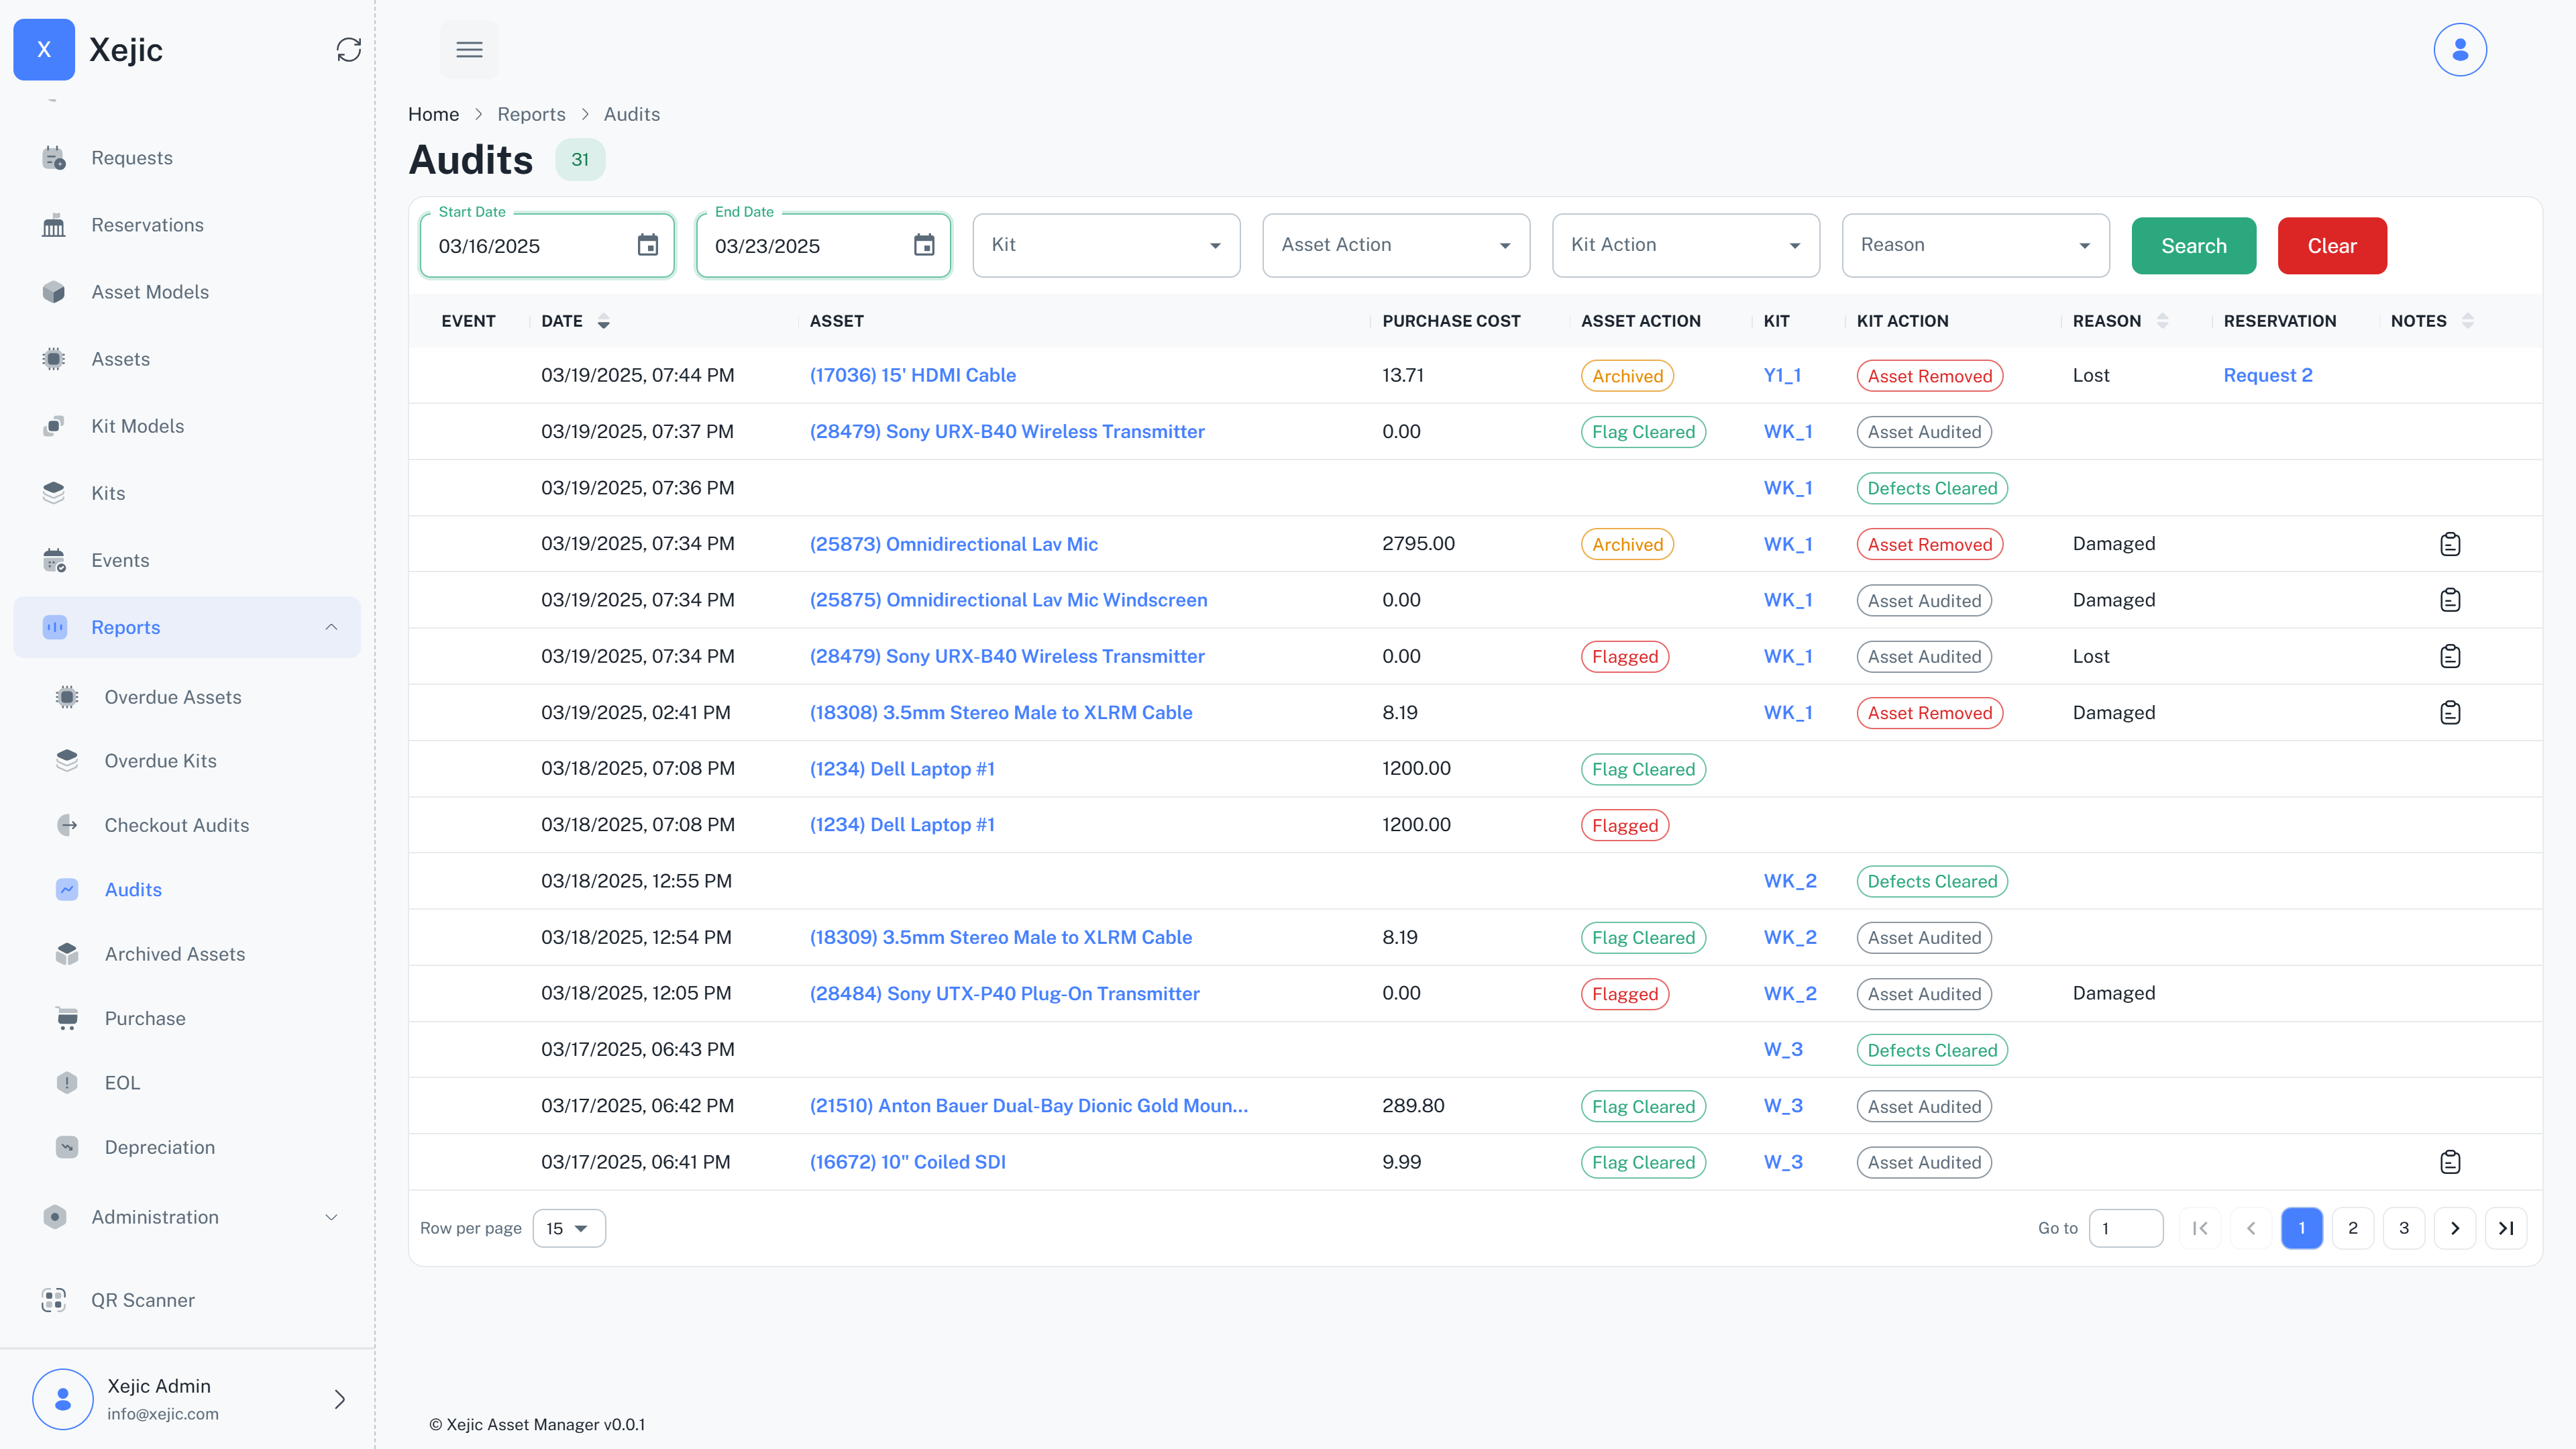
Audit Report
The audit report gives a detailed report on assets, and actions performed on the assets. You can filter by the action on the assets e.g Archived and filter by the reason as to why it was Archived as well.
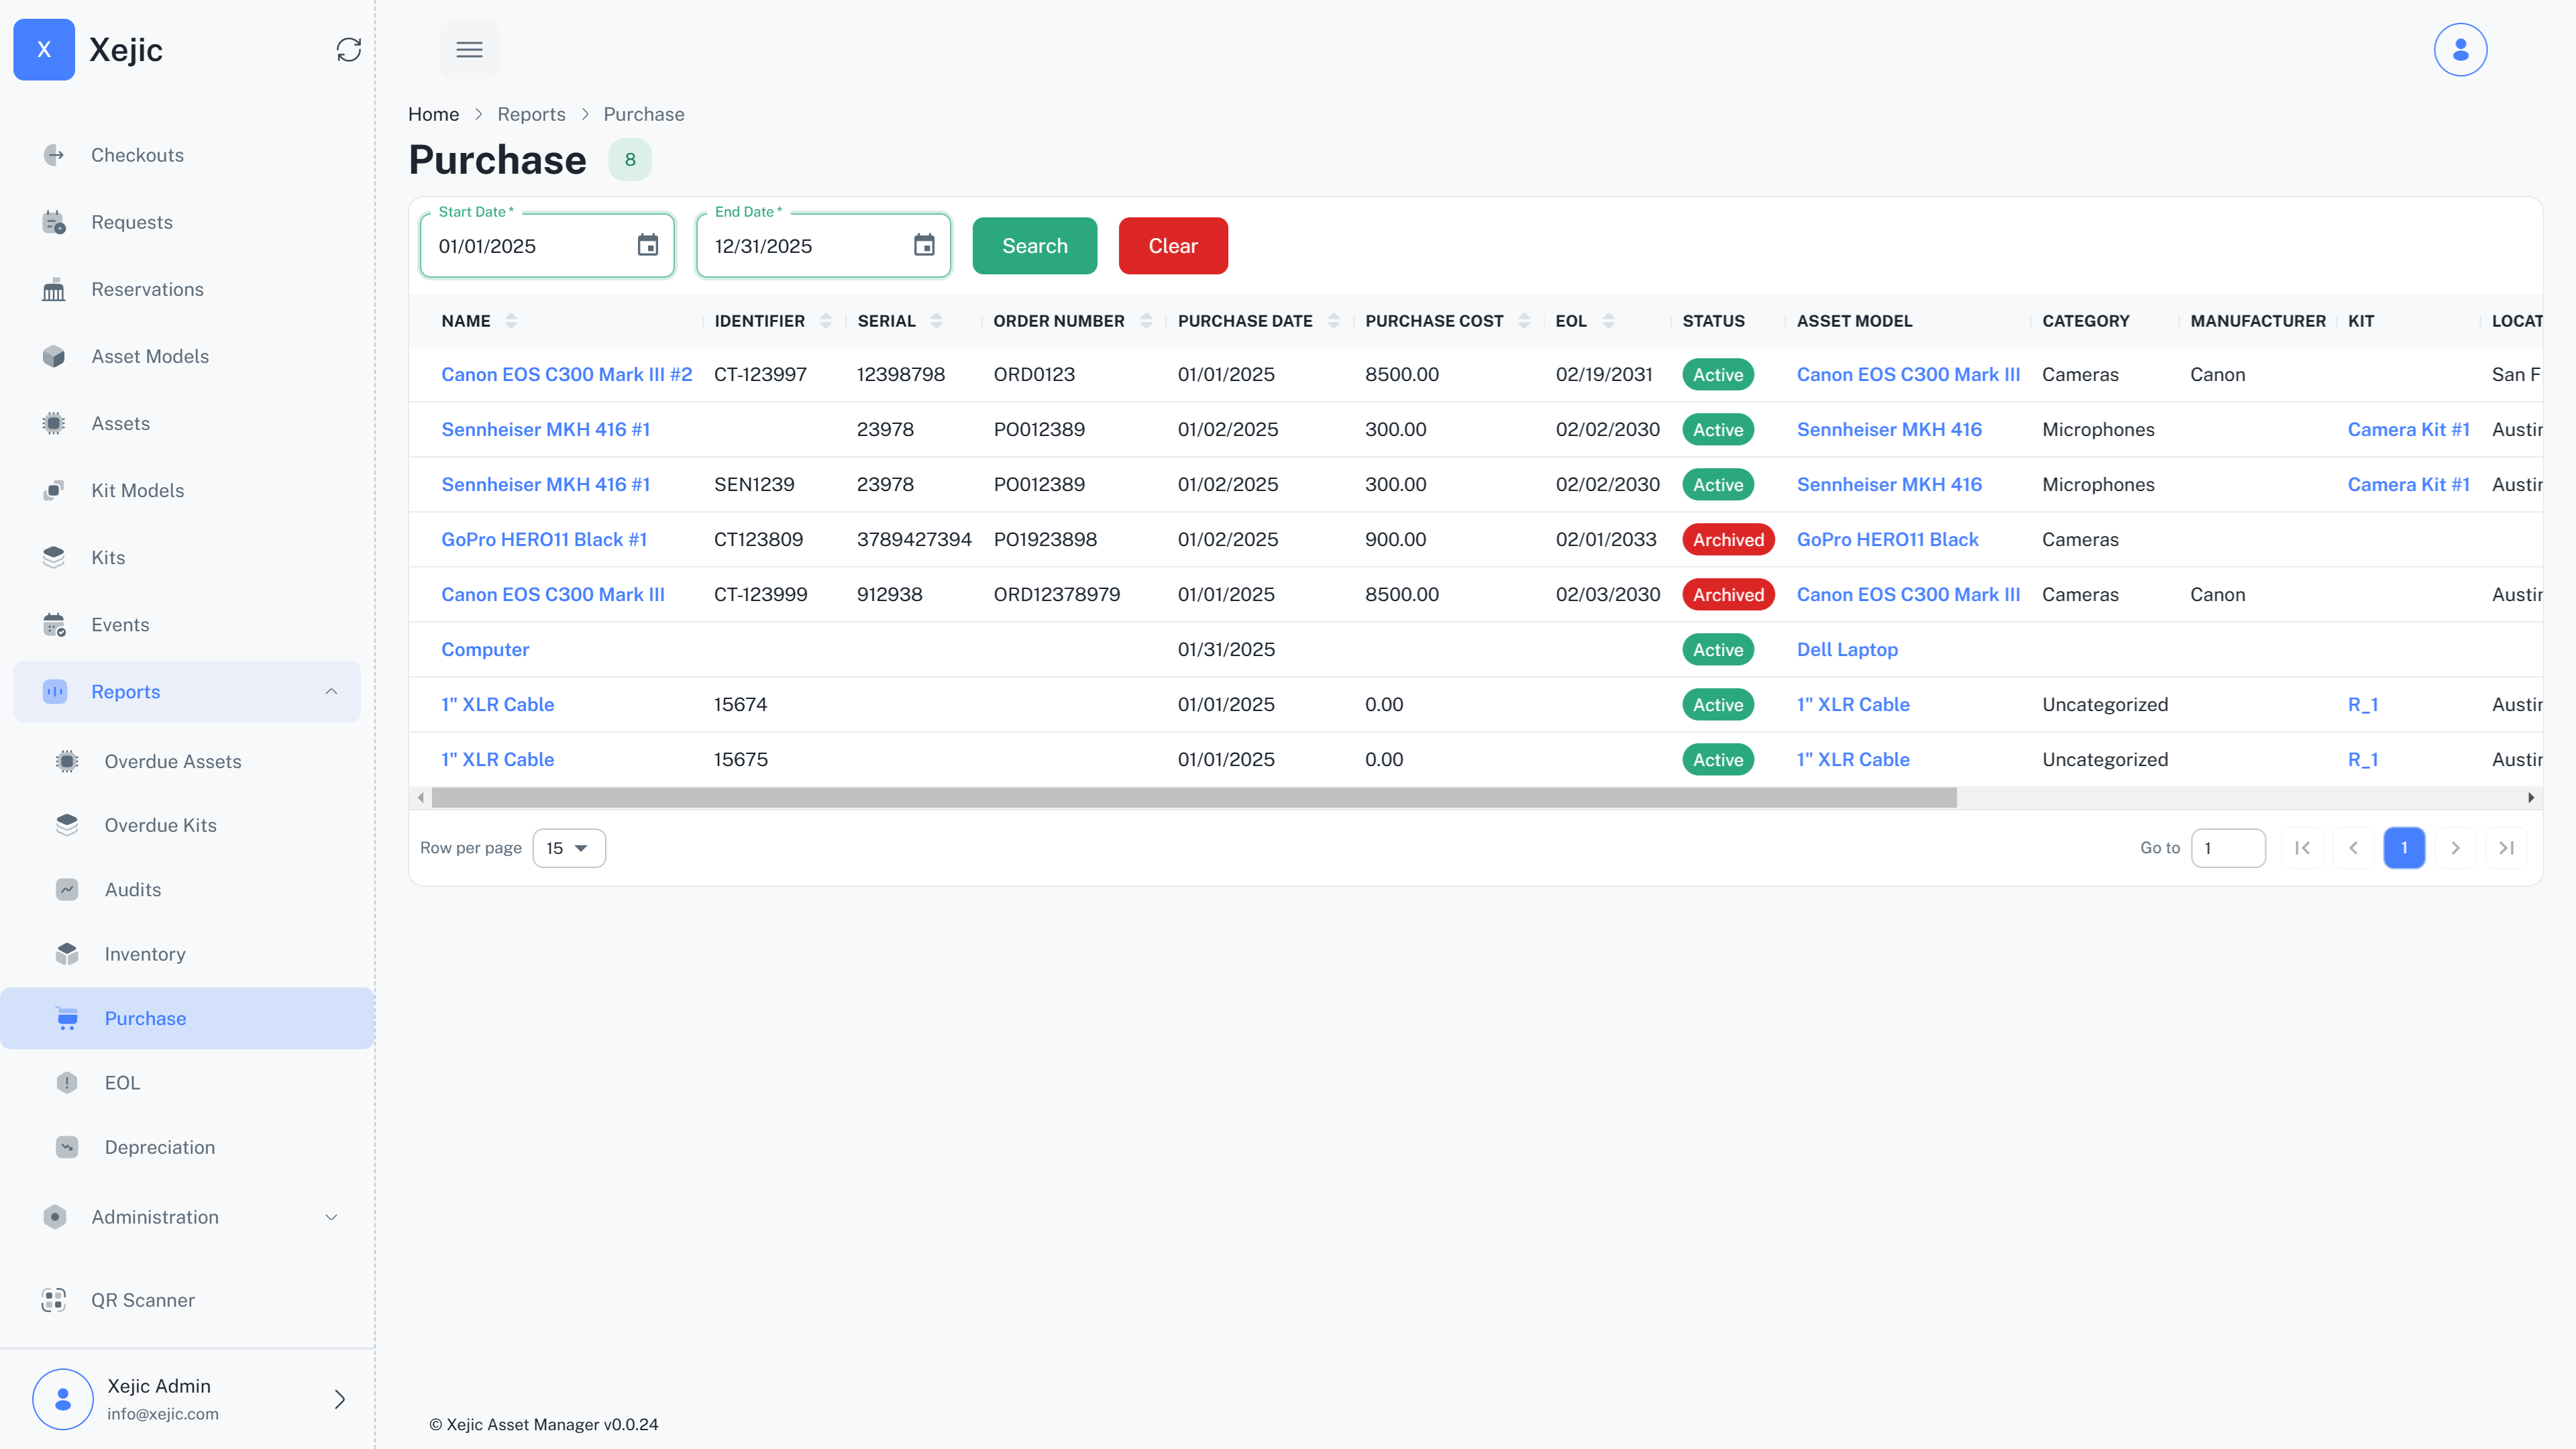
Purchase Report
The purchase report gives a list of assets filtered by purchase date.